Occasionally when you take a picture with your iPhone, you will find that it is upside down or in landscape mode when you want it in portrait.
Luckily there are some image-editing tools on the iPhone that can help, including one that allows you to rotate pictures that need it.
Our tutorial below will provide you with a couple of different options to accomplish this goal.
You can rotate a picture on an iPhone 13 by opening Photos, choosing the picture, tapping Edit, then tapping the rotation button.
How to Rotate an iPhone 13 Photo
- Open Photos.
- Select the picture.
- Tap Edit.
- Touch the Rotation button.
- Rotate the picture as needed.
- Tap Done.
Our guide continues below with additional information about how to rotate a picture on iPhone 13, including pictures of these steps.
Deal of the Day
- HIGH-QUALITY SOUND — Powered by the Apple H1 headphone chip, AirPods deliver rich, vivid sound.
- EFFORTLESS SETUP — After a simple one-tap setup, AirPods are automatically on and always connected. They sense when they’re in your ears and pause when you take them out. And sound seamlessly switches between your iPhone, Apple Watch, Mac, iPad, and Apple TV.
Last update on 2025-07-18 / Affiliate links / Images from Amazon Product Advertising API | As an Amazon Associate, I earn from qualifying purchases.
here is an option on the iPhone Control Center that lets you lock the screen in portrait orientation. This can be helpful when you don’t want the screen to rotate, and it’s possible that you have used this feature in the past when you wanted to look at a picture that kept flipping as you turned your screen.
But you don’t need to resort to hacks like that, as the picture editing options on the iPhone’s Photos app can let you rotate an existing picture to the correct orientation.
Our guide below will show you how to accomplish this with a picture that you have already saved to your iPhone’s Cameras Roll by following a few short steps.
Related: If you’ve been looking for the iPhone 13 battery saver option, then this article can help you find it.
How to Do a Custom Picture Rotation on an iPhone
The steps in this article were performed on an iPhone 13 in the iOS 16.4 operating system.
This first section is going to show you how to rotate your picture as much as you would like, while the next section will show you how to use the 90-degree rotation options instead.
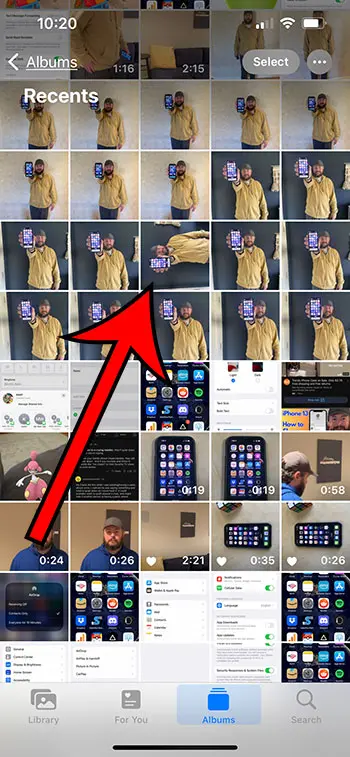
Step 1: Open the Photos app on your iPhone.
Step 2: Find the picture that you would like to rotate, then tap on it to select it.
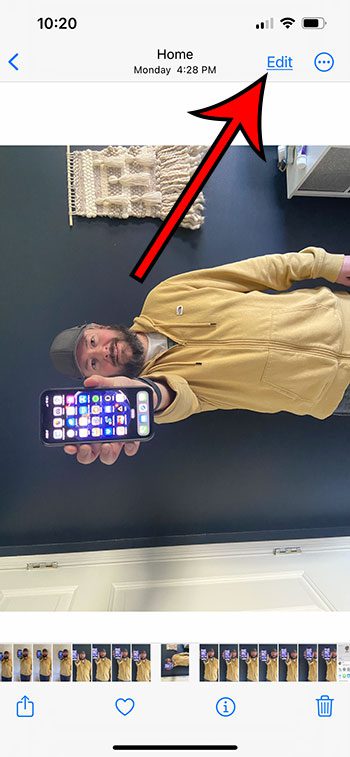
Step 3: Touch the Edit button at the top-right corner of the screen.
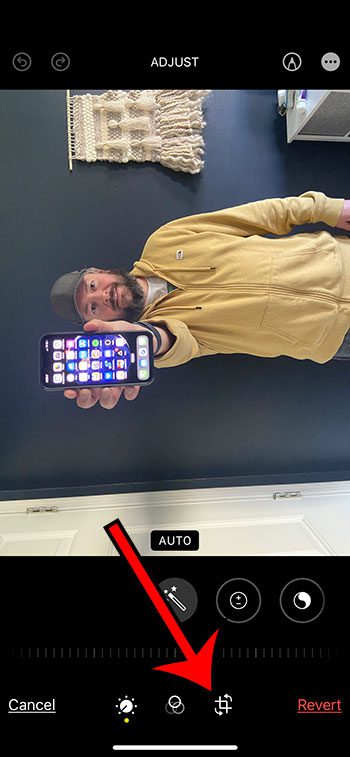
Step 4: Tap the Rotation button at the bottom of the screen.
It looks like a square with arrows around it.
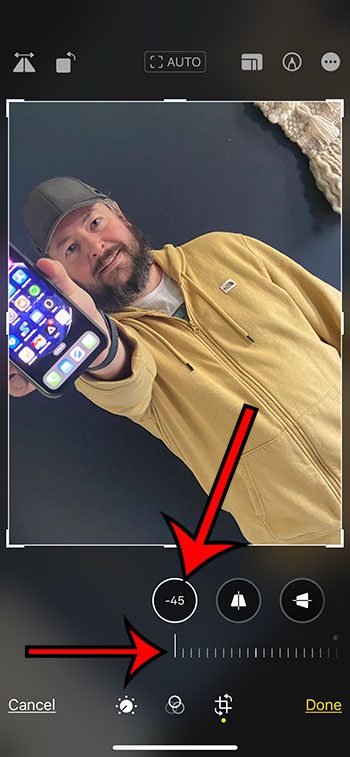
Step 5: Use the tools on this screen to rotate the image as desired.
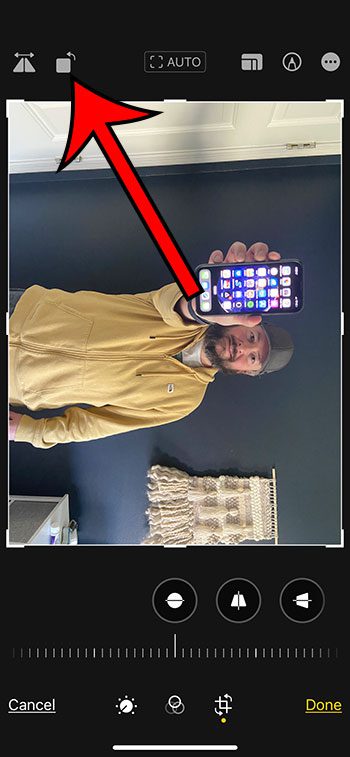
You can drag the slider underneath the image to rotate it up to 45 degrees. If that’s not enough, then you can tap the Rotation button at the top-left to rotate it 90 degrees, then drag the slider to rotate it 45 degrees in either direction from that orientation.
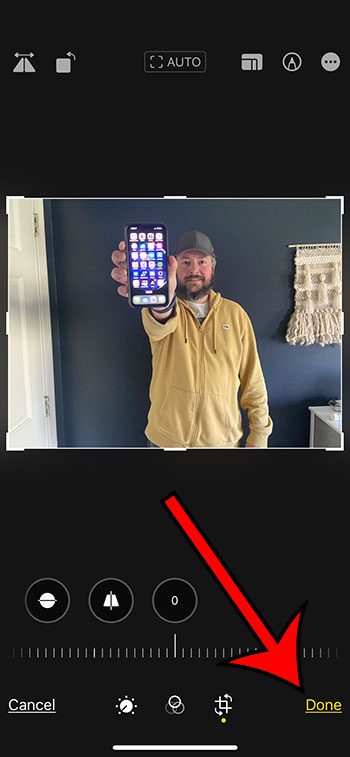
Step 6: Tap the Done button at the bottom-right corner of the screen when you are finished.
Note that if you decide that you don’t like the change, you can always open the picture back up and choose the Revert button at the bottom-right of the screen to restore the original picture.
Now that you know how to rotate a picture on iPhone 13, you will be able to use this utility any time you have a picture that is in the wrong orientation and you need to fix it.
You can also check out our video about how to rotate a picture on an iPhone 13 for more on this topic.
How to Rotate iPhone Photos in 90-Degree Intervals
This section will also address a way that you can rotate your pictures, but rather than using the “free” rotation option from the previous section, this option will restrict you to 90-degree increments.
Step 1: Open the Photos app.
Step 2: Find the picture to edit.
Step 3: Tap the Edit button.
Step 4: Select the Rotation button.
Step 5: Touch the 90-degree Rotation button at the top-left of the screen.
Note that you can press this button multiple times until the picture is in the correct orientation.
Step 6: Tap the Done button once you have finished rotating the picture.
Hopefully, this article has provided you with the knowledge that you need in order to get your iPhone pictures into the correct orientation.
Video About Rotating iPhone Pictures

Matthew Burleigh has been writing tech tutorials since 2008. His writing has appeared on dozens of different websites and been read over 50 million times.
After receiving his Bachelor’s and Master’s degrees in Computer Science he spent several years working in IT management for small businesses. However, he now works full time writing content online and creating websites.
His main writing topics include iPhones, Microsoft Office, Google Apps, Android, and Photoshop, but he has also written about many other tech topics as well.

