To securely hide photos on your iPhone 13, follow these detailed steps:
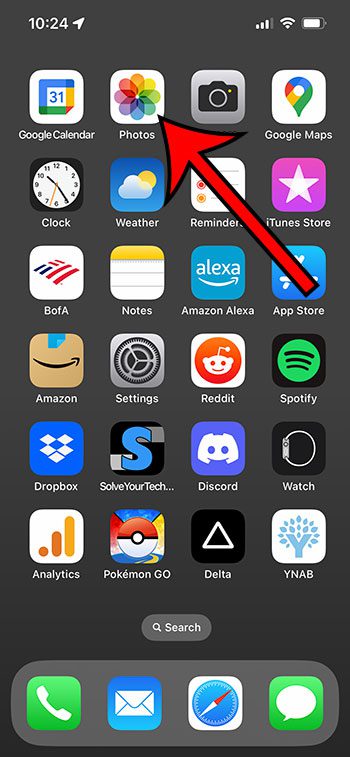
- Launch the ‘Photos’ application on your iPhone 13.
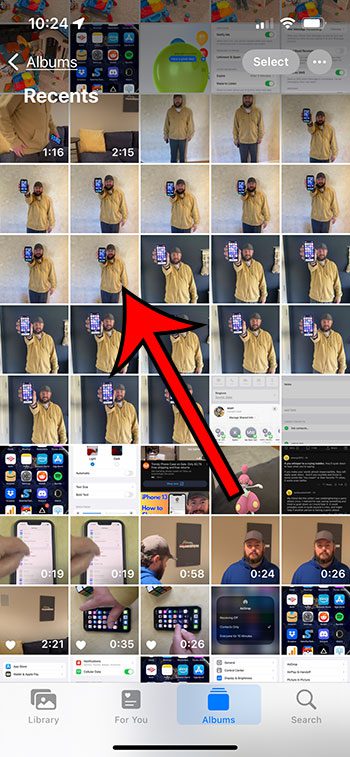
- Browse and select the specific photo you wish to conceal.
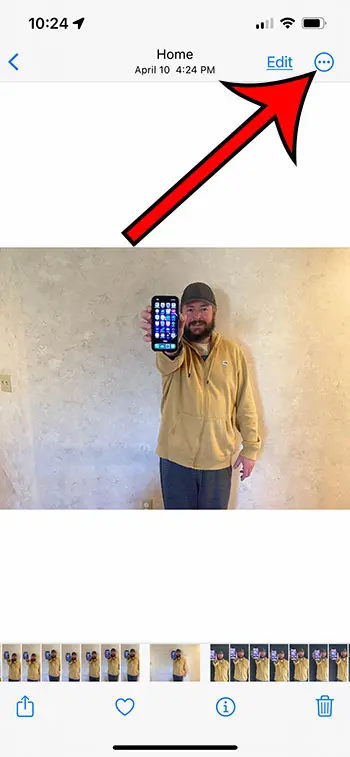
- On the top right corner, tap on the ‘More’ button, represented by three dots.
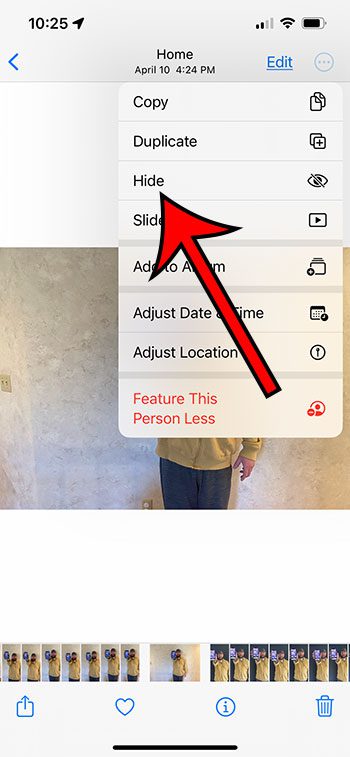
- From the options that appear, select ‘Hide.’
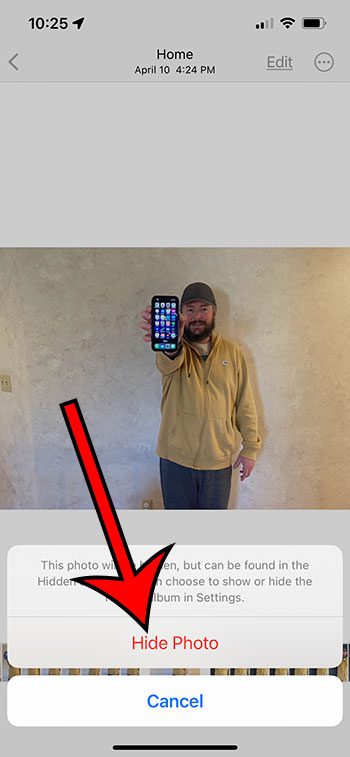
- A prompt will appear, asking for confirmation. Choose ‘Hide Photo’ to complete the process.
Our guide continues below with additional information about how to hide photos on iPhone 13, including pictures of these steps.
You can also check out our hide photos on iPhone video for more on this topic.
Hiding iPhone Photos (Guide with Pictures)
The steps in this article were performed on an iPhone 13 in the iOS 16 operating system. These steps will work for other iPhone 13 models as well, such as:
- iPhone 13 Mini
- iPhone 13 Pro
- iPhone 13 Pro Max
Step 1: Open the Photos app on your iPhone.
Step 2: Locate the photo that you would like to hide, then tap on it to select it.
Step 3: Touch the button with three dots at the top-right corner of the screen.
Step 4: Choose the Hide option from this dropdown menu.
Step 5: Tap the Hide Photo button to confirm that you want to hide the photo.
Now that you know how to hide photos on iPhone 13, you will be able to use this technique to make sure that other people can’t see the pictures that you don’t want them to see.
Video About Hiding Photos on an iPhone
Frequently Asked Questions
How do I view hidden photos on an iPhone 13?
Photos that you hide on your iPhone 13 are moved to a special Hidden folder.
You can locate this by opening the Photos app, selecting the Albums tab at the bottom of the screen, then scrolling all the way down to the Utilities section and tapping Hidden.
Your iPhone will then use Face ID to verify your identity, at which point you can view the photos that you had previously hidden.
Can I hide the Hidden folder on the iPhone 13?
While photos can be hidden using the method described earlier in this article, you can still see that there is a Hidden folder if you scroll through the list of albums.
You can elect to hide this folder as well by going to Settings > Photos > then disabling the Show Hidden Album option.
Note that if you decide to unhide a picture in the future, then you will need to turn this setting back on so that you can access the hidden folder.
How do I unhide a photo on the iPhone 13?
If you would like to unhide a photo that you have previously hidden, then you need to open the Photos app, choose the Albums tab at the bottom of the screen, then scroll down and choose the Hidden option.
Your phone will then verify your identity with Face ID, Touch ID, or a passcode, and then you can select the photo that you would like to unhide.
You can then tap the three dots at the top-right corner of the screen and choose the Unhide option.
Summary – iPhone Photo Hiding
- Open Photos.
- Find the photo and select it.
- Tap the three dots.
- Choose Hide.
- Select Hide Photo.
Conclusion
Hiding photos on your iPhone is a useful technique to know if you have pictures that you don’t want other people to see.
This is especially true if friends and family often look at your pictures.
The ability to move them to the Hidden folder, and to hide that folder as well, can help to ensure that private photos stay that way unless you decide that you want others to see them.

Matthew Burleigh has been writing tech tutorials since 2008. His writing has appeared on dozens of different websites and been read over 50 million times.
After receiving his Bachelor’s and Master’s degrees in Computer Science he spent several years working in IT management for small businesses. However, he now works full time writing content online and creating websites.
His main writing topics include iPhones, Microsoft Office, Google Apps, Android, and Photoshop, but he has also written about many other tech topics as well.
