To create a Google Drive link for a photo, right-click the photo in Google Drive, select Share, and under General access choose Anyone with the link. Then select Copy link and paste it anywhere. Anyone who gets the link can open the photo without being added by name or signing in.
These steps are for Google Drive in a web browser on a computer and the Google Drive app on iPhone, iPad, and Android, checked against Google’s Share files from Google Drive help page in October 2026. They work the same for personal Google accounts and most work or school accounts, which may have limits set by an administrator.
Put the Photo in Google Drive
- The photo has to be in Google Drive. Pictures backed up from your phone usually live in Google Photos, not Drive. If yours are there, skip to the Google Photos section below.
- Choose one photo or a folder. A link to a single file opens that photo. A link to a folder opens every photo inside it, including ones you add later.
- Pick the access level now. For photos, Viewer is almost always right. It lets people look at and download the picture but not rename, move, or delete it.
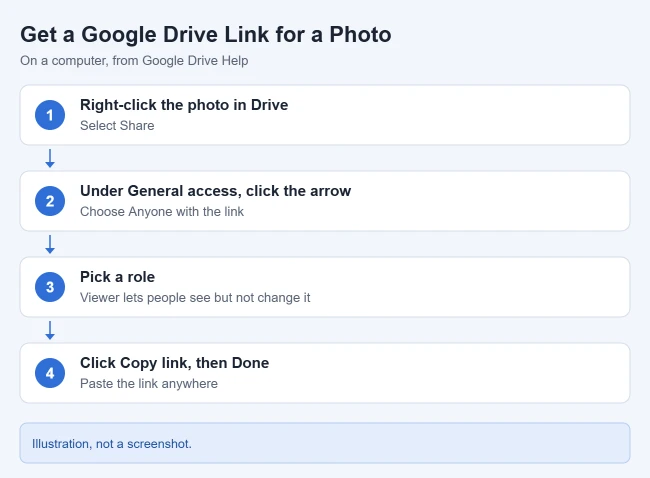
- Go to drive.google.com and find the photo. If it isn’t there yet, click New > File upload, pick the photo, and wait for the upload to finish.
- Right-click the photo and select Share. The sharing window opens with the photo’s name at the top.
- Under General access, click the down arrow and choose Anyone with the link. The setting changes from Restricted.
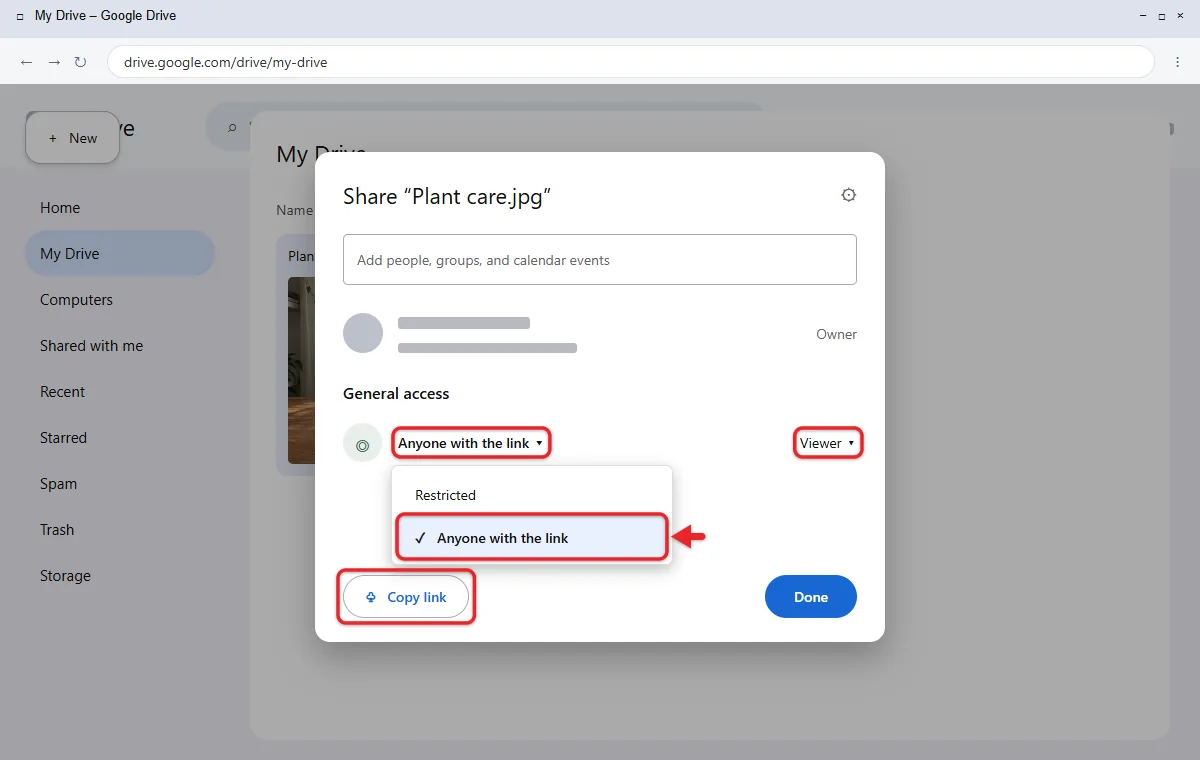
- Choose a role next to the access setting. Viewer lets people see the photo but not change or delete it.
- Select Copy link. The link is now on your clipboard.
- Select Done, then paste the link into an email, a text message, or a post.
The link looks like drive.google.com/file/d/ followed by a long code. Anyone who opens it sees the photo in a preview window with a download button.
If you use a work or school account, Google notes your organization might not let you share outside it, and “Anyone with the link” may be missing or replaced by an option limited to your organization.
How to Get a Link in the Google Drive App
The menus differ a little between iPhone and Android.
On iPhone or iPad
- Open the Google Drive app and find the photo.
- Tap the three dots next to the photo, then tap Share.
- Under General access, tap Change.
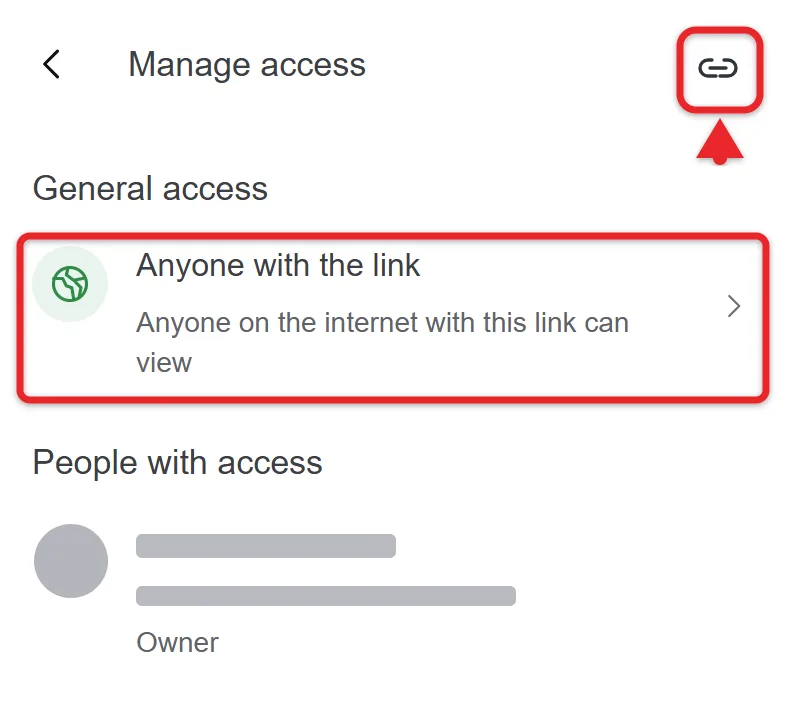
- Choose Anyone with the link, and check that the role is Viewer.
- Tap Copy link, then tap Back.
On Android
- Open the Google Drive app and find the photo.
- Tap the three dots next to the photo, then tap Manage access. If you don’t see it, tap Share, then Share again.
- Under General access, tap Change, then choose Anyone with the link.
- Pick Viewer, tap Copy link, and tap Back.
Paste the link into Messages, WhatsApp, email, or any other app.
If the photo is only on your phone, upload it first: tap New (the plus button) in the Drive app, tap Upload, and pick the photo.
- Use a folder. Put the photos in a folder and share the folder the same way. Access you give to a folder is inherited by every file in it, so new photos you drop in later are shared too.
- Select several files. On a computer, hold Shift, select two or more photos, then click Share at the top.

- Share with specific people. Instead of a link, type email addresses in the Share window, pick a role, and click Send. Only those people can open the photo while General access stays Restricted. You can share a single file with up to 600 individual email addresses.
For an album of many pictures, a folder is easier for the people you send it to. They can open one link and scroll through everything, or download the entire Google Drive folder as a ZIP file.
What People With the Link Can See and Do
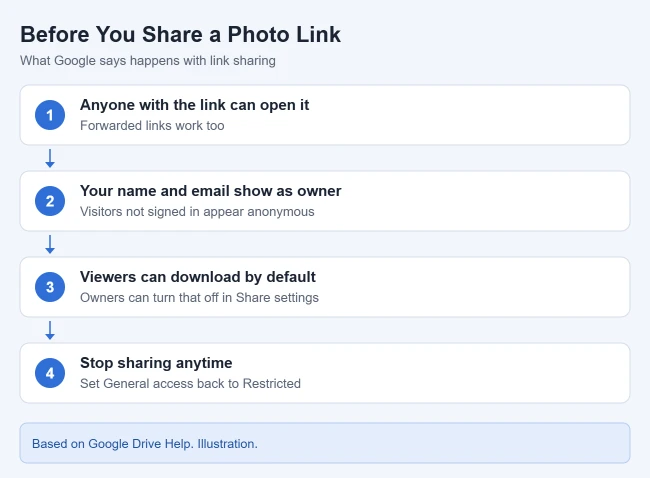
- Anyone who has the link can open it. That includes people it gets forwarded to.
- Your name and email are visible. The owner’s name and email show to people who open a shared file. Visitors who aren’t signed in to a Google account appear as anonymous animals.
- Viewers can download by default. Viewers and commenters can download unless the owner changes it.
- Choose roles carefully. Commenters can add comments. Editors can change the file and, by default, share it with others. For photos, Viewer is usually right.
- Location data may travel with the file. Phone photos often store where they were taken. People who download the original photo get that information too, so check before you share a picture taken at home.
How to Limit Downloads
- Open Share for the photo.
- Click the Settings gear at the top right of the sharing window.

- Under People who can download, copy, and print, check only the roles you want to allow, such as Editors.
This can’t stop people from sharing the photo in other ways, such as taking a screenshot.
How to Stop Sharing a Photo
- Right-click the photo and select Share.
- Under General access, choose Restricted.
- Click Done.
The link stops working for anyone you didn’t add by name. Restricted also overrides link access the photo would otherwise get from its folder. To remove someone you added, click the arrow next to their name, choose Remove access, and click Save.
Deleting the photo doesn’t cut off access right away. People you shared with can still make a copy until you permanently delete it from your trash.
To check whether a photo you shared publicly has been posted somewhere else, you can run a reverse image search from your iPhone.
The same Share window works for documents and spreadsheets. The steps for stopping sharing a Google Docs file and getting a shareable link for a Google Sheets file cover roles and download limits.
When People See You Need Access
- People see “You need access.” General access is still Restricted. Change it to Anyone with the link, or add them by email.
- Anyone with the link isn’t offered. Work and school accounts may block sharing outside the organization. Ask your administrator, or use a personal Google account.
- The upload won’t finish. Your Google storage may be full. Drive, Gmail, and Google Photos share the same 15 GB on a free account.
- Someone can still open the photo after you stopped sharing. Check whether the folder it’s in is still shared, or whether you added them by email.
Google Drive Link vs. Google Photos Link
If your pictures live in Google Photos rather than Drive, you don’t need to move them.
- Go to photos.google.com or open the Google Photos app.
- Select the photo, album, or video.
- Click or tap Share.
- Choose Create link. On Android, swipe through the sharing options to find it.
As with Drive, anyone with the link can view the photos, and people with an album link may also be able to add photos to it. In the Photos app, your shared links are listed under your profile picture > Photos settings > Sharing > Manage sharing activity.
Use Google Photos when you want an album people can add to or comment on. Use Drive when you want control over download rights and access levels, or when you’re sharing photos alongside other files.
Only sending one or two pictures? You can also send a photo by email. To stop phone photos from uploading to Google, unsync Google Photos.
Google Drive Photo Link Questions
Do people need a Google account to open the link?
Not with “Anyone with the link.” People who aren’t signed in show up as anonymous animals while viewing.
Can I stop people from downloading my photo?
Partly. In the Share window, click the Settings gear and limit People who can download, copy, and print. People can still take screenshots.
Does a Google Drive link expire?
Not on its own. The link works until you change General access back to Restricted or delete the photo. Some work and school accounts can set an expiration date, but only for people added by email.
Will the photo lose quality?
No. Drive stores the file you uploaded, and people who download it get the same file.
Can I make a direct download link?
Google Drive doesn’t have an official option for that. Send the regular link; people can click the download button in the preview.
Next step: if you have lots of photos on your phone, upload them to the cloud so they’re ready to share from any device.

Matthew Burleigh is the founder, head writer, and editor of Solve Your Tech, which he launched in 2012. He has written technology tutorials since 2008 and worked in IT since 2003, including small-business support, IT management, and consulting. He holds Bachelor’s and Master’s degrees in Computer Science from Arizona State University.
Matthew writes practical guides for Windows, iPhone and iPad, Microsoft Office, Outlook, Google apps, and Android. Solve Your Tech’s guides are checked step by step against the device or app maker’s own documentation and tested on his own devices whenever he has the hardware or software, with clear steps, sources, and update dates.
Read more about Matthew and how Solve Your Tech writes and updates its guides, or report a correction.