To change the theme in Photoshop, press Ctrl + K (Windows) or Command + K (Mac) to open Preferences, select Interface, click one of the Color Theme swatches, and select OK. The swatches run from dark to light, and the one you pick recolors the panels, toolbar, and dialog boxes.
The same Preferences window holds almost every other setting people want to change in Photoshop, such as the text size, tooltips, ruler units, and memory use. This guide covers the theme first, then the other common preferences, and then how to go back if you do not like the result.
Before You Start
These steps are written for the current desktop version of Photoshop on Windows and Mac. Adobe lists version 27.x as the current release and 26.x as the prior one. To see yours, choose Help > About Photoshop on Windows or Photoshop > About Photoshop on a Mac.
- Menu names differ by system. On Windows, Preferences is under the Edit menu. On a Mac, Adobe now lists it as Photoshop > Settings. Older Mac versions show Photoshop > Preferences instead. It is the same window.
- The theme is a shade of gray. Photoshop’s “color theme” changes how dark or light the app looks. It does not add a colored skin, and it does not change your images.
- Close Photoshop normally afterward. Adobe says all settings are saved when you close the app, but they are lost if you force quit or the app crashes.
How to Change the Photoshop Theme
- Open Photoshop. You do not need to have an image open.
- Choose Edit > Preferences (Windows) or Photoshop > Settings (Mac). You can also press Ctrl + K or Command + K. The Preferences window opens with a list of categories on the left.
- Select Interface in the category list. Adobe describes this category as the place to customize the appearance and behavior of the Photoshop interface.
- Find Color Theme in the Appearance section at the top. It is a row of gray squares, from darkest to lightest.
- Click the square you want. The window should change shade right away, so you can try each one before you decide.
- Select OK to keep the change and close Preferences.
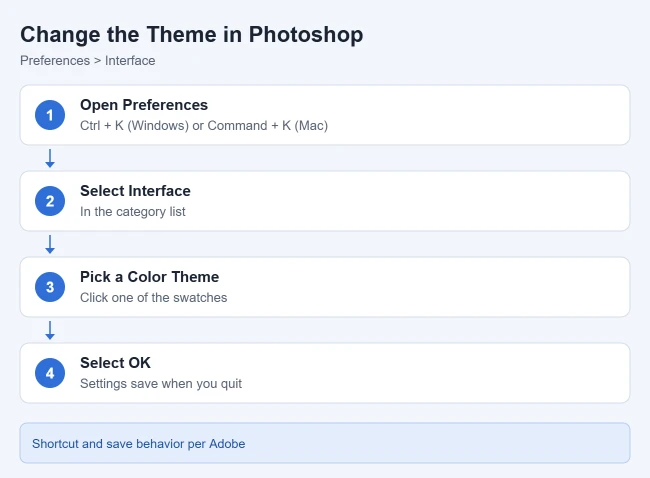
Adobe’s current help page confirms how to open Preferences and what the Interface category is for, but it does not describe the Color Theme swatches one by one. If your version shows a different number of swatches or a slightly different label, pick the shade that looks right to you. See Adobe’s Adjust preferences page for the official steps and the full category list.
How to confirm the theme changed
Look at the panels on the right and the toolbar on the left after you select OK. They should be darker or lighter than before. Open any dialog box, such as Image > Image Size, and it should match the new shade too.
How to undo it
Go back to Preferences > Interface and click the swatch you had before. If you are still in the Preferences window and have not selected OK yet, select Cancel instead.
Change the Theme With a Keyboard Shortcut
Photoshop is widely reported to step through the same themes from the keyboard, with no need to open Preferences:
- Shift + F1: one shade darker.
- Shift + F2: one shade lighter.
Treat these as worth a try, not a guarantee. They are not listed in Adobe’s current help pages, so they may not work in every version. Some laptops also need the Fn key held down for the F keys to register, and some keyboards use F1 and F2 for screen brightness. If nothing happens, use the Preferences steps above, which always work.
To see the shortcuts that Photoshop does list, choose Edit > Keyboard Shortcuts. Adobe explains that window on its View keyboard shortcuts page.
Other Appearance Settings on the Interface Page
While you are in Preferences > Interface, a few nearby options change how Photoshop looks without touching the theme.
Make the text larger
If panel labels are hard to read, change UI Font Size. UI stands for user interface, which means the menus, panels, and buttons of the app itself.
- Open Preferences and select Interface.
- In the Presentation section, open the UI Font Size menu and choose Tiny, Small, Medium, or Large.
- Optionally select Scale UI To Font to resize the whole interface to match the text size.
- Select OK, then close and reopen Photoshop.
This one does not apply right away. Adobe says to restart Photoshop to apply the change, and notes that the result may depend on your system’s display settings.
Fix a tiny or oversized interface on Windows
On a high-resolution screen, Photoshop can look too small or too large. Adobe says to go to Edit > Preferences > Interface > UI Scaling and choose Auto, 100%, or 200%. Auto follows the scaling of your main monitor. Windows itself also has a scale setting under Start > Settings > System > Display.
Change the highlight color
The Interface page may also show a Highlight Color menu. It sets the color used for selected items, such as the active layer in the Layers panel. If the selected layer is hard to spot in a dark theme, try the other option in that menu. Adobe’s current help pages do not describe this menu, so its choices may differ in your version.
Where Other Common Preferences Are
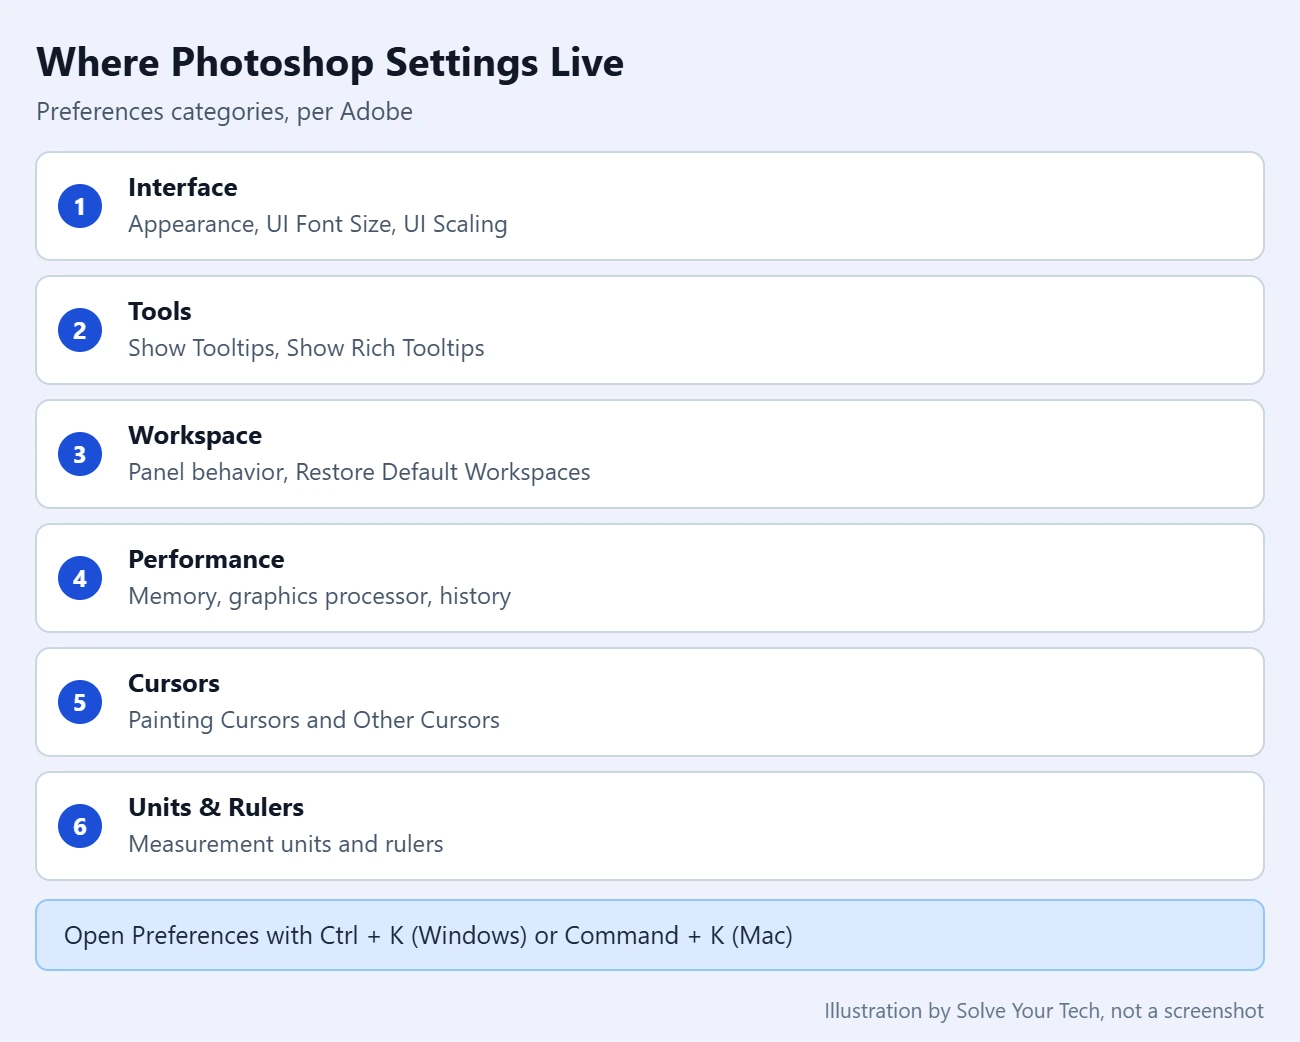
Adobe groups Preferences into categories. Open Preferences with Ctrl + K or Command + K, then select the category on the left. These are the ones most people need.
| To change this | Open this category | What to look for |
|---|---|---|
| Theme and text size | Interface | Color Theme, UI Font Size, UI Scaling |
| Pop-up tool descriptions | Tools | Show Tooltips, Show Rich Tooltips |
| Inches, pixels, or centimeters on the rulers | Units & Rulers | Measurement units and rulers |
| Memory and graphics card use | Performance | Memory Usage, Graphics Processor Settings |
| The shape of the brush pointer | Cursors | Painting Cursors, Other Cursors |
| Panel behavior and preset layouts | Workspace | Restore Default Workspaces |
| Opening and saving files | File Handling | File opening, saving, and compatibility options |
| Text and font behavior | Type | Text and font-related settings |
The Type category controls how the text tools behave. It does not change the typeface of text in your image. For that, see how to change text font in Photoshop.
Turn tooltips off or on
A tooltip is the small label that appears when you hover over a tool. Adobe describes two kinds. Standard tooltips show the tool name and its keyboard shortcut. Rich tooltips show a description and a short video of the tool in use.
- Open Preferences and select Tools.
- Deselect Show Rich Tooltips to stop the video pop-ups, and deselect Show Tooltips to stop the plain labels as well.
- Select OK.
Both are on by default. To bring them back, return to the same page and select the two boxes again. Many people keep the plain tooltips, because they show the shortcut key for each tool, and turn off only the rich ones.
Change the ruler units
Open Preferences and select Units & Rulers. Adobe lists this category as the place to set measurement units, rulers, and column sizes. Choose the unit you want for the rulers and select OK. The rulers along the top and left of the image window should show the new unit. If you do not see rulers at all, turn them on from the View menu.
Give Photoshop more or less memory
Be careful with this one, because it affects the rest of your computer. Adobe says Photoshop uses 70% of available RAM by default and advises against going above 85%, since that can leave too little memory for your operating system and other apps.
- Open Preferences and select Performance.
- In the Memory Usage section, check the Ideal Range shown for your computer.
- Drag the Let Photoshop Use slider, or type a value. Adobe suggests changing it in 5% steps.
- Select OK and restart Photoshop. The new memory amount only applies after a restart.
Adobe covers the graphics processor, cache, and history options on its Configure Photoshop performance preferences page.
How to Remove a Tool From the Toolbar
The toolbar is not part of Preferences. It has its own window, and nothing is deleted when you remove a tool. The tool just moves to a hidden list.
- Choose Edit > Toolbar. The Customize Toolbar window opens.
- Drag tools you do not use to the Extra Tools list. You can also drag tools and groups to reorder them.
- Select Save Preset if you want to keep this layout as a file you can load later.
- Select Done to save, or Cancel to discard the changes.
Tools you moved are still available from the extra tools slot at the bottom of the toolbar, as long as that toggle is turned on in the same window. To put everything back, open Edit > Toolbar again and select Restore Defaults. Be careful with Clear Tools, which moves every tool to Extra Tools at once.
How to Undo Your Changes
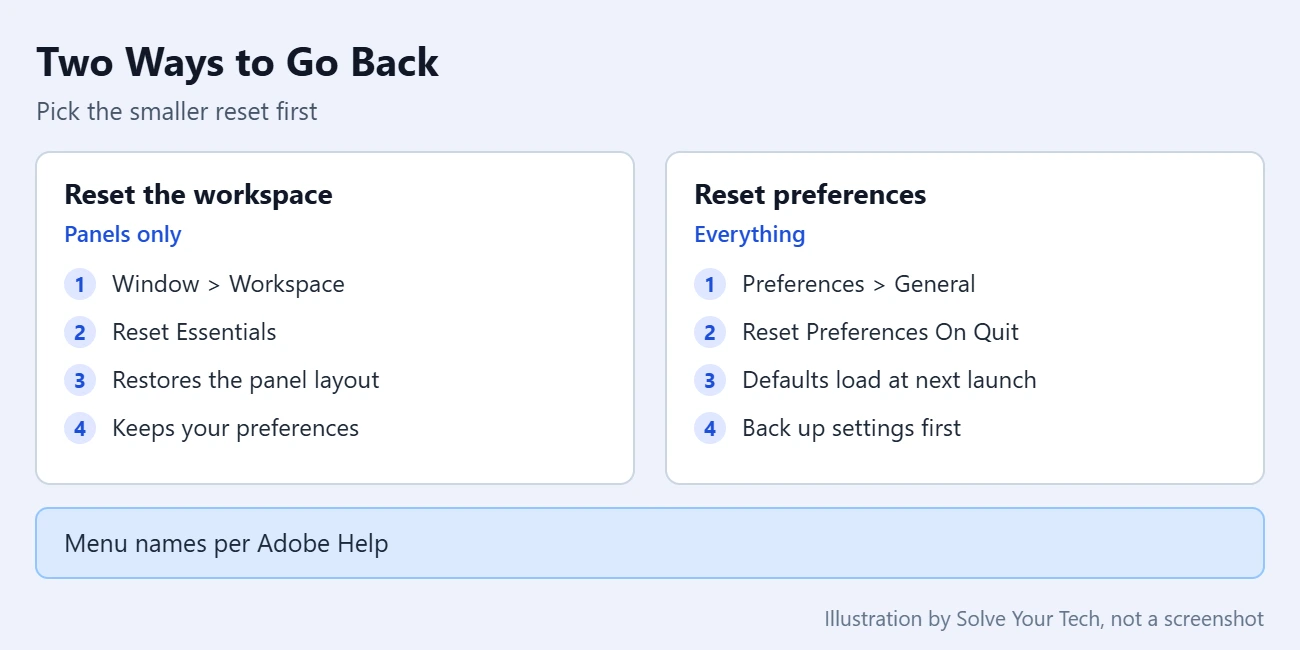
Most preferences are simple to reverse: open the same page and pick the old value. If you changed many things and cannot remember them all, Photoshop has two larger resets. Start with the smaller one.
Reset only the panel layout
If panels are missing or in the wrong place, you do not need to reset any preferences. Choose Window > Workspace and select the reset command for the Essentials workspace. Our guide on how to reset the workspace in Photoshop walks through it. This leaves your theme and other preferences alone.
Reset every preference
Warning: this returns every setting in the Preferences window to its default, not just the theme. Adobe recommends backing up your settings first so you can restore them. The backup is a copy of the Adobe Photoshop <version> Settings folder, made while Photoshop is closed. Adobe gives the folder locations on its Backup and restore preferences page.
- Choose Edit > Preferences > General (Windows) or Photoshop > Settings > General (Mac).
- Select Reset Preferences On Quit.
- Select OK.
- Close Photoshop. The next time you open it, it uses the default preferences.
Adobe also documents a keyboard method: close Photoshop, then hold Alt + Ctrl + Shift (Windows) or Option + Command + Shift (Mac) while you start it, and select Yes when asked whether to delete the settings file.
Troubleshooting
The theme went back after I reopened Photoshop
Settings are written when Photoshop closes normally. If the app crashed or you force quit it after changing the theme, the change was not saved. Set the theme again, then close Photoshop from the File menu (Windows) or the Photoshop menu (Mac) and reopen it to check.
I cannot find Preferences on my Mac
Look under the Photoshop menu next to the Apple menu, not under Edit. In current versions it is called Settings. In older versions it is called Preferences. Command + K opens it in either case.
Shift + F1 and Shift + F2 do nothing
Try holding Fn as well, since many laptops use the F keys for hardware controls. If that does not help, the shortcut may not apply to your version or may be taken by another program. Change the theme in Preferences > Interface instead.
The text size did not change
UI Font Size needs a restart. Close Photoshop completely and open it again. If the text still looks the same, check your system’s display scaling, because Adobe notes that the result can depend on it.
Photoshop behaves oddly after I changed settings
Adobe says damaged preference files can cause unexpected behavior, and that resetting preferences often fixes it. Back up the settings folder, then use Reset Preferences On Quit as described above.
Frequently Asked Questions
Where is the theme setting in Photoshop?
It is in the Preferences window under the Interface category, labeled Color Theme. Open Preferences with Ctrl + K on Windows or Command + K on a Mac.
Does Photoshop have a light mode?
Yes. The lighter swatches in the Color Theme row give Photoshop a light gray interface. Photoshop opens with a dark theme unless you change it.
Does changing the theme affect my images?
No. The theme only changes the app’s panels, toolbar, and dialog boxes. Your image pixels and colors are not edited. A lighter or darker surround can make an image look slightly different to your eye, which is why some people pick a neutral shade for color work.
Do I need to restart Photoshop after changing the theme?
The theme itself should apply as soon as you click a swatch. A few other preferences do need a restart, including UI Font Size and the memory setting on the Performance page.
Will my preferences carry over when Photoshop updates?
Adobe says that by default, settings in Preferences migrate from a prior version to an updated version, and you can choose to keep or remove them when you uninstall a version.
Can I copy my preferences to another computer?
Adobe says you can use a backup of the settings folder to transfer settings between computers. Close Photoshop on both computers, copy the Adobe Photoshop <version> Settings folder, and place it in the same location on the second one. On a Mac the user Library folder is hidden. Hold Option while opening the Go menu in Finder to show it.
More Photoshop Guides
Once Photoshop looks the way you want, these guides cover common next tasks:
- How to save a Photoshop PSD as a PNG
- How to export layers as separate images in Photoshop
- How to draw a straight line in Photoshop
- How to exit full screen mode in Photoshop

Matthew Burleigh is the founder, head writer, and editor of Solve Your Tech, which he launched in 2012. He has written technology tutorials since 2008 and worked in IT since 2003, including small-business support, IT management, and consulting. He holds Bachelor’s and Master’s degrees in Computer Science from Arizona State University.
Matthew writes practical guides for Windows, iPhone and iPad, Microsoft Office, Outlook, Google apps, and Android. Solve Your Tech’s guides are tested on current devices or checked against official product documentation, with clear steps, sources, and update dates.
Read more about Matthew and how Solve Your Tech writes and updates its guides, or report a correction.