A common addition that you might need to make to an image in Photoshop is the addition on some text. You might even need to make it look like someone is saying that text. Therefore you may need to know how ot create a speech bubble in Adobe Photoshop.
While there are a lot of very talented artists that can draw and create almost anything in Photoshop, some of us just don’t have that gift to be able to freely draw on a computer screen. This can extend to even very basic shapes, like a speech bubble.
Every time that I have tried to manually draw a speech bubble, it either looks like a balloon or some weird cloud. Fortunately there is a custom shape tool in Photoshop CS5 that can help to solve this specific problem. So continue reading our brief tutorial below to learn how to create a speech bubble in Photoshop CS5.
As an Amazon affiliate, I earn from qualifying purchases.
How to Create a Speech Bubble in Adobe Photoshop
- Open your image.
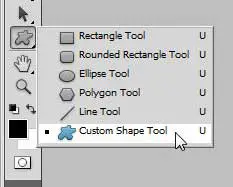
- Right-click the Shape Tool and choose Custom Shape Tool.
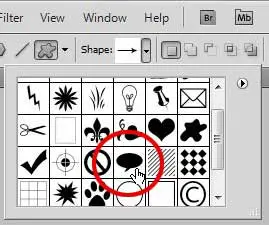
- Choose the Shape dropdown and select the speech bubble.
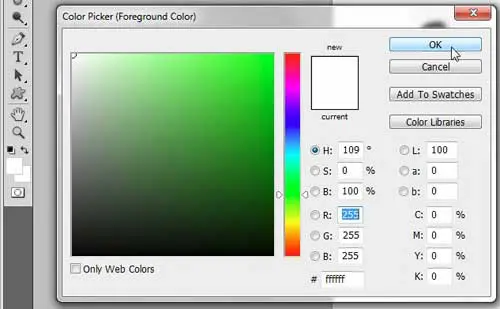
- Click the Foreground Color box, choose a color, then click OK.
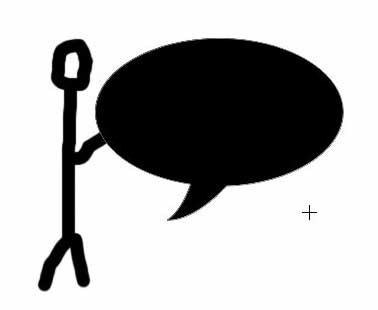
- Draw the speech bubble on the canvas.
- Select the Move tool and position the speech bubble.
- Click the Type Tool.
- Adjust the Font settings.
- Click inside the bubble and add your text.
Our article continues below with additional information on adding a speech bubble in Photoshop, including pictures of these steps.
Do you ever need to draw a line through email text? Our how to strikethrough in Outlook tutorial will show you how to accomplish that.
How to Make Photoshop CS5 Speech Bubbles (Guide with Pictures)
I am going to be writing this tutorial with the assumption that you want to create a white speech bubble with black text. If not, then you can simply choose a different foreground color for your speech bubble and a different text color for the words that you are putting inside of the speech bubble before you create each respective element.
If the text in the bubble is not in the right location, then you can use the instructions in our how to move text in Photoshop article to relocate it.
Step 1: Open the image to which you want to add a speech bubble.
Step 2: Right-click the Shape tool in the toolbox at the left side of the window, then click the Custom Shape Tool option.
Step 3: Click the drop-down menu to the right of Shape in the toolbar at the top of the window, then click the Speech Bubble option.
Step 4: Click the Foreground Color box in the toolbox at the left side of the window, click the top-left corner of the color picker to choose the color white, then click the OK button.
Step 5: Click near the location in your image where you want to insert the speech bubble, then drag your mouse to expand the size.
You don’t need to worry too much about being exact with your location, as Photoshop automatically creates the shape on its’ own layer, which allows you to freely move it.
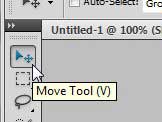
Step 6: Click the Move Tool icon at the top of the toolbox, the click your speech bubble and drag it to the desired location.
Step 7: Click the Type Tool in the toolbox.
Step 8: Choose your font settings using the options in the toolbar at the top of the window.
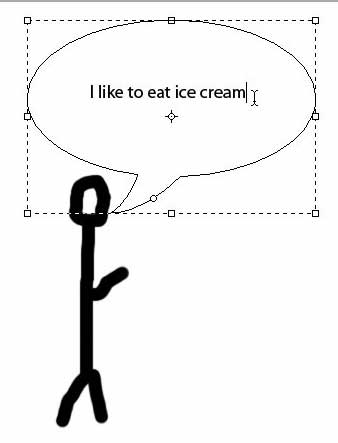
Step 9: Click inside the speech bubble, then type the text that you want to add.
Depending upon the shape and size of your speech bubble, you may need to add some line breaks and spaces to properly position your text. You can move to a new line by pressing Enter on your keyboard, and you can add spaces by pressing the spacebar.
Be sure to save your image once you have finished customizing your speech bubble.
Are you having trouble figuring out how to go back and change the font on text that you have already created in Photoshop? The instructions in this tutorial can be helpful in pointing out the steps that you need to follow in order to edit and customize existing text layers.
Is your computer struggling to run Photoshop as smoothly as you would like? Maybe it’s time to upgrade to a new laptop. There are a number of options available that are both affordable and powerful, including this one available at Amazon.

Matthew Burleigh has been writing tech tutorials since 2008. His writing has appeared on dozens of different websites and been read over 50 million times.
After receiving his Bachelor’s and Master’s degrees in Computer Science he spent several years working in IT management for small businesses. However, he now works full time writing content online and creating websites.
His main writing topics include iPhones, Microsoft Office, Google Apps, Android, and Photoshop, but he has also written about many other tech topics as well.
