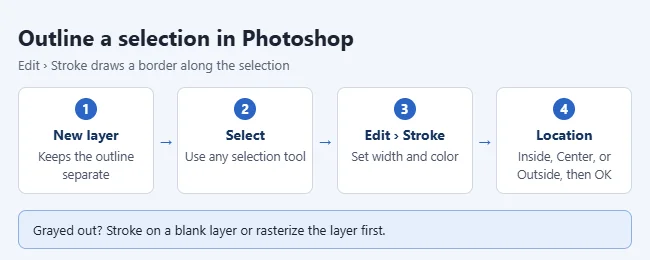
To outline a selection in Photoshop, make the selection, then choose Edit > Stroke. Enter a width in pixels, choose Inside, Center, or Outside for the location, and select OK. Photoshop draws a colored border along the edge of the selection. Adobe calls this outline a stroke.
This guide covers Photoshop on Windows and Mac. The steps follow Adobe’s current Photoshop documentation. Older versions such as CS5 use the same Edit > Stroke command, although the dialog boxes may look a little different.
What you need before you start
- An open image. Any document works, including a blank one.
- An active selection. A selection is the area inside the moving dashed line, often called marching ants. You can make one with any selection tool, such as the Rectangular Marquee, Elliptical Marquee, Lasso, or Object Selection tool.
- A layer that holds pixels. The Stroke command paints pixels, so it does not work directly on text, shape, or Smart Object layers. A new blank layer is the simplest choice.
- The Layers panel. If you cannot see it, choose Window > Layers.
Outline a selection with Edit > Stroke
Before you begin, know that this command paints the outline permanently onto the active layer. Putting it on its own new layer, as in step 1, keeps your photo untouched and makes the outline easy to remove later.
- Choose Layer > New > Layer, then select OK. A new empty layer appears in the Layers panel above your image. Keep it selected.
- Set the foreground color to the color you want for the outline. Click the top color square near the bottom of the Tools panel and pick a color. Adobe lists this as the first step because the stroke uses that color.
- Make your selection with any selection tool. Drag around the area you want to outline. The marching ants show the path the outline will follow.
- Choose Edit > Stroke. The Stroke dialog box opens.
- Enter a Width in pixels. A larger number makes a thicker outline. If the dialog shows a color box, check that it matches the color you want.
- Under Location, choose Inside, Center, or Outside. This decides where the outline sits compared with the selection edge.
- Under Blending, leave Mode on Normal and Opacity at 100% for a solid line. A lower opacity makes the outline more see-through.
- Leave Preserve Transparency unchecked when you are working on a blank layer. Adobe says this option strokes only the areas that already have pixels, and an empty layer has none.
- Select OK. A colored border appears around the selection.
- Choose Select > Deselect, or press Ctrl+D on Windows or Command+D on Mac, to remove the marching ants and see the result.
Adobe describes every option in its help article Stroke a selection or layer with color.
Choose Inside, Center, or Outside
The Location setting changes how the finished outline looks, especially with a thick width.
- Inside draws the outline within the selection. Use it when the selection reaches the edge of the canvas, such as a border around a whole photo.
- Center draws the outline over the selection edge itself, with part of the width on each side.
- Outside draws the outline beyond the selection. Use it when you do not want the line to cover the edge of the object you selected.
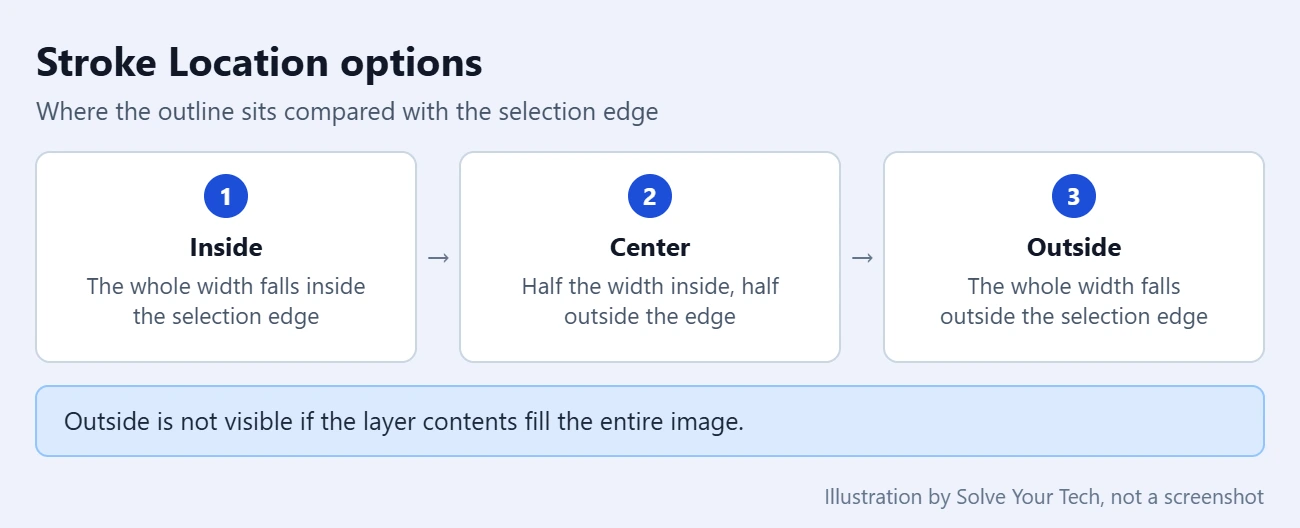
Adobe notes one limit: if the layer contents fill the entire image, a stroke applied outside is not visible, because there is no room left on the canvas for it.
Confirm the outline, or undo it
After you deselect, look at the Layers panel. The small preview next to the new layer should show the outline shape. Click the eye icon beside that layer to hide and show the outline and confirm it sits on its own layer.
- Undo right away: choose Edit > Undo, or press Ctrl+Z on Windows or Command+Z on Mac.
- Remove it later: if the outline is on its own layer, select that layer and delete it. Your image stays as it was.
- Change the color or width: a stroke made with Edit > Stroke is made of pixels, so it is not adjustable. Undo or delete it, then stroke the selection again with new settings.
Outline a whole layer with a Stroke layer style
If you want to outline everything on a layer, such as text, a shape, or a cut-out object with transparent pixels around it, a layer style is often the better tool. A layer style is an effect attached to a layer that you can change or switch off at any time.
- In the Layers panel, double-click the layer in the empty area to the right of its name. Adobe says to click outside the layer name and thumbnail. You can also select the layer style icon at the bottom of the Layers panel.
- In the Layer Style dialog, select Stroke in the list on the left.
- Set the Size, and choose a Position of Outside, Inside, or Center.
- Choose the fill. Adobe says the Stroke effect can outline an object with a color, a gradient, or a pattern.
- Select OK. The outline follows the edges of the layer content.
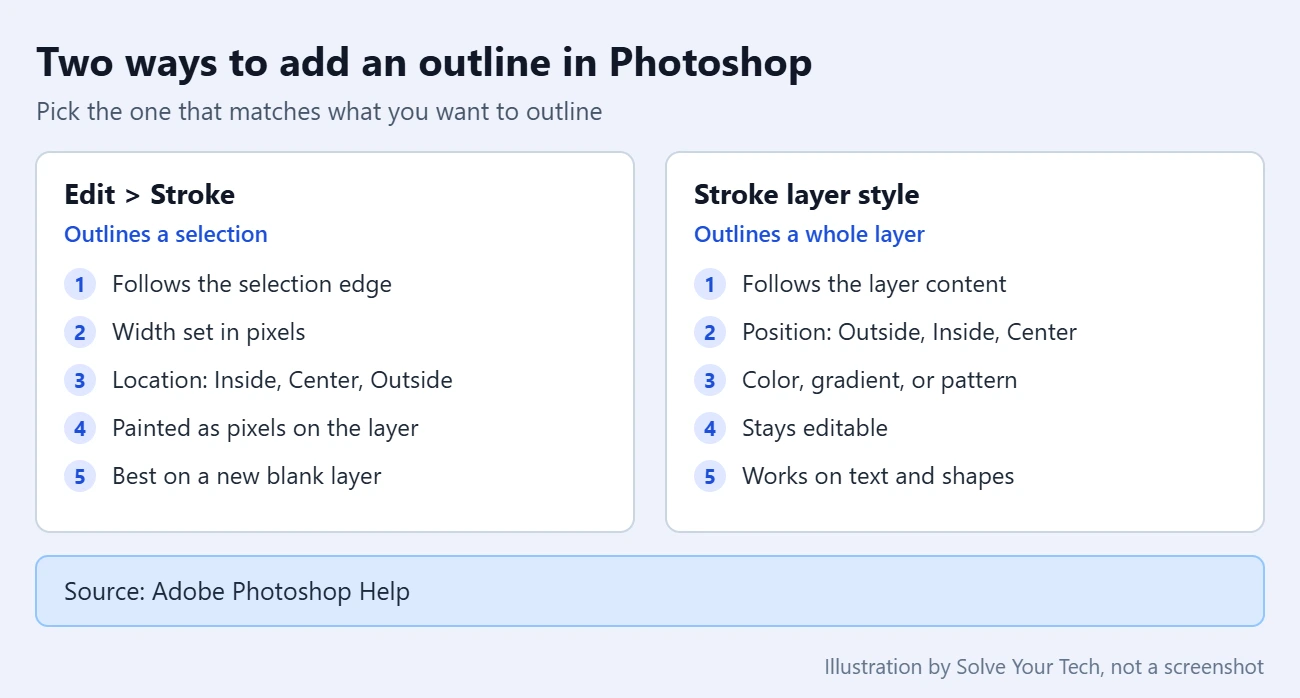
A layer style outlines the content of the whole layer, not the current selection. If the layer is a full photo with no transparent areas, the outline runs around the edge of the picture. Adobe lists the effect in Layer style effects and options overview.
More ways to build the outline
Outline the shape of a layer
Hold Ctrl on Windows or Command on Mac and click a layer thumbnail in the Layers panel. Adobe says this selects all non-transparent pixels on that layer. Then create a new layer and use Edit > Stroke. This works for text too, and it leaves the text layer editable because the outline is painted on a different layer.
Leave a gap between the object and the outline
With a selection active, choose Select > Modify > Expand, enter a value between 1 and 100 pixels, and select OK. The selection grows by that amount. Now stroke it on a new layer. The outline floats away from the object instead of touching it. Choose Contract in the same menu to shrink the selection. See Adobe’s Expand or contract a selection.
Turn the selection edge into a band
Choose Select > Modify > Border and enter a width between 1 and 200 pixels. Photoshop replaces your selection with a band centered on the old edge. Adobe’s example is a 20-pixel border that extends 10 pixels inside and 10 pixels outside. You can then fill that band with color.
Outline a shape layer
Shapes drawn with the shape tools have their own stroke. Select the shape layer, then use the Stroke options in the Contextual Task Bar, the Options bar, or the Properties panel. Our guide on how to create a speech bubble in Photoshop shows this on a real shape.
Troubleshooting
Edit > Stroke is grayed out
Adobe says the layer might be a shape, text, or Smart Object. The safest fix is to create a new blank layer and stroke on that. Adobe’s own fix is to right-click the layer and choose Rasterize Layer. Be careful: rasterizing turns text and shapes into plain pixels, so you can no longer edit the words or reshape the object. The command is also unavailable when nothing is selected and the active layer has nothing to stroke.
Nothing appears after you select OK
- You chose Outside and the selection or layer fills the whole canvas. Switch to Inside.
- Preserve Transparency is checked on an empty layer. Uncheck it and try again.
- The outline color matches the background, or Opacity is very low.
- The outline layer sits below another layer that covers it. Drag it higher in the Layers panel.
The outline has soft or jagged edges
A stroke follows the selection it is given. A feathered selection has blurred edges, which can produce a softer outline. For crisp, straight lines, see how to draw a straight line in Photoshop.
The Layers panel is missing
Choose Window > Layers. If several panels have gone missing or moved, reset your Photoshop workspace. If the whole interface has disappeared, you may need to exit full screen mode in Photoshop instead.
Frequently asked questions
What is the difference between Edit > Stroke and a Stroke layer style?
Edit > Stroke paints a border along the edge of the current selection, and the result is ordinary pixels on the layer. A Stroke layer style outlines all of the content on a layer and remains an adjustable effect. Use Edit > Stroke for part of an image, and the layer style for a whole layer such as text.
Can I change the outline color later?
With a Stroke layer style, yes. Double-click the Stroke effect under the layer in the Layers panel and pick a new color. With Edit > Stroke, the outline is pixels, so the simple route is to delete the outline layer and stroke the selection again.
Can I outline text without rasterizing it?
Yes. Add a Stroke layer style to the text layer, which Adobe describes as useful on hard-edged shapes such as type. Or load the text as a selection by holding Ctrl or Command and clicking its thumbnail, then stroke that selection on a new layer. To pick a different typeface before you add the outline, see how to change the font in Photoshop.
How thick can the outline be?
The Stroke dialog sets the width in pixels. Adobe’s current help page does not state a maximum, so if Photoshop rejects a value, enter a smaller number. Remember that the same pixel width looks thinner on a large, high-resolution image than on a small one.
Does the outline stay when I save the file?
Yes, it is part of the image. Saving as a Photoshop PSD file keeps the outline on its own layer so you can remove or redo it later. Formats such as JPEG flatten everything into one picture.
Next step
Once the outline is in place, you may want to color the area inside it. To fill a selection instead of outlining it, see how to add a pattern in Photoshop.

Matthew Burleigh is the founder, head writer, and editor of Solve Your Tech, which he launched in 2012. He has written technology tutorials since 2008 and worked in IT since 2003, including small-business support, IT management, and consulting. He holds Bachelor’s and Master’s degrees in Computer Science from Arizona State University.
Matthew writes practical guides for Windows, iPhone and iPad, Microsoft Office, Outlook, Google apps, and Android. Solve Your Tech’s guides are tested on current devices or checked against official product documentation, with clear steps, sources, and update dates.
Read more about Matthew and how Solve Your Tech writes and updates its guides, or report a correction.