Working with layers in Adobe Photoshop CS5 presents you with an assortment of options for customizing your image.
Most of these options are achievable by adding content to your layers and manipulating the appearance of each layer until you have a finalized version of your creation.
The simplicity of working with Photoshop CS5 layers, however, can take a turn towards the frustrating side if you can’t figure out how to unlock a layer in Photoshop CS5.
This is a particularly common problem to encounter when attempting to edit the background layer of an image, as most default Photoshop CS5 settings include the locking of that specific layer.
Fortunately, it is possible to unlock a Photoshop CS5 layer, and you can even follow these steps to learn how to unlock a background layer in Photoshop CS5.
How Do You Unlock a Layer in Photoshop CS5
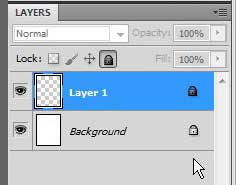
You have probably found this tutorial because you have encountered a Photoshop CS5 roadblock that stems from the lock icon displayed on the right side of a layer, such as in the image below.
The lock next to the Background layer is one that is present on any new image that I create in Photoshop CS5.
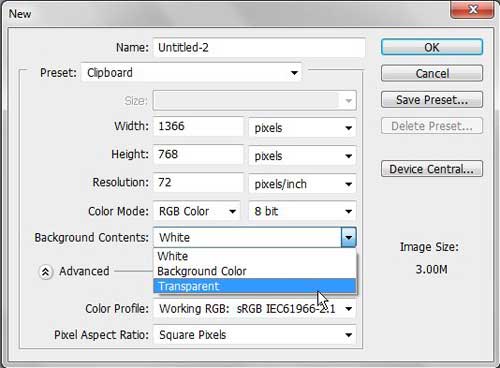
If I wanted to remove it permanently, I could change the Background Contents option on the New image screen to Transparent, and the default layer in any new Photoshop CS5 image after that would be transparent and unlocked.
However, for the purpose of this tutorial, we are dealing with unlocking a layer in an existing image.
You will note that the example image I am working with has two locked layers. I’ve intentionally locked Layer 1, which means that I’m not able to do anything to it. The Background layer is locked by default, which means that I can draw on it, but I can’t move it or transform it.
Fortunately, the process of removing both of these lock types is identical and remarkably simple.
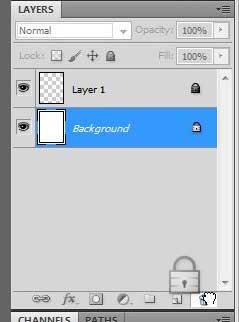
First you must click the layer that you want to unlock, then simply click the lock icon at the right of the layer name and drag the lock to the Trash icon at the bottom of the Layers panel.
If you remove the lock from the Background layer, Photoshop will rename that layer to Layer 0. You can now freely edit, resize and reposition all of your layers as needed.
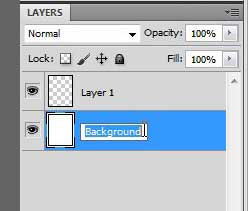
If, for some reason, it is vital that you keep the Background name on Layer 0, you can double-click the layer name, then rename it to Background.
Now that you know how to unlock a layer in Photoshop CS5, you will be able to make changes to layers that weren’t possible when that layer was locked before.
If you have not experimented much with adjusting your Photoshop CS5 layer options, you should take some time to familiarize yourself with the Layers panel.
Right-clicking on a layer or using the icons at the bottom of the panel can provide you with most of the tools that you will need to effectively adjust the properties of your layers.

Matthew Burleigh has been writing tech tutorials since 2008. His writing has appeared on dozens of different websites and been read over 50 million times.
After receiving his Bachelor’s and Master’s degrees in Computer Science he spent several years working in IT management for small businesses. However, he now works full time writing content online and creating websites.
His main writing topics include iPhones, Microsoft Office, Google Apps, Android, and Photoshop, but he has also written about many other tech topics as well.


