Working with pictures that you want to put on a t-shirt can be surprisingly complicated.
But one of the things that you might not be expecting is a t-shirt that prints backward.
Fortunately, our guide on how to reverse image in Word for iron on transfer will help you to prevent a picture from printing the wrong way so that you don’t waste ink and transfer paper as you are attempting to generate the iron-on image that you need to create your shirt or another article of clothing.
How to Reverse Image in Word for Iron On Transfer
- Open your document.
- Click the picture.
- Select the Format tab.
- Choose Rotate, then Flip horizontal.
Our guide continues below with additional information on how to reverse image in Word for iron on transfer, including pictures of these steps.
There are many situations where you may want to design your own t-shirt, and it has never been easier to create one yourself.
You can even create one at home if you have a computer, printer and t-shirt transfer paper.
But if your image is not symmetrical, or if there are words on it, then you may discover that the image is backwards.
Fortunately, this is something that you can fix using the picture editing tools in Microsoft Word. So check out our short guide below to learn how to flip your image horizontally in Word 2010 so that it looks correct when you iron it onto your t-shirt.
If you have a picture of something that you can’t identify, then read our guide on how to do a reverse image search on iPhone using the Google app.
How to Flip an Image Horizontally in Word 2010 (Guide with Pictures)
While this tutorial is specifically intended for people that need to flip a picture horizontally for a t-shirt transfer, not every type of t-shirt transfer paper requires this.
You should read the printing instructions on your transfer paper to ensure that it is required.
Additionally, it is always a good idea to first print the image on a regular sheet of paper before printing on the t-shirt transfer paper to make sure that it looks the way you expect it to.
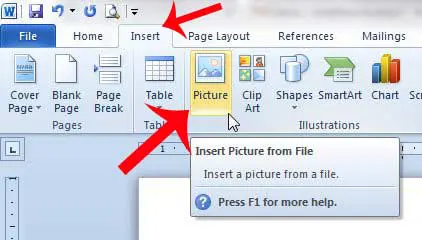
This tutorial will assume that you already have a Word document with the image for the t-shirt transfer. If not, simply create a new document in Word, click Insert at the top of the window, click Picture, then select the t-shirt transfer image.

Step 1: Open the document containing the image that you want to flip.
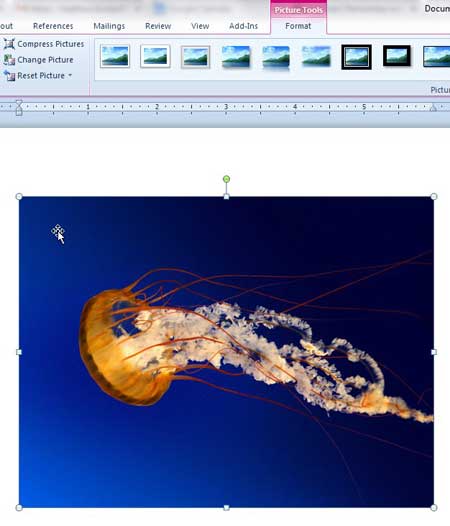
Step 2: Click the image to select it.

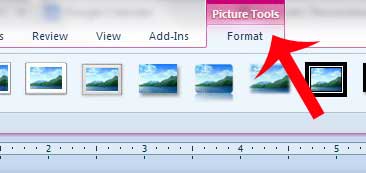
Step 3: Click the Format tab at the top of the window under Picture Tools.

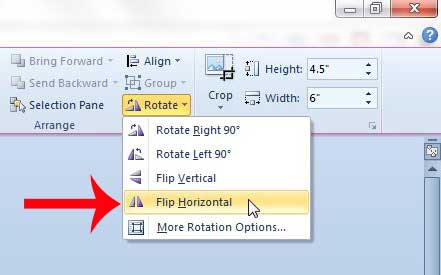
Step 4: Click the Rotate option in the Arrange section of the ribbon, then click the Flip Horizontal option.

Now that you know how to reverse image in Word for iron on transfer you can use these steps anytime that you need to configure a picture so that you can print it on a shirt.
Your image should then print out backwards, meaning that it will display correctly on the t-shirt after you have ironed it on.
Do you want to add text to a picture that you are printing? You can learn how to add text to a picture in Word 2010 if you do not want to use an image editing program.

Matthew Burleigh has been writing tech tutorials since 2008. His writing has appeared on dozens of different websites and been read over 50 million times.
After receiving his Bachelor’s and Master’s degrees in Computer Science he spent several years working in IT management for small businesses. However, he now works full time writing content online and creating websites.
His main writing topics include iPhones, Microsoft Office, Google Apps, Android, and Photoshop, but he has also written about many other tech topics as well.