Does your school or job require you to add captions to the pictures that you include in documents?
While many pictures may not need an explanation, it’s generally a good idea to add picture captions if you think that there might be some confusion about an image, or if you want to clarify something.
Our tutorial below will show you how to add captions to pictures in Google Docs using a couple of different options.
How to Add a Caption to a Picture in Google Docs
- Open your document.
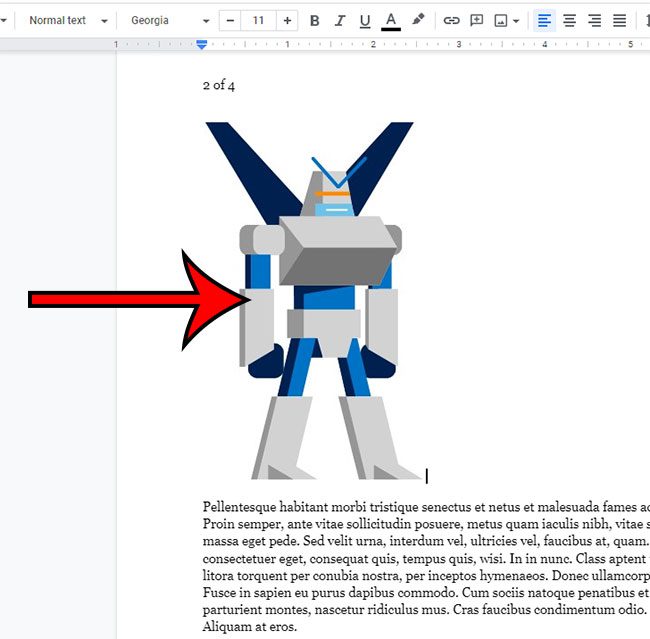
- Click on the picture.
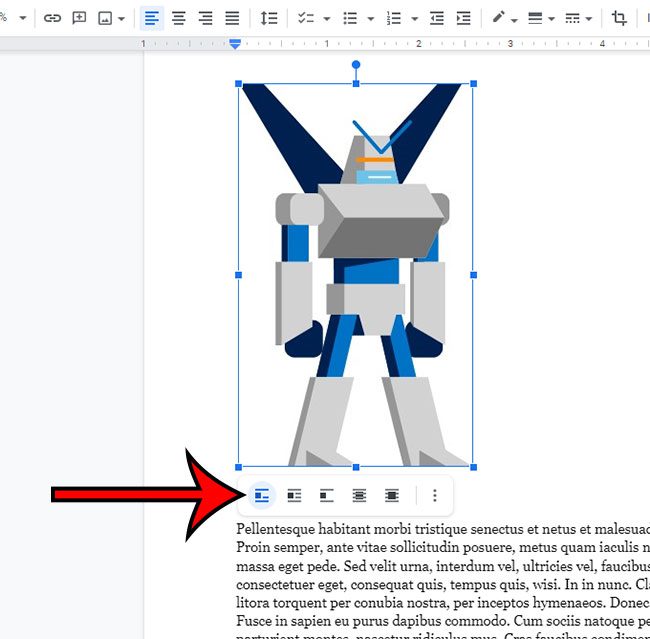
- Select the In line button below it.
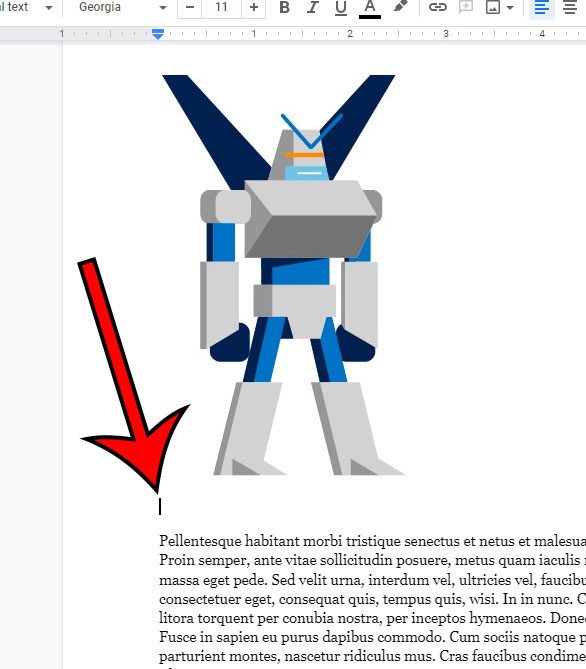
- Place your mouse cursor on the line below the image.
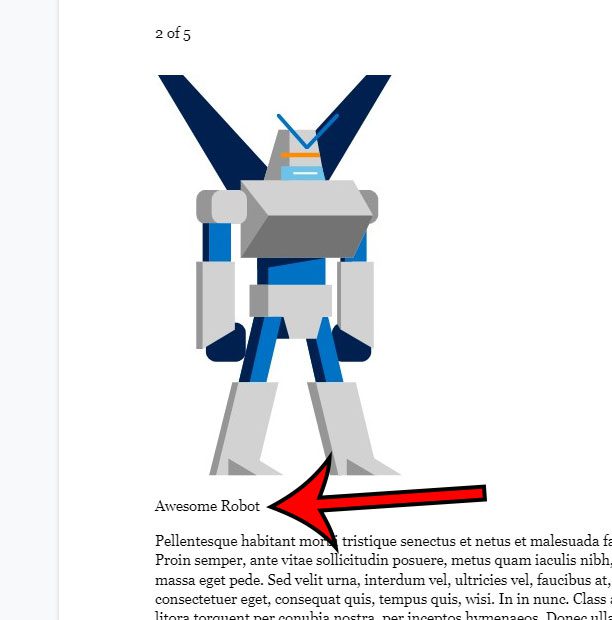
- Type the desired caption.
- Format the image as needed.
Our can I add captions to pictures in Google Docs guide continues below with additional information, including images of these steps.
Whenever you add a picture to a document in Google Docs, there are some additional items that you can adjust for that picture.
You might want to rotate it or flip it, or it might be bigger than you had initially wanted, so you can use the handles on the outside of the image to resize it.
But if you think that the picture needs some additional information, then you may want to add a caption as well.
Captions are traditionally used to describe an image, or provide information about the source of the image.
Our guide below will show you how to add captions to pictures in Googe Docs so that you can apply that type of image formatting to the objects in your documents.
Related: Check out our guide on inserting pictures in Google Docs if you would like to know more about some of the options for adding images to documents.
How to Caption a Google Docs Image (Guide with Pictures)
The steps in this article were performed in the Google Chrome desktop web browser, but will work in other laptop or desktop browsers like Edge or Firefox.
Step 1: Go to Google Drive and open the document with the picture that you wish to caption.
Step 2: Click on the picture to select it.
Step 3: Choose the In line option in the pop-up menu below the image.
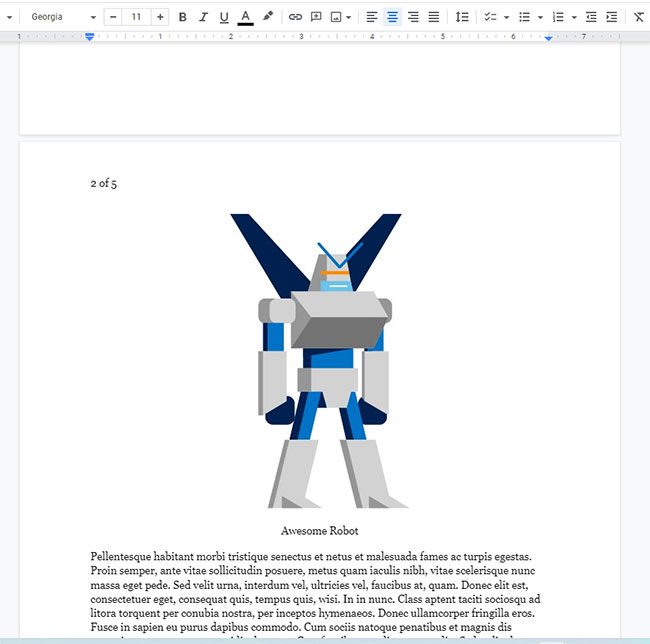
Step 4: Position your cursor on the line directly below the image. Note that you might need to press Enter to add a line break.
Step 5: Type the image caption text.
Step 6: Use the various formatting tools in the toolbar above the document to achieve the desired appearance for your picture and caption text.
In the image above, I elected to center my image and my caption text. You could also italicize or bold the text, change its font, or generally apply any other formatting styles that you would traditionally use in Google Docs.
Now that you know how to add a caption to a picture in Google Docs, you will be able to use this method any time there is a picture that would benefit from a little explanation or some additional information.
Related: Visit our how to insert text box in Google Docs article if you’ve been looking for a way to use that type of object in a document.
More Information on Google Docs Picture Captions
If you have a picture that includes a caption in your document, you might decide that you no longer want that caption or that it needs to be edited.
You can edit an existing picture caption in Google Docs by placing your mouse cursor in the caption text, then editing that text the same way that you would edit any other text in your document.
You can delete a Google Docs image caption by highlighting all of the captioned text, then pressing the Delete or Backspace key on your keyboard.
Some of the other pieces of information that you might want to add to your Google Docs images include:
- Adding alt text – including alt text on an image is an important step if someone who uses a screen reader will be viewing the document.
- Including a link on the picture – you can apply a hyperlink to a picture in your document so that a reader can click on the image and be taken to a Web page you have specificed.
- Adding a comment to an image – this is helpful if you are collaborating on a document with other people and think that someone might have a question.
Note that each of these options can be modified by right-clicking on the picture, then choosing the appropriate action from that menu.
How to Use the Drawing Tool to Caption a Picture in Google Docs
You can also add a caption to a picture in Google Docs with the Drawing tool.
To accomplish this, use the following steps.
Step 1: Select the point in the document where you want to add the captioned picture.
Step 2: Click Insert at the top of the window, then Drawing, then New.
Step 3: Select the Image button in the toolbar above the drawing canvas, then browse to and select the image.
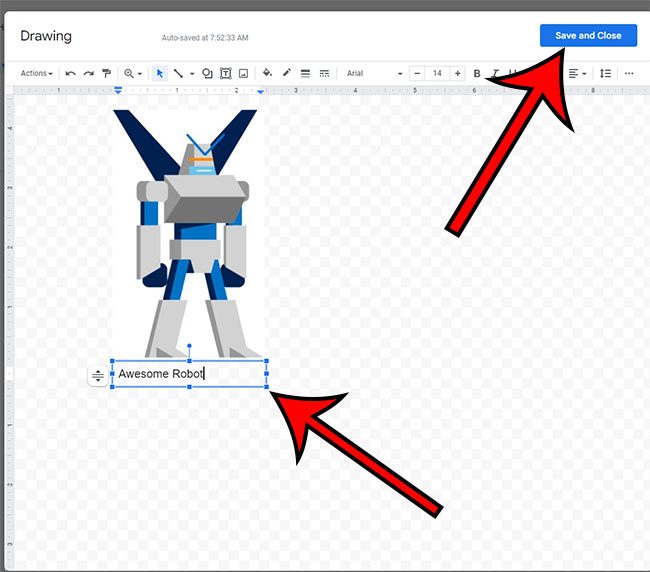
Step 4: Click the Text box button in the toolbar, then draw the text box below the image.
Step 5: Type the caption into the text box, then click the Save and close button to add the captioned picture to the document.
If you need to edit something about a caption created this way, double-click on the picture, then edit the caption text.

Matthew Burleigh has been writing tech tutorials since 2008. His writing has appeared on dozens of different websites and been read over 50 million times.
After receiving his Bachelor’s and Master’s degrees in Computer Science he spent several years working in IT management for small businesses. However, he now works full time writing content online and creating websites.
His main writing topics include iPhones, Microsoft Office, Google Apps, Android, and Photoshop, but he has also written about many other tech topics as well.
