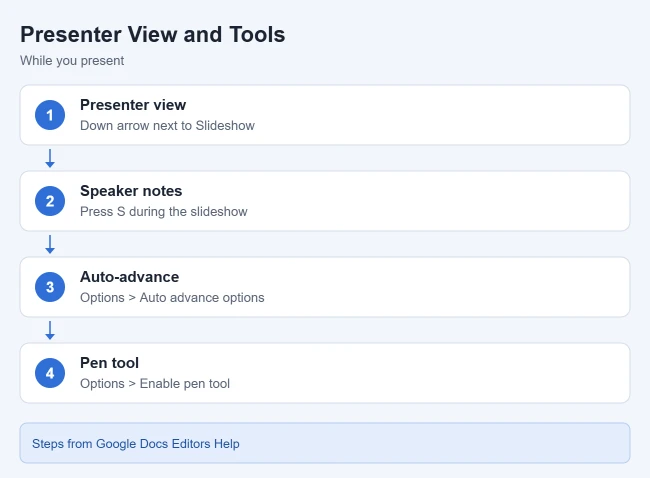
To present in Google Slides, click Slideshow at the top right (or press Ctrl + F5, or Command + Enter on a Mac). Use the arrow keys to move between slides and press Esc to stop. For speaker notes only you can see, click the arrow next to Slideshow and choose Presenter view.
This guide covers starting a slideshow, presenting with speaker notes, auto-advancing slides, using the pen and laser pointer, presenting on a second monitor, and the keyboard shortcuts for present mode. It is based on Google’s Present slides and Keyboard shortcuts for Google Slides help pages.
How to View Your Presentation in Google Slides
- Open the presentation in Google Slides.
- Click Slideshow at the top right.
- Use the arrow keys, or the arrows at the bottom of the screen, to change slides.
- Press Esc to exit full screen.
Result: Google says the presentation goes full screen starting from the current slide. Google recommends presenting in Chrome for best results. The toolbar, sidebar and speaker notes are hidden in this view.
To start from the first slide instead, Google lists Command + Shift + Enter on a Mac. There is also a Start from beginning option in the menu next to Slideshow.

How to Present With Speaker Notes
- Open the presentation.
- Click the down arrow next to Slideshow.
- Click Presenter view.
- Click Speaker notes in the presenter window.
Result: Presenter view opens a separate window with your notes, a timer and the next slide, while your audience sees only the main slideshow. You can also press S during a slideshow to open speaker notes, according to Google.
While you edit, Google lists Ctrl + Alt + Shift + S (Command + Option + Shift + S on a Mac) to open the speaker notes panel.
How to Auto-Advance Slides
- Click Slideshow.
- At the bottom, click Options > Auto advance options.
- Choose how quickly to advance the slides.
Result: The slides play on their own. Google notes you need to set this again each time you present. For a presentation you publish with File > Publish to the web, you can set the timing under “Auto-advance slides” instead.
How to Use the Pen Tool and Laser Pointer
Google says you can draw on slides while presenting. Click Options > Enable pen tool, then click and drag on the slide. You can change the pen color, or click Erase > Erase all to clear the current slide. Annotations disappear when the slideshow ends. Press L to toggle the laser pointer.
How to Present on Another Monitor
Google says this needs Chrome and at least one extra monitor. Click the arrow next to Slideshow and choose Presentation display options, allow Chrome’s multi-display permission if asked, pick Presenter view, Present from beginning or Full screen, choose the monitor, and click Start slideshow. Google notes these settings are cleared when you reload the presentation.
Present Mode Keyboard Shortcuts
Google lists these shortcuts for present mode:
- Esc: stop presenting
- Right arrow / Left arrow: next or previous slide
- A number, then Enter: go to that slide
- Home / End: first or last slide
- B or W: show a blank black or white slide (press any key to return)
- Ctrl + Shift + C: toggle captions (English only)
Frequently Asked Questions
Can I present Google Slides from my phone?
Yes. Google says full-screen presentations work from a computer, a mobile device, or a TV with Chromecast or AirPlay.
Can I download the presentation while presenting?
Yes. Google says the toolbar at the bottom of the presentation lets you print it or download it as a PDF or PPTX file.
Related Guides
- How to skip a slide in Google Slides
- How to print Google Slides with notes or 4 per page
- How to embed a Google Slides presentation
- How to insert a YouTube video into Google Slides

Matthew Burleigh is the founder, head writer, and editor of Solve Your Tech, which he launched in 2012. He has written technology tutorials since 2008 and worked in IT since 2003, including small-business support, IT management, and consulting. He holds Bachelor’s and Master’s degrees in Computer Science from Arizona State University.
Matthew writes practical guides for Windows, iPhone and iPad, Microsoft Office, Outlook, Google apps, and Android. Solve Your Tech’s guides are tested on current devices or checked against official product documentation, with clear steps, sources, and update dates.
Read more about Matthew and how Solve Your Tech writes and updates its guides, or report a correction.