You might already be familiar with the tools in Microsoft Word that can help you fix mistakes in your writing.
Learning how to do a grammar check in Word can improve the quality of your writing and reduce the issues that others might encounter when reading your documents.
But if you find that you often forget to run those checks, you might be looking for a way to do them automatically.
Our tutorial below will show you how to turn on automatic spell check in Microsoft Word so that it flags mistakes as you type them.
How to Turn on Automatic Spell Check in Word 2013
- Open Word.
- Click File.
- Choose Options.
- Select Proofing.
- Enable Check spelling as you type.
- Click OK.
Our article continues below with additional information on turning on spellcheck in Word 2013, including pictures for these steps.
In this digital age, many people have come to rely on applications and devices to perform certain actions, such as fixing words that aren’t spelled correctly.
Therefore you might need to learn how to turn on automatic spell check in Word 2013 if the application isn’t doing it already.
Word 2013 has a number of different tools that can check your document for mistakes. A popular one to enable is the passive voice checker, but perhaps the most commonly used proofreading tool is the spell checker.
You have probably found that you can manually run a spell check by clicking the Review tab at the top of the window, then clicking the Spelling & Grammar button, but there is another setting that will enable Word to fix misspellings automatically as you type.
Our tutorial below will show you where this automatic spell checker is located so that you can take advantage of this handy feature.
We also discuss some additional things you can do if this automatic spell check setting isn’t helping.
One of the other options on the Review tab can read your documents to you. Our guide on how to change the read aloud voice in Word will show you how to adjust the voice that it uses.
How to Enable Spellcheck in Word 2013 (Guide with Pictures)
The steps in this guide will adjust the settings in Word 2013 so that the program automatically fixes misspellings as you type.
Note that it may not fix every misspelling, as certain misspellings can be a little ambiguous. It is still a good idea to run the manual spell checker when you are done to help with any of the words that the tool misses.
Step 1: Open the document in Word 2013.
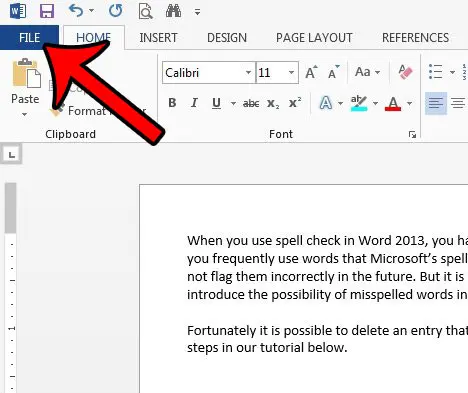
Step 2: Click the File tab at the top-left corner of the window.
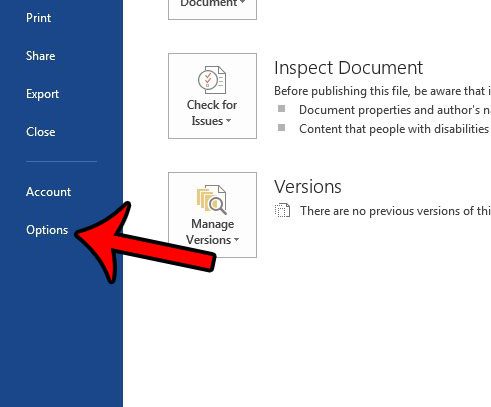
Step 3: Click the Options button at the bottom of the left column.
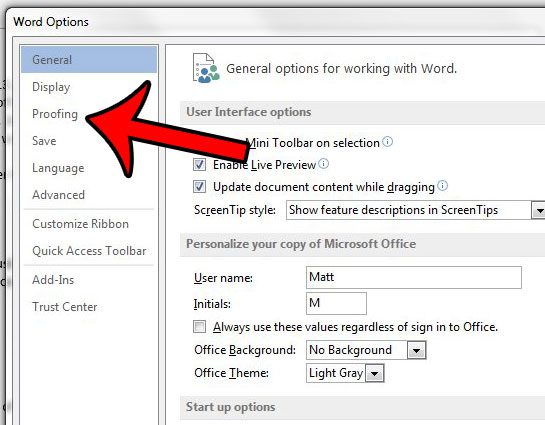
Step 4: Click the Proofing tab at the left side of the Word Options window.
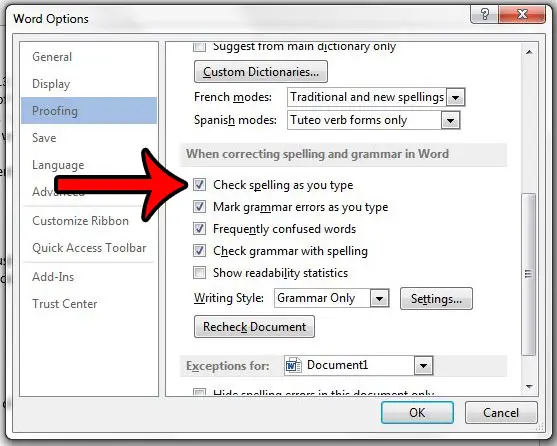
Step 5: Check the box to the left of Check spelling as you type.
You can then click the OK button at the bottom of the window to close and apply your changes.
Now that you know how to turn on automatic spell check in Word 2013, you can make sure that the application is checking your content as you add it to the document.
If Word 2013 still won’t automatically fix your spelling mistakes, then there is another setting that you should check.
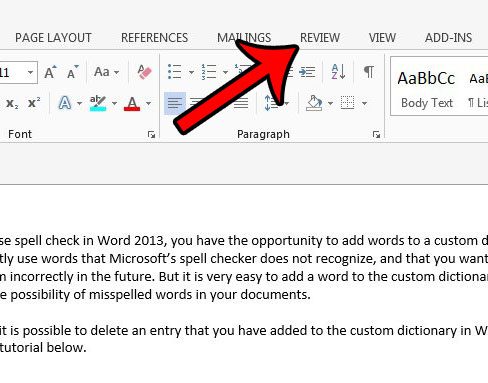
Click the Review tab at the top of the window.
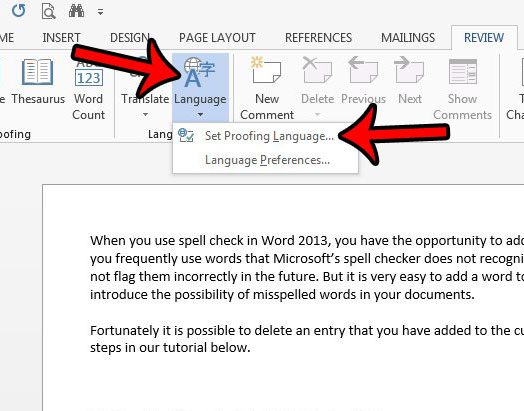
Click the Language button in the Language section of the ribbon, then click the Set Proofing Language option.
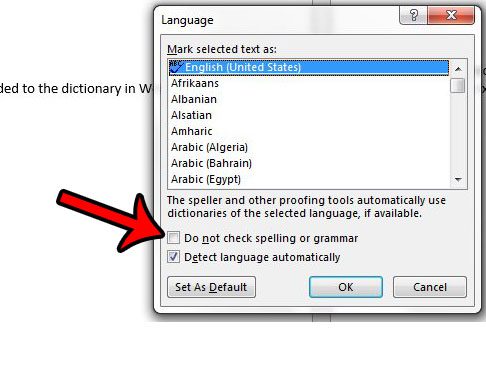
Confirm that the box to the left of Do not check spelling and grammar is unchecked. It should look like the image below. You can then click the OK button on this Language window.
If Word keeps bypassing a misspelled word, then read this article – https://www.solveyourtech.com/how-to-remove-an-entry-in-the-word-2013-dictionary/ – to learn how you can remove an entry from the dictionary and have Word identify it as a mistake.
Continue Reading
- How to insert a check mark in Microsoft Word
- How to do small caps in Microsoft Word
- How to center text in Microsoft Word
- How to merge cells in Microsoft Word tables
- How to insert a square root symbol in Microsoft Word

Matthew Burleigh has been writing tech tutorials since 2008. His writing has appeared on dozens of different websites and been read over 50 million times.
After receiving his Bachelor’s and Master’s degrees in Computer Science he spent several years working in IT management for small businesses. However, he now works full time writing content online and creating websites.
His main writing topics include iPhones, Microsoft Office, Google Apps, Android, and Photoshop, but he has also written about many other tech topics as well.