Emailing files as attachments is often the most efficient method to share a file on your computer with another person.
You’ve probably even sent multiple files as an attachment, as is often the case when you are sending pictures.
But sending a whole lot of files as attachments can be messy, both for you as the sender and for the person that is receiving the message.
For example, depending upon the email host of the recipient, as well as whether or not they are using a third-party program to manage their emails, a lot of your attachments might not be visible or, even worse, they might have to individually download each of those files.
Fortunately, you can take advantage of the file-zipping utility in Windows to combine all of your files into a handy zip folder.
As an Amazon affiliate, I earn from qualifying purchases.
How to Send a Folder in Outlook 2013
For the purposes of this tutorial, we will be working with an existing folder.
But if your files are all stored in different folders, or if you don’t want to send all of the files in an existing folder, then you will need to create a new folder that only contains the files you want to send.
So once you have properly organized all of your files so that they are all together in one folder, you can follow the steps below to email a folder in Outlook 2013.
Step 1: Browse to the location of the folder that you want to send.
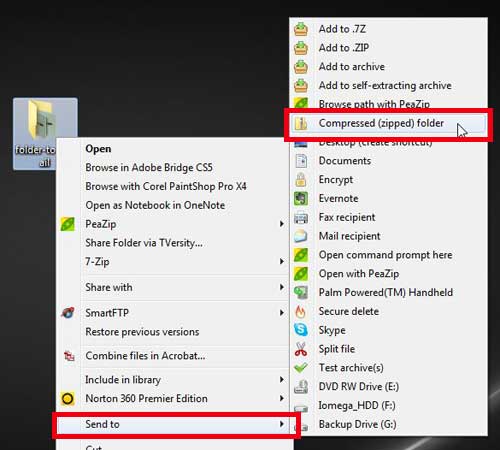
Step 2: Right-click the folder, click Send to, then click Compressed (zipped) folder.
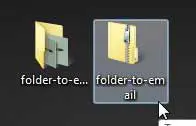
Step 3: This is going to create a zipped folder in the same location as the original folder, with the same name. You can distinguish between the two folders because one has a zipper on it.
Step 4: Launch Outlook 2013.
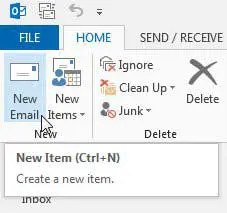
Step 5: Click the New E-mail button at the top-left corner of the window.
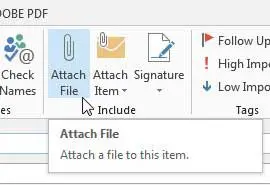
Step 6: Click the Attach File button in the Include section of the ribbon at the top of the window.
Step 7: Browse to the zipped folder, select it, then click the Insert button.
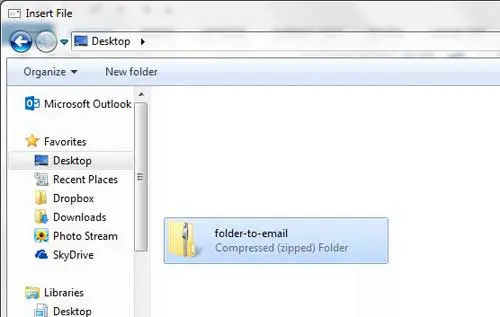
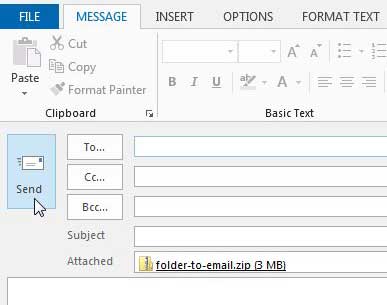
Step 8: Add the address of your recipient to the To field, add a subject to the Subject field, then type your message. Click the Send button to send your email with the attached zipped folder.
Are you backing up all of the important files on your computer? If not, purchasing a portable external hard drive and using a free backup program like CrashPlan can be a lifesaver if your hard drive crashes.
Now that you know how to send an entire folder of files to someone in an email from Outlook 2013, you can use this method to quickly share large numbers of files with other people.
Have you been looking for ways to update your signature? Read here to learn how to add a link to your Outlook 2013 signature.

Matthew Burleigh has been writing tech tutorials since 2008. His writing has appeared on dozens of different websites and been read over 50 million times.
After receiving his Bachelor’s and Master’s degrees in Computer Science he spent several years working in IT management for small businesses. However, he now works full time writing content online and creating websites.
His main writing topics include iPhones, Microsoft Office, Google Apps, Android, and Photoshop, but he has also written about many other tech topics as well.