Powerpoint presentations offer a lot of flexibility for the presenter, as you are able to customize many aspects of the process.
But if you are sharing a presentation with other people, then the Powerpoint format may not be as effective.
Fortunately, you can turn a Powerpoint slideshow into a video file from within the application.
Use these steps to convert your Powerpoint file into a video file.
Open the presentation in Microsoft Powerpoint.
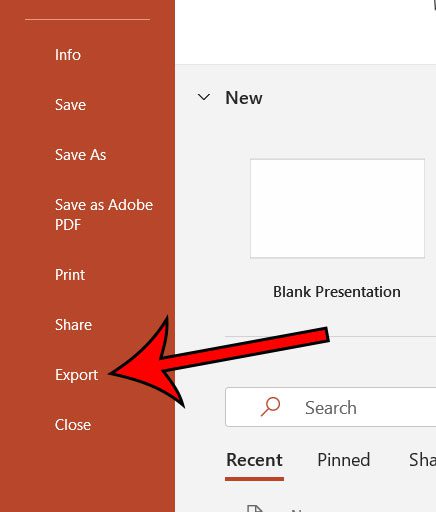
Click the “File” tab at the top-left of the window.
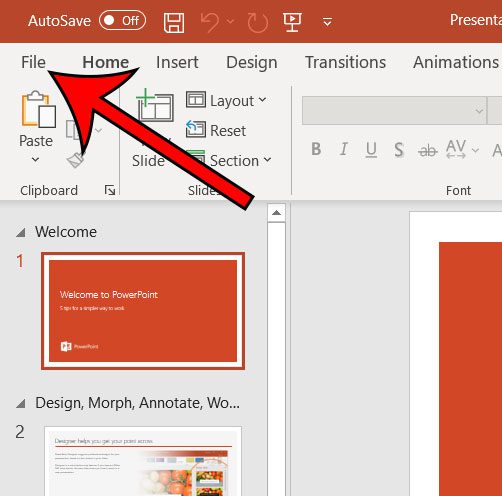
Select the “Export” tab at the left side of the window.
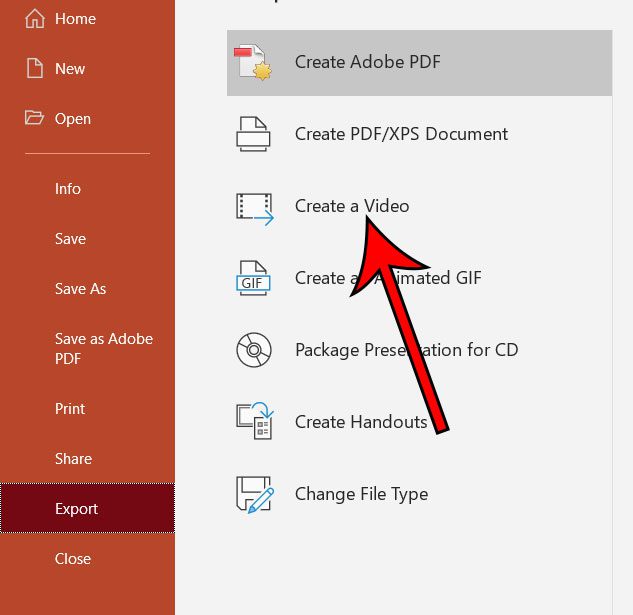
Click the “Create a Video” button.
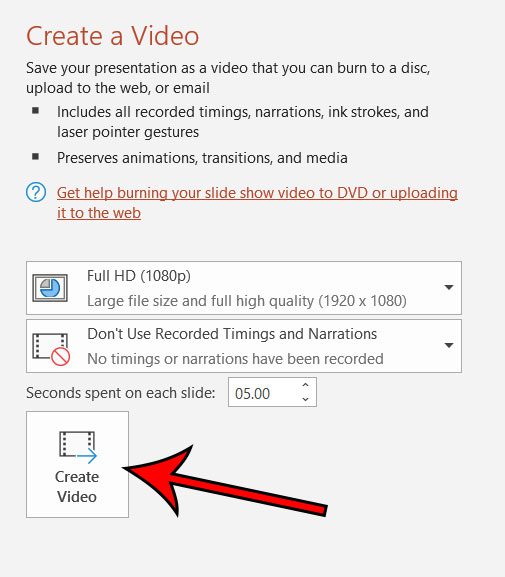
Adjust the video options as needed, then click the “Create Video” button.
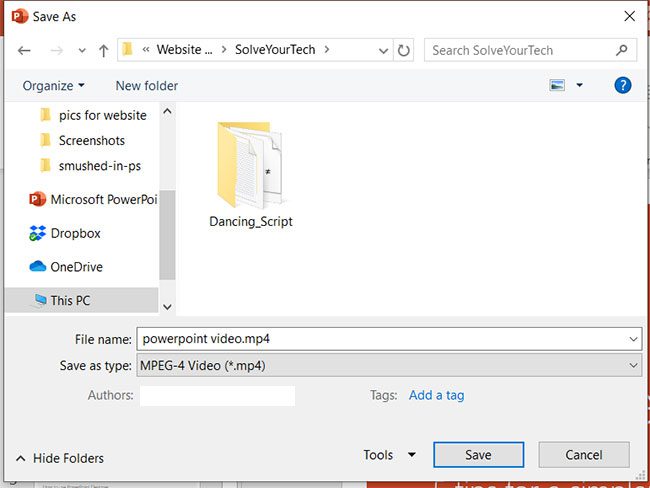
Choose a location for the video file, give the file a name, then click “Save.”
The steps above were performed using the Microsoft Powerpoint for Office 365 version of the application, but these steps are similar for most other versions of Powerpoint.
This process of converting a Powerpoint slideshow into a video will let you select the resolution of the video, allow you to select whether timing and narrations are used, and let you specify the amount of time to display each size.
Powerpoint videos can take a few minutes to create, depending on your computer’s specs and the length of the presentation.
These videos can have large file sizes, meaning that you may not be able to send them as an email attachment. Uploading a video to Google Drive or Dropbox, then sharing the link to that file, is typically a good alternative.
Frequently Asked Questions
What type of video files can I create in Powerpoint?
By default, any video version of a Powerpoint slideshow will be in the MPEG-4 (.mp4) file format. However, you will have the option of creating a Windows Media Video (.wmv) file instead. You can make the switch by clicking the “Save as Type” dropdown menu when choosing the file save location.
How do I make a hi-res Powerpoint video?
In the “Create a Video” column during the conversion process there is a button that lets you choose a video resolution. It says “Full HD” by default, but you can also elect to create an Ultra HD (4K) version of the presentation.
How can I convert a Powerpoint to a video with audio?
One of the buttons during the video export process that lets you choose whether or not to use recorded narrations. If you click that button and choose the “Use Recorded Timing and Narrations” option, then any narrations associated with slides will be included. Additionally any audio files you have added to the presentation will be included in the video as well.
Continue Reading
- How to create a check mark in Powerpoint
- How to make curved text in Powerpoint
- How to make a Powerpoint slide vertical
- How to remove an animation from Powerpoint
- How to set a picture as a background in Powerpoint

Matthew Burleigh has been writing tech tutorials since 2008. His writing has appeared on dozens of different websites and been read over 50 million times.
After receiving his Bachelor’s and Master’s degrees in Computer Science he spent several years working in IT management for small businesses. However, he now works full time writing content online and creating websites.
His main writing topics include iPhones, Microsoft Office, Google Apps, Android, and Photoshop, but he has also written about many other tech topics as well.
