Occasionally you will need to add a picture to a spreadsheet, or someone will send you a spreadsheet with pictures in it.
But if you need to move a row or column that contains pictures, you will probably run into a problem where the data in the row or column moves, but the pictures do not.
Fortunately, you can adjust this behavior by locking a picture to a cell in Excel 2011. Our guide below will show you how to modify your spreadsheet picture to achieve this result.
Locking a Picture to a Cell in Excel 2011
The steps in this article were written for and performed on the Excel 2011 version of the software, for the Mac. The steps are similar for Windows versions.
You can read here to learn about locking pictures to cells in Excel 2010.
Once you have completed the steps below, the picture in the cell will resize with the rest of the cells in its row or column, and will be included if you cut and paste a row or column to a different location in the worksheet.
Here is how to lock a picture to a cell in Excel 2011 –
- Open the worksheet in Excel 2011.
- Locate the picture that you wish to lock to the cell.
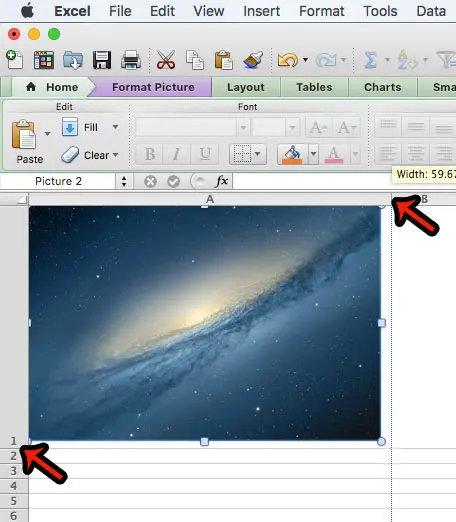
- Resize the row and column so that the picture is contained entirely within the cell.
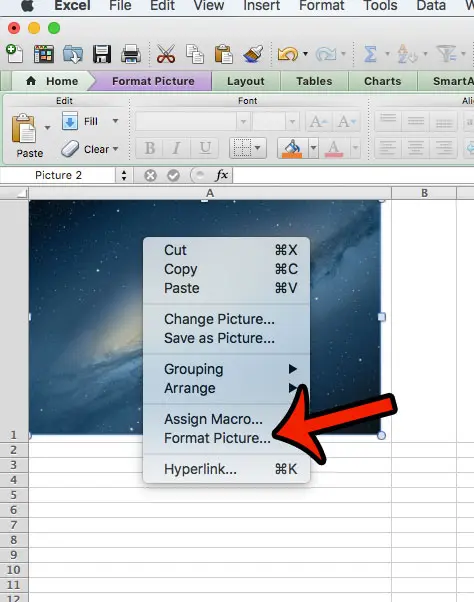
- Right-click the picture, then click the Format Picture option.
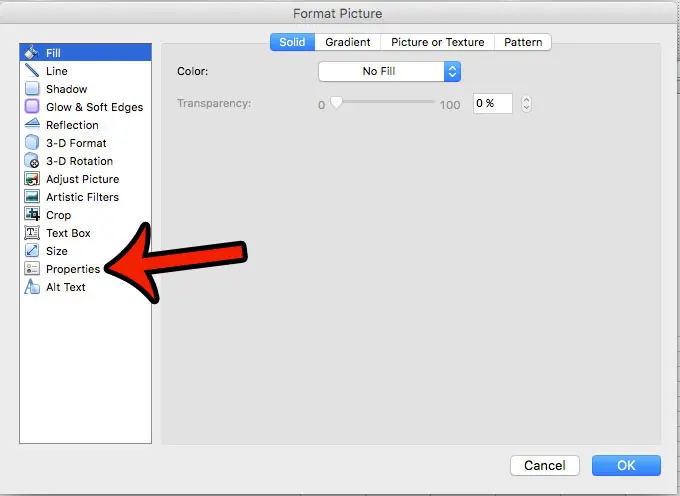
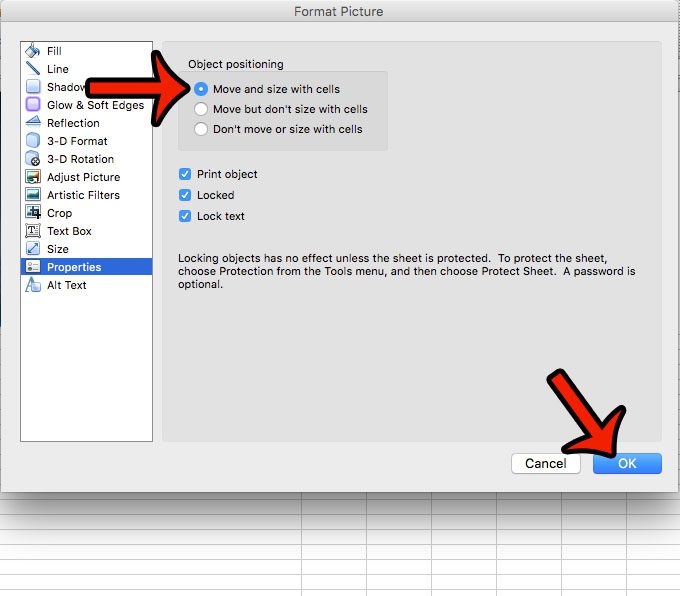
- Click the Properties option in the column at the left side of the window.
- Check the option to the left of Move and size with cells, then click the blue OK button at the bottom of the window.
These steps are also shown below with pictures –
Step 1: Open your worksheet in Excel 2011.
Step 2: Find the picture that you want to lock to a cell.
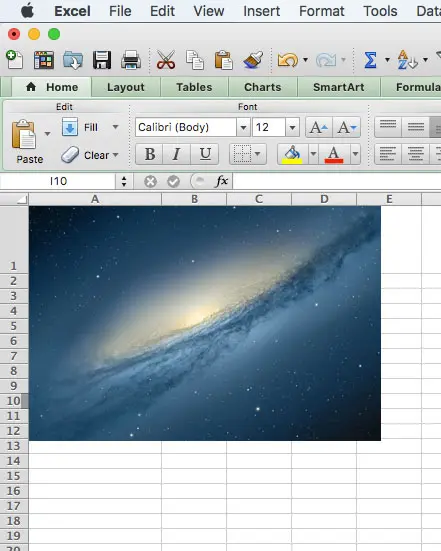
Step 3: Resize the row and column so that the picture is contained entirely within the cell. You can resize a row by clicking and dragging the one of the borders of the row number, and you can resize a column by clicking and dragging one of the borders around the column letter.
Step 4: Right-click the picture, then click the Format Picture option.
Step 5: Click Properties in the column at the left side of the window.
Step 6: Click the circle to the left of Move and size with cells, then click the OK button at the bottom of the window.
Now that you know how to lock a picture to a cell in Excel 2013, you can let that image be resized and moved with the rest of the data in a row or column.
If there is a lot of formatting in a workbook that is making it difficult for you to work, then it might be easiest to simply remove all of that formatting. Learn how to clear all formatting in Excel 2011 and make it simpler to format your worksheet to your liking.

Matthew Burleigh has been writing tech tutorials since 2008. His writing has appeared on dozens of different websites and been read over 50 million times.
After receiving his Bachelor’s and Master’s degrees in Computer Science he spent several years working in IT management for small businesses. However, he now works full time writing content online and creating websites.
His main writing topics include iPhones, Microsoft Office, Google Apps, Android, and Photoshop, but he has also written about many other tech topics as well.