The meeting requests that you receive in Outlook get deleted automatically after you accept the invitation.
But you may have trouble finding events on your calendar, which can leave you looking for those requests.
Our tutorial below will show you how to change a setting in Outlook so that the meeting requests are kept in the inbox even after you accept or deny the invitation.
As an Amazon affiliate, I earn from qualifying purchases.
How to Save Outlook 2013 Meeting Requests
- Open Outlook.
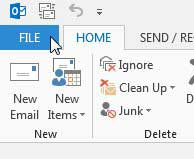
- Click the File tab.
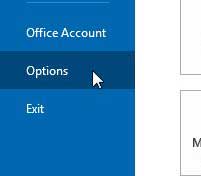
- Choose Options.
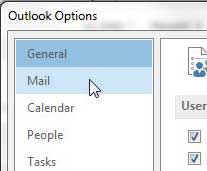
- Select the Mail tab.
- Uncheck Delete meeting requests and notifications from inbox after responding.
- Click OK.
Our guide continues below with additional information on how to stop deleting meeting requests in Outlook 2013, including pictures of these steps.
Meeting requests are a very useful tool in Microsoft Outlook because it bridges the gap between your calendar and your email, which are often two of the most used applications for both office workers and students.
But Microsoft Outlook will typically delete these meeting requests by default which can make it difficult to find them later if you need to know something about the invitees, or the subject, or locate any important information that was included on the request.
Meeting requests that you receive in Outlook provide a simple way to add an event to your calendar.
But if you can’t remember when a meeting is scheduled for, or if you don’t use your Outlook calendar very much, then finding a meeting that was added to your calendar in this way can be difficult.
Unfortunately, Outlook also deletes these meeting requests after you have accepted or rejected them, so it can be tough to find them that way as well. Luckily you can change Outlook 2013’s behavior so that meeting requests are not automatically deleted after you have acted upon them.
Related Topic: Check out our how to add a link to an Outlook signature article for some ideas on how to customize your email signature.

How to Stop Outlook 2013 from Deleting Meeting Requests from your Inbox (Guide with Pictures)
This is a setting that is very much about personal preference and will depend upon the number of meeting requests that you receive via this method.
People that receive a lot of meeting requests and faithfully follow their calendar are more likely to see these requests as junk that should be removed from their inbox, while people that might use a different calendar to manage their schedule or don’t receive a lot of these requests may like having them there.
Whatever your preference, you can follow the steps below to adjust Outlook’s behavior when it comes to handling meeting requests in your inbox.
Step 1: Launch Outlook 2013.
Step 2: Click File at the top-left corner of the window.

Step 3: Click Options at the bottom of the column on the left side of the window.
This is going to open a new Outlook Options window.

Step 4: Click the Mail option in the column at the left side of the Outlook Options window.

Step 5: Scroll down to the Send messages section of the window, then click the box to the left of Delete meeting requests and notifications from Inbox after responding to remove the check mark.

Step 6: Click the OK button at the bottom of the window to apply your changes.
Our article continues below with additional discussion on working with meeting requests in Outlook 2013.
More Information on How to Keep Meeting Requests in the Inbox in Microsoft Outlook 2013
While it can be useful to keep these requests around if you want to be able to reschedule a meeting in Outlook 2013 but need to find information about the initial request, your inbox can become crowded and difficult to navigate if you receive a lot of requests like this.
If you have elected to keep your meeting requests in your inbox so that you have a record of every time that someone chooses to schedule a meeting in Outlook 2013 and includes you, it’s entirely possible that you might change your mind about it later in the future.
If so you simply need to return to File > Options > Mail and check the box that you unchecked in the section above.
If you have an iPhone or an iPad and want to be able to view your screen in your TV, then check out the Apple TV. In addition to the mirroring feature offered by AirPlay, you can also stream from Netflix, iTunes, Hulu Plus and more.
Learn how to change the send and receive frequency in Outlook 2013 if you would like Outlook to check your email server for new messages more often than it currently is doing.

Matthew Burleigh has been writing tech tutorials since 2008. His writing has appeared on dozens of different websites and been read over 50 million times.
After receiving his Bachelor’s and Master’s degrees in Computer Science he spent several years working in IT management for small businesses. However, he now works full time writing content online and creating websites.
His main writing topics include iPhones, Microsoft Office, Google Apps, Android, and Photoshop, but he has also written about many other tech topics as well.