The Weather app on your iPhone is a useful way to see what the current conditions are outside, as well as get a glimpse of the predictions for the next few days. You can even add more cities if you are going to be traveling and would like to know how things are in the future location.
One new addition to the iPhone’s weather app is a system of notifications that can let you know when rain or snow is going to be stopping and starting at your location. These notifications can give you a chance to prepare yourself appropriately for the impending precipitation.
But if you have only seen other people get these notifications, or if you are already receiving them and want them to stop, then you may be wondering how to change these notifications settings.
Our guide below will show you where to find the notification settings for upcoming rain and snow for the Weather app on your iPhone.
How to Turn On or Turn Off Precipitation Notifications in the Weather App on iPhone
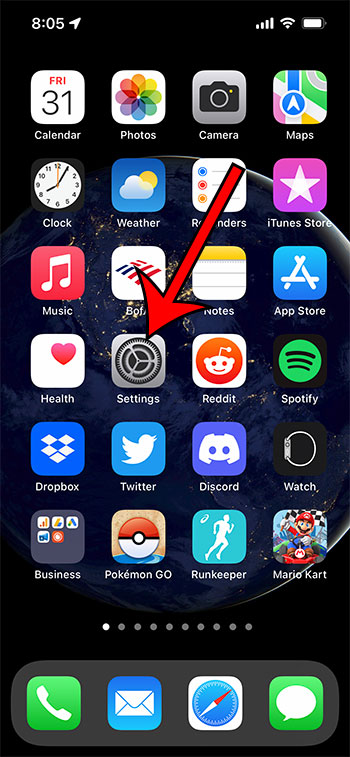
- Open Settings.
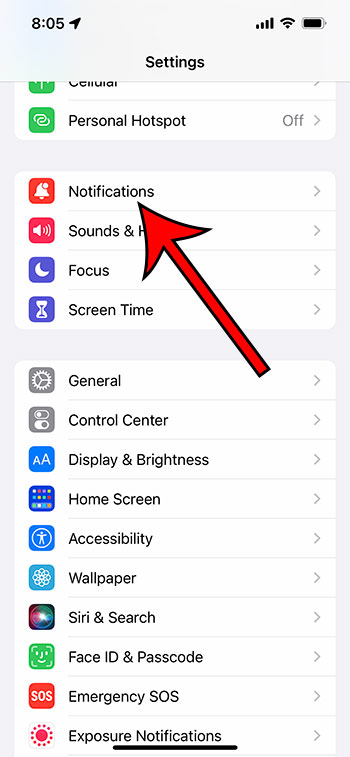
- Select Notifications.
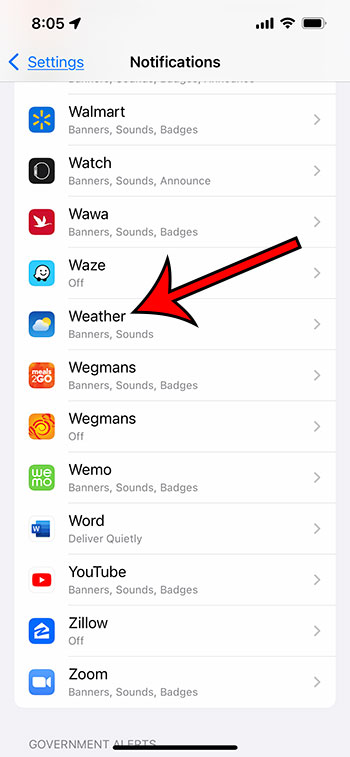
- Choose Weather.
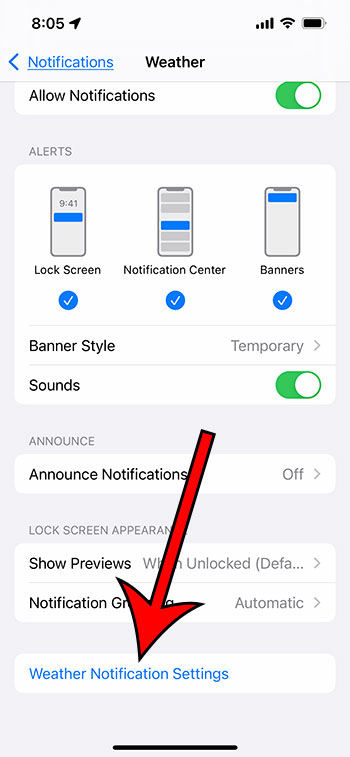
- Touch Weather Notification Settings.
- Turn the settings on or off, then tap Done.
Our guide continues below with additional information on enabling or disabling the rain and snow notifications on an iPhone, including pictures of these steps.
Do you use Photoshop for image editing? Our guide on how to resize a layer in Photoshop can show you a quick way to adjust the size of your image layers.
How to Change the Rain and Snow Notifications on an iPhone (Guide with Pictures)
The steps in this article were performed on an iPhone 13 in iOS 15.0.2. Note that these notifications were not available in earlier versions of iOS, so you may not see them depending on the iOS version that is installed on your device.
Step 1: Open the Settings app.
Step 2: Select the Notifications option.
Step 3: Scroll down and touch the Weather option.
Note that the apps are listed in alphabetical order.
Step 4: Scroll to the bottom of the screen and select the Weather Notification Settings option.
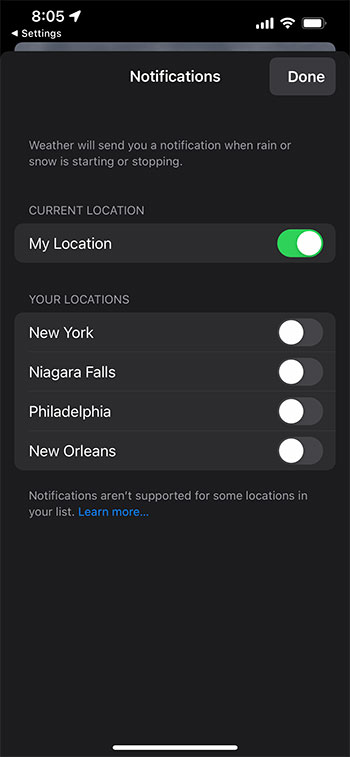
Step 5: Tap the button next to each option that you would like to enable or disable.
A notification is turned on when there is green shading around the button. I have the “My Location” notification turned on in the picture below.
Step 6: Tap the Done button at the top right corner of the screen when you are finished.
You can continue reading our tutorial below for additional discussion on turning the rain and snow notifications on or off on your iPhone.
Alternate Method for Changing the iPhone Rain and Snow Notifications
The steps above show you how to adjust this setting through the Settings app on your iPhone.
However, there is another way that you can get to these settings which might be a little easier to remember.
- Open the Weather app.
- Tap the button with three horizontal lines at the bottom-right corner of the screen.
- Touch the button with three dots at the top-right of the screen.
- Choose Notifications.
- Enable or disable the desired setitngs, then tap Done.
Ultimately both of these methods will take you to the same menu. You can use whichever one seems more natural to you when you decide that you want to either start or stop receiving these types of notifications.
More Information on How to Enable or Disable Rain and Snow Notifications in the iPhone Weather App
If you want to use these notifications but don’t see them then you may need to update your iPhone. You can do this by going to Settings > About > Software Update > then downloading and installing any available updates. Note that you need to have a few GB of available space to perform an iOS update.
If you would like to adjust the style of notifications that the Weather app uses then you can do so by going to Settings > Notifications > Weather. Here you will find options to adjust the notification style, whether or not the app can use badge app icons (the red circle with the white number that appears on some apps), you can turn sounds on or off, and more.
If you would like to add another city to your weather app then you can open the Weather app, touch the button with three horizontal lines at the bottom right of the screen, then search for a city and tap the Add button at the top-right corner of the screen.
As you add more cities you will be able to decide whether or not you want to receive notifications about upcoming rain or snow there, even if you aren’t physically located there.

Matthew Burleigh has been writing tech tutorials since 2008. His writing has appeared on dozens of different websites and been read over 50 million times.
After receiving his Bachelor’s and Master’s degrees in Computer Science he spent several years working in IT management for small businesses. However, he now works full time writing content online and creating websites.
His main writing topics include iPhones, Microsoft Office, Google Apps, Android, and Photoshop, but he has also written about many other tech topics as well.
