A lot of the changes that app updates include are meant to improve the way the app performs. Often these are not very noticeable to the app users. One recent update to Pokemon Go added an option that lets you enable the native refresh rate. Depending on your device, this can be a pretty nice change to make.
Many of the apps and games you use on your iPhone have refresh rates that the developer sets to a certain level. Lower levels are often used because they can save battery life. Depending on the app it might not even be noticeable that the refresh rate isn’t as high as it could be.
In Pokemon Go when you enable the native refresh rate the change will occur immediately. If your device can benefit from an increased refresh rate then you should notice that the game runs much more smoothly and that the transitions and animations look a lot better.
Our guide below will show you where to find and enable the native refresh rate in Pokemon Go so that you can start using it when you play the game.
How to Increase the Refresh Rate for Pokemon Go
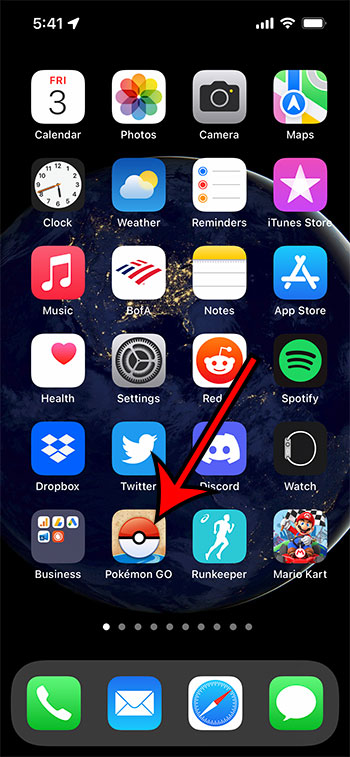
- Open Pokemon Go.
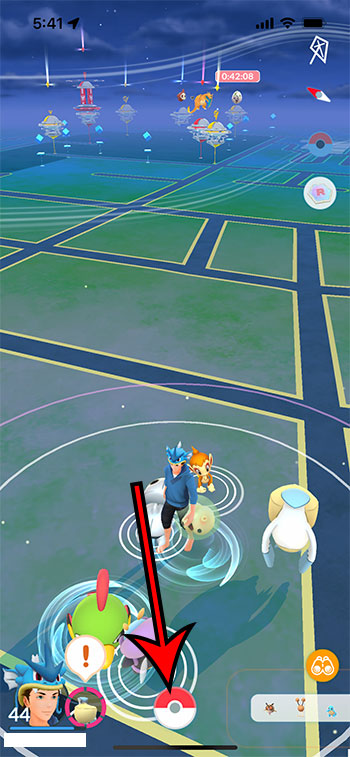
- Touch the Pokeball icon.
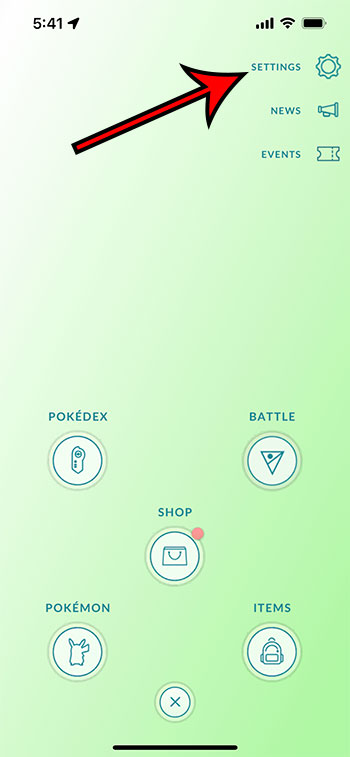
- Select Settings.
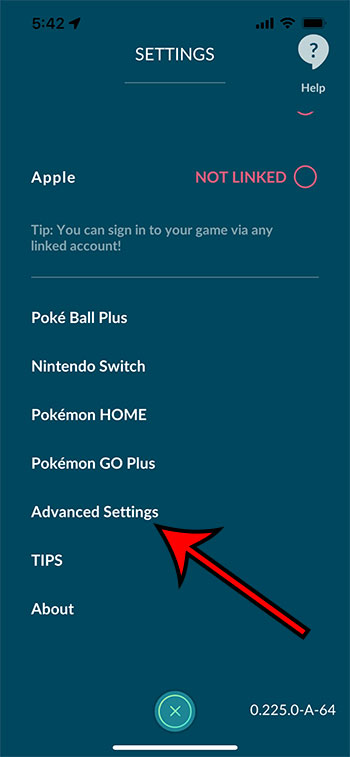
- Scroll down and choose Advanced Settings.
- Tap the button to the right of Native Refresh Rate.
Our guide continues below with more information on enabling the native refresh rate in Pokemon Go on an iPhone, including pictures of these steps.
How to Turn on Pokemon Go’s Native Refresh Rate Option (Guide with Pictures)
The steps in this article were performed on an iPhone 13 in iOS 15.0.2. I am using the 0.225.0-A-64 version of the Pokemon Go app.
If you don’t see the setting in the final step below then you probably need to install the latest version of the game. You can do this by searching for the app in the App Store, then tap the Update button next to it.
Step 1: Open the Pokemon Go app on your iPhone.
Step 2: Touch the Pokeball icon at the bottom of the screen.
Step 3: Touch the Settings button at the top-right corner of the screen.
Step 4: Scroll all the way to the bottom of the menu and select the Advanced Settings option.
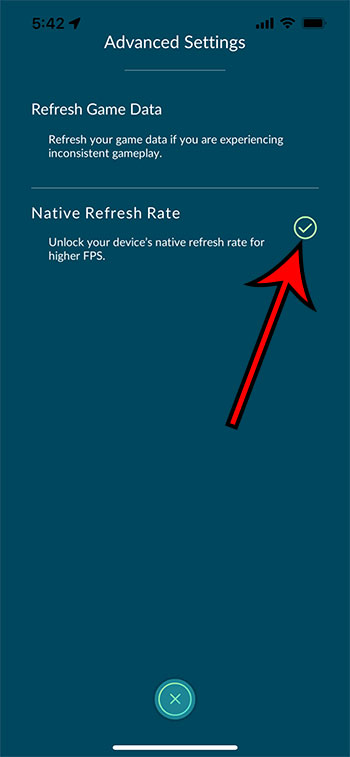
Step 5: Tap the button to the right of Native Refresh Rate to turn it on.
I have enabled the native refresh rate in the picture below.
You can then exit this menu and perform some actions in the game to see if the change is noticeable. If your iPhone is able to take advantage of this feature then everything should feel a lot smoother.
I was skeptical of how much of an improvement this would be, but it feels to me like the game looks and runs much smoother after enabling the native refresh rate. I like it a lot and will continue to play with this option turned on.
More Information on How to Enable Native Refresh Rate in Pokemon Go on an iPhone
As indicated on the menu when you enable this option, the Native refresh Rate setting will “Unlock your device’s native refresh rate for higher FPS.” The “FPS” part of that means frames per second, which will vary depending on the iPhone model you are using. Some of the higher end newer iPhone models like the iPhone 13 pro and iPhone 13 Pro Max are capable of 120 FPS, while other newer models can run at 60 FPS.
It’s possible that your device might seem to run a little choppy if you enable this setting. If so then you will need to turn it off to make the game more playable.
Turning on the native refresh rate option can cause your iPhone to use a lot more battery when you are playing the game, as it requires more power to push a higher frame rate in the game.

Matthew Burleigh has been writing tech tutorials since 2008. His writing has appeared on dozens of different websites and been read over 50 million times.
After receiving his Bachelor’s and Master’s degrees in Computer Science he spent several years working in IT management for small businesses. However, he now works full time writing content online and creating websites.
His main writing topics include iPhones, Microsoft Office, Google Apps, Android, and Photoshop, but he has also written about many other tech topics as well.
