Google Slides has some options that can make it easier to format your content.
One of these settings will let you have vertical or horizontal lines on your slides so that you can more easily position your slide objects.
How to Insert a Vertical Guide in Google Slides
- Open your slideshow.
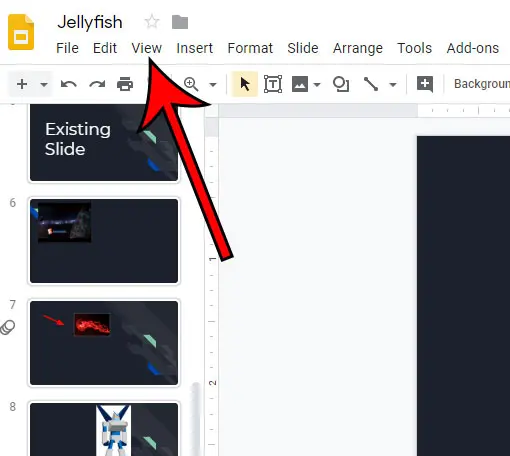
- Select the View tab.
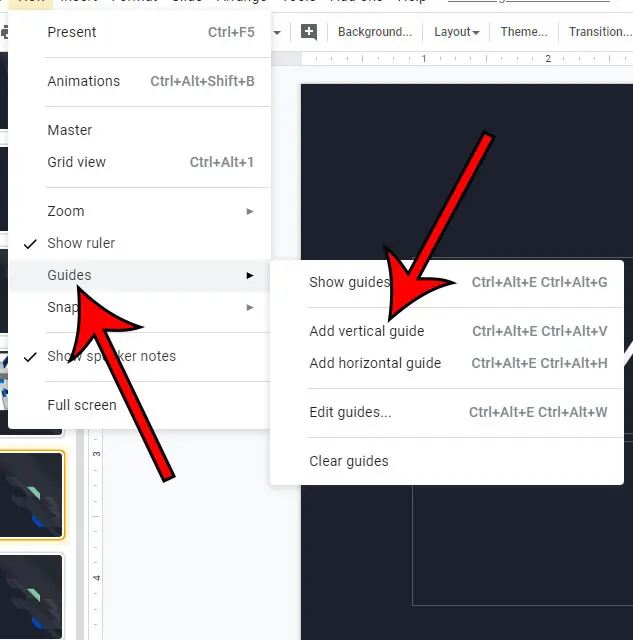
- Choose Guides, then Add Vertical Guide.
Our tutorial continues below with additional information on adding vertical guides to Google Slides, including pictures of these steps. We also discuss how to make a line straight in Google Slides with the line tool and the Shift key.
Many of the objects that you may want to place into a slide in Google Slides, such as a text box or an image, are probably not going to be the same size as the slide itself. This can lead to deleting objects from the slide as you attempt to make everything look the way that you imagined.
But adjusting the alignment in a document can be tricky, so it’s helpful to take advantage of some tools that help you position elements. Therefore, you may wish to put that object at the center of the slide so that it looks good.
While Google Slides offers the ability for you to center some of your objects, you might prefer to do it yourself, or have an object slightly off-center.
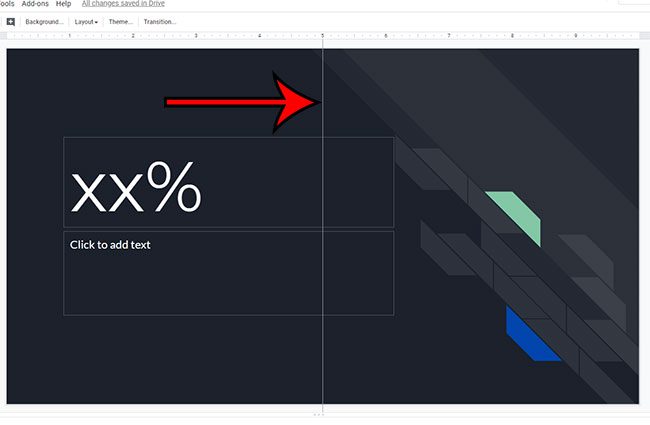
One way that you can accomplish this is by adding a vertical guide that runs down the middle of the slide. This guide won’t show up when you are presenting your slideshow or when you print it, but it can come in handy when you are editing the slides.
Read our article on how to circle something in Google Slides if you want to highlight something in one of your slides.
How to Show the Vertical Guide in Google Slides (guide with Pictures)
The steps in this article were performed in the desktop version of the Google Chrome Web browser, but will work in other modern desktop browsers as well.
Step 1: Sign into your Google Drive at https://drive.google.com and open a Slides file.
Step 2: Click the View tab at the top of the window.

Step 3: Choose the Guides option, then click Add vertical guide.

You should now see a vertical line running down the center of the slide, as shown in the picture below.

If you have added the vertical guide to your slideshow then you might now be wondering how to make a line straight in Google Slides as well.
How to Make a Line Straight in Google Slides
You might have already discovered how to draw lines in Google Slides, but you could be having difficulty making the line straight. This is a bit easier with the vertical guide that we added in the section above, as you can use it to draw your line, then simply drag the line to the desired place on the slide.
However, there is also a trick with the Shift key that lets you draw straight lines as well.
- Open your slideshow.
- Choose the slide where you want the line.
- Click the Line tool button above the slide, then choose the Line option.
- Click and hold your mouse button down where you want to start the line.
- Hold the Shift key on your keyboard.
- Drag the line until it’s either horizontal or vertical, then drag it to the desired length.
- Let go of the mouse button and the Shift key to create the straight line.
Do you have a chart or graph in your slideshow that you would like to share by itself? Find out how to download a graph or chart as a picture in Google Slides so that you can email it, share it, or add it to another file.

Matthew Burleigh has been writing tech tutorials since 2008. His writing has appeared on dozens of different websites and been read over 50 million times.
After receiving his Bachelor’s and Master’s degrees in Computer Science he spent several years working in IT management for small businesses. However, he now works full time writing content online and creating websites.
His main writing topics include iPhones, Microsoft Office, Google Apps, Android, and Photoshop, but he has also written about many other tech topics as well.