Excel workbooks with multiple worksheets are a great way to coordinate data that might not necessarily belong on the same worksheet, but that is relevant enough to a single topic that it merits combination.
Typically you can navigate between different worksheets within a workbook by clicking the tabs at the bottom of the window.
But these tabs can be hidden in a couple of different ways, and it is possible that every tab in the workbook is hidden, even the tab for the worksheet on which you are currently working.
Our guide below will show you both how to unhide all of the worksheet tabs if they are hidden that way, plus it will show you how to unhide worksheets that have been hidden on an individual level.
Here is how to show your Excel 2013 tabs if they are all hidden –
- Open Excel 2013.
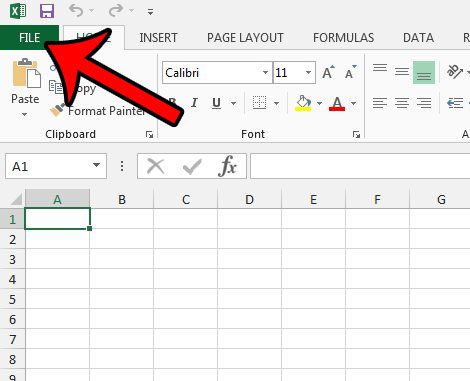
- Click the File tab.
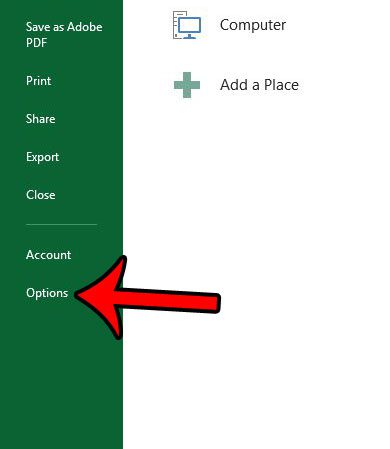
- Click Options at the bottom of the left column.
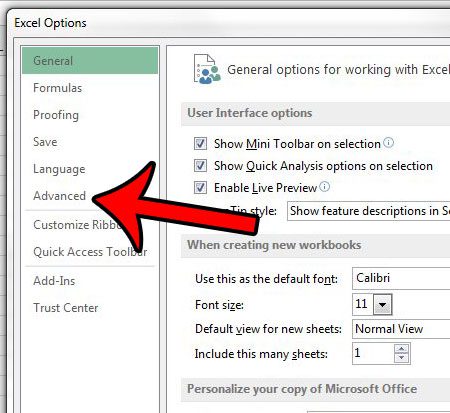
- Click Advanced on the Excel Options window.
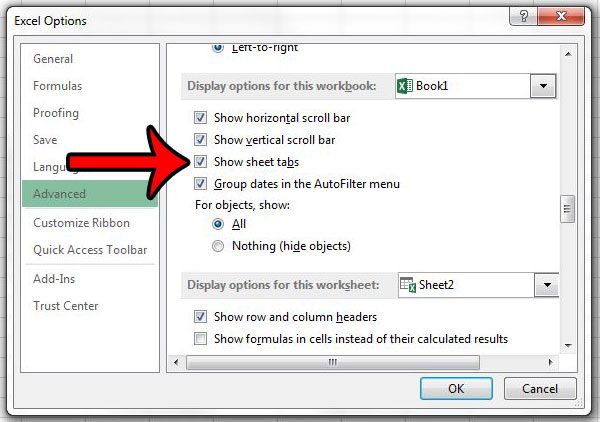
- Check the box to the left of Show sheet tabs in the Display options for this workbook section of the menu.
- Click the OK button.
These steps are repeated below –
Step 1: Open your workbook in Excel 2013.
Step 2: Click the File tab at the top-left corner of the window.
Step 3: Click Options at the bottom of the column on the left side of the window.
Step 4: Click the Advanced tab in the left column of the Excel Options window.
Step 5: Scroll down to the Display options for this workbook section, then check the box to the left of Show sheet tabs.
Step 6: Click the OK button at the bottom of the Excel Options window to apply your changes.
Here is how to show your Excel 2013 when only some of them are missing –
- Open your workbook in Excel 2013.
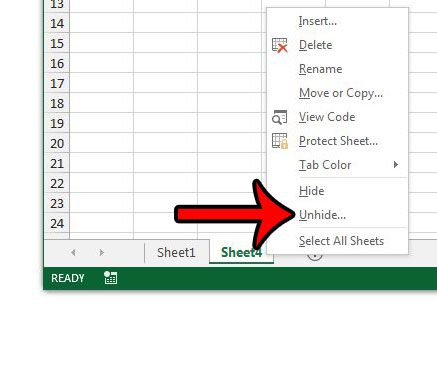
- Right-click a worksheet tab at the bottom of the window, then click the Unhide option.
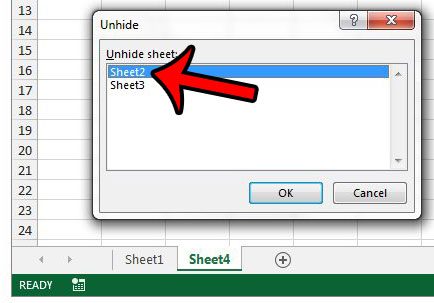
- Click a worksheet that you want to unhide, then click the OK button.
- Repeat steps 2 and 3 for each additional worksheet that you want to unhide.
These steps are also repeated below with pictures –
Step 1: Open your workbook in Excel 2013.
Step 2: Locate the worksheet tabs at the bottom of the window, right-click one of them, then select the Unhide option from this shortcut menu.
Step 3: Click a worksheet that you want to unhide, then click the OK button.
Step 4: Repeat steps 2 and 3 for each additional worksheet that you want to unhide.
Now that you know how to show missing worksheet tabs in Excel 2013, you will be able to find, view, and edit information on a tab that you couldn’t see previously.
While this second method for unhiding individually missing worksheet tabs is fine when you only have a couple, it is very tedious when there are a lot of hidden tabs. Click here to find a helpful macro that will quickly unhide all of the hidden worksheets in an Excel 2013 workbook.

Matthew Burleigh has been writing tech tutorials since 2008. His writing has appeared on dozens of different websites and been read over 50 million times.
After receiving his Bachelor’s and Master’s degrees in Computer Science he spent several years working in IT management for small businesses. However, he now works full time writing content online and creating websites.
His main writing topics include iPhones, Microsoft Office, Google Apps, Android, and Photoshop, but he has also written about many other tech topics as well.