Correct orientation on pictures has long been a problem for anyone using a camera, and it’s a problem that is still present on mobile device cameras.
Because of this issue, you may find pictures on your camera roll that do not have the correct orientation and need to be rotated.
You might think that this requires you to export the picture from your iPad, but there are actually some basic image editing tools on your iPad that allow you to make adjustments like this.
So if you want to rotate a picture directly from your iPad, you can follow the tutorial below.
As an Amazon affiliate, I earn from qualifying purchases.
Check out this portable hard drive with cloud backups if you are looking for a simple, affordable way to create backups of your important files.
Rotating a Picture in iOS 7 on Your iPad
This article is specifically going to focus on rotating pictures on the iPad, but you will notice that there are some other tools available to you as well. So if you find that you need to make additional adjustments to other pictures, remember that you have these options available on the device.
Step 1: Open the Photos app.

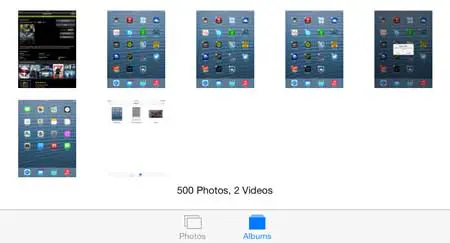
Step 2: Select either the Albums or the Photos option at the bottom of the screen, depending upon how you want to find the image that needs to be rotated.

Step 3: Open the album containing the picture, if you chose to search by album.

Step 4: Touch the thumbnail image of the picture that you want to rotate.

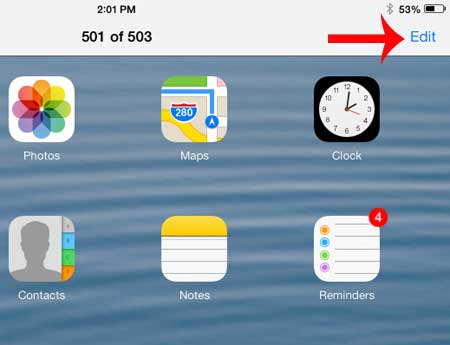
Step 5: Touch the Edit button at the top-right corner of the screen.

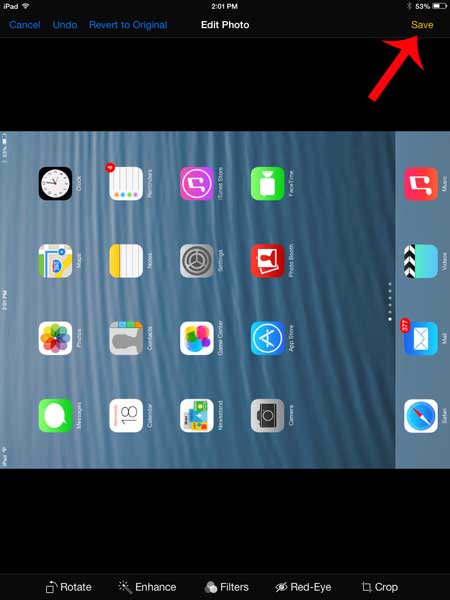
Step 6: Touch the Rotate button at the bottom-left corner of the screen. You might need to touch it more than once, depending upon how much you need to rotate the image.

Step 7: Touch the Save button at the top-right corner of the screen once you are happy with the rotated image. You will also note that there are some Undo options at the top-left of the screen if you don’t want to save the rotated image.

If you’re looking to buy another tablet but don’t want to spend the money for another iPad, then check out the Kindle Fire. It’s a fast, easy-to-use tablet that is much more friendly on your budget.
Now that you know how to rotate a picture on the iPhone, you can easily fix images that are facing the wrong direction.
You can take pictures of your iPad screen if you want to share something on your screen that you can’t otherwise save. Read this article to learn how to take an iPad screenshot.

Matthew Burleigh has been writing tech tutorials since 2008. His writing has appeared on dozens of different websites and been read over 50 million times.
After receiving his Bachelor’s and Master’s degrees in Computer Science he spent several years working in IT management for small businesses. However, he now works full time writing content online and creating websites.
His main writing topics include iPhones, Microsoft Office, Google Apps, Android, and Photoshop, but he has also written about many other tech topics as well.