Making a spreadsheet print properly can be difficult. As the file grows larger and the data uses more pages, readers might have trouble remembering what information belongs to which row. One way to improve this is to set a column to repeat the left side of each page in Excel.
No matter what you use Microsoft Excel for, there’s a strong possibility that you will need to print something from it at some point. This is often a tricky proposition, however, as the default spreadsheet settings in Excel typically won’t result in a great printed document. This is especially true for multi-page documents.
One way that you can simplify these printed spreadsheets, however, is by configuring the spreadsheet to print a specific column on every page. For spreadsheets that are oriented with headings in the first column, this is a very important function. It will make the rest of your pages easier to read because your readers will be able to see which row heading is applying to the columns that they are seeing on each successive page.
Our article below will show you where to locate the Page Setup menu, which provides a way for you to define both a column that you want to repeat at the left side of the page, as well as a row that you want to repeat at the top of every page.
How to Repeat a Column on the Left Side of Every Printed Page in Excel 2010
- Open the worksheet.
- Select Page Layout.
- Click Print Titles.
- Click in Columns to repeat at left.
- Choose the column to repeat.
- Click OK.
Our guide continues below with additional information on repeating a column at the right side of the page in Excel 2010, including pictures of these steps.
How to Repeat Columns in Excel 2010 (Guide with Pictures)
This is a similar process to one we have previously written about printing a row on every page in Excel 2010. The main difference being that printing a column on every page is ideal when your spreadsheet extends far to the right, while printing a row on every page is better suited for spreadsheets that extend far down.
Step 1: Open the spreadsheet in Excel 2010.
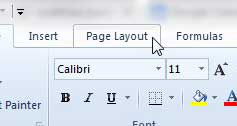
Step 2: Click the Page Layout tab at the top of the window.
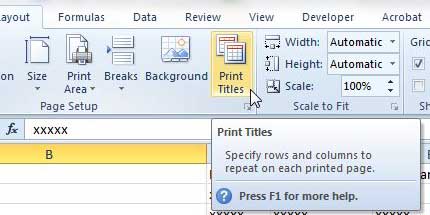
Step 3: Click the Print Titles button in the Page Setup section of the ribbon at the top of the window.
This Page Setup group contains a number of useful other settings, too, like breaks, print area, paper size, and more.
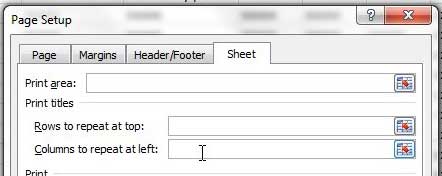
Step 4: Click inside the Columns to repeat at left box.
Note that the “Sheet” tab is selected here automatically because you clicked the Print Titles button to open this menu. You can click another tab in the Page Setup menu, such as “Page,” “Margins,” or “Header/Footer” to see some more ways to modify the printed pages other than repeating rows at the top and columns at the left.
Step 5: Click the letter at the top of the column that you want to repeat on each page.
For example, in the image below, I am selecting column A.
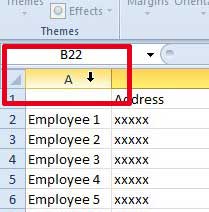
Step 6: This will populate the Columns to repeat at left field, so you can click the OK button at the bottom of the window.
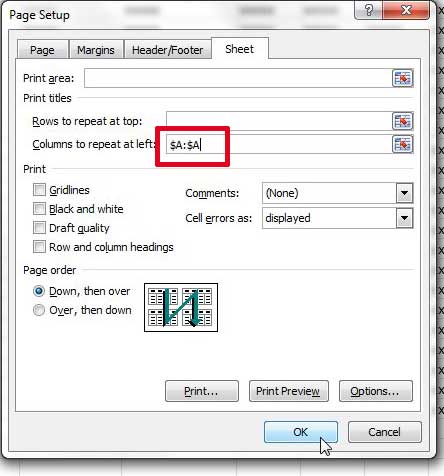
Alternatively, you could select the Print Preview button if you would like to open that screen and see how your spreadsheet will look with the changes you specified.
You can now go ahead and finish setting up your spreadsheet as needed, then the spreadsheet will print out with your selected column repeated on each page.
More Information on How to Set Columns to Repeat at Left – Excel 2010
Our tutorial above discusses repeating one column at the left side of the spreadsheet, but you can also use these steps to repeat multiple columns. You can click and drag to select multiple columns, or you can enter the values in the field yourself. In our image above the phrase $A:$A repeats the first column, while $A:$B would repeat the first two columns.
At the start of this article we mentioned that you could use similar steps if you have rows to repeat at the top of each page. When you open the Page Setup dialog box, as we did by clicking “Page Titles” in step 3 above, there is a “Rows to repeat at top” box. If you click inside that field you can then click the row numbers to repeat on each page.
It’s useful to become familiar with checking and referencing the row and column headings in your spreadsheet. It makes it easier to communicate with other people when you are talking about specific cells, rows, or columns, plus it will make it easier in the future when you need to print row headings at the top of every printed page, or print columns on every page.
If you do a lot of printing from multiple printers, then a wireless laser printer can be very helpful. Brother makes a wireless laser printer that is very affordable and has great reviews. Learn more here.
You can also learn how to adjust your print settings to fit all of your columns on one page in Excel 2010.
Additional Sources

Matthew Burleigh has been writing tech tutorials since 2008. His writing has appeared on dozens of different websites and been read over 50 million times.
After receiving his Bachelor’s and Master’s degrees in Computer Science he spent several years working in IT management for small businesses. However, he now works full time writing content online and creating websites.
His main writing topics include iPhones, Microsoft Office, Google Apps, Android, and Photoshop, but he has also written about many other tech topics as well.