The Music app on your iPad can be set to display either just the songs that you have downloaded or every song that you own in iCloud.
Some people might like to be able to see everything that they own, while others like to carefully manage their downloaded music library.
Our tutorial below will show you how to remove music in the cloud from the iPad 2 in iOS 7 so that only the songs downloaded ot the device are displayed in the Music library.
As an Amazon affiliate, I earn from qualifying purchases.
How to Stop Showing All Music on Your iPad
- Open Settings.
- Choose Music.
- Turn off Show All Music.
Our guide continues below with additional information on how to remove music in the cloud from the iPad 2 in iOS 7, including pictures of these steps.
The default setting for music on your iPad 2 after updating to iOS 7 will display all of your songs.
This includes a combination of songs that you have intentionally downloaded to the device, as well as the songs that you have purchased through iTunes but haven’t yet downloaded.
This is a great way to have access to all of your music without downloading every song that you own and needlessly taking up a lot of your limited storage space.
Unfortunately, however, your iPad will cycle through these songs when it is on shuffle, and they will all be displayed when you are scrolling through your library.
If you have purposely not downloaded a lot of your music because you don’t want to listen to it right now, then this can be a problem.
Fortunately, you can configure your iPad 2 so that it is not displaying music in the cloud. Instead, it only displays the songs that you have downloaded and transferred to the iPad.
The Roku is an excellent gift for anyone that likes to watch streaming movies or TV shows but doesn’t have an easy way to do so on their TV. Find out what the Roku can do here and see why it’s going to be a really hot gift this holiday season.
How to Only Show Downloaded Songs in iOS 7 on the iPad 2 (Guide with Pictures)
This is a setting that you can turn on and off at will, so if you decide later that you want to download a song to your device, you can simply turn the setting back on and download a desired song to your iPad.
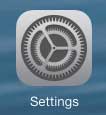
Step 1: Touch the Settings icon.

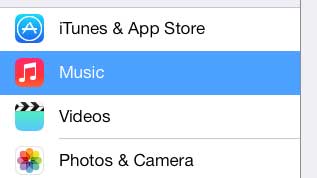
Step 2: Scroll to the bottom of the column on the left side of the screen, then touch the Music option.

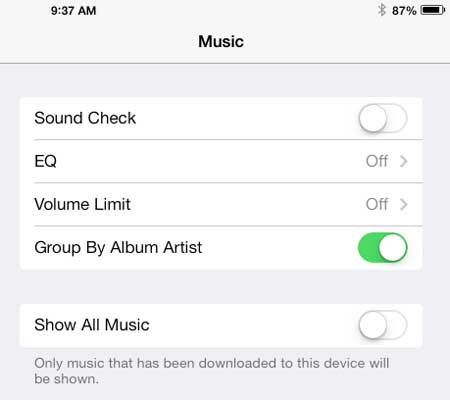
Step 3: Move the slider to the right of Show All Music from the right to the left.
When the setting is turned off there will not be any green shading around the button.

Now that you know how to remove music in the cloud from the iPad 2 in iOS 7, you will be able to toggle your library display so that you can see just the files that are downloaded on the iPad.
The Apple TV provides a simple way to stream videos and music from your iPad to your TV. It also makes it easy to stream content from iTunes, Netflix, Hulu Plus, and more. Learn more about the Apple TV here if you’ve been looking for an affordable way to do any of these things.
We have also written about how to stop showing music in the cloud on the iPhone 5 as well.

Matthew Burleigh has been writing tech tutorials since 2008. His writing has appeared on dozens of different websites and been read over 50 million times.
After receiving his Bachelor’s and Master’s degrees in Computer Science he spent several years working in IT management for small businesses. However, he now works full time writing content online and creating websites.
His main writing topics include iPhones, Microsoft Office, Google Apps, Android, and Photoshop, but he has also written about many other tech topics as well.