To return an Amazon purchase, open Your Orders, find the item, choose its return option, select the reason and refund or replacement offered, then choose a return method. Follow the resulting instructions: some returns use a printed shipping label, while eligible drop-offs use a QR code without an extra shipping box.
This guide covers Amazon.com purchases in the United States. Your item, seller, location and reason determine the available choices. A store that accepts some Amazon returns is not automatically the right destination for yours.
Check the Item Before Starting
Use the account and shopping country that placed the order. Have the complete item and its accessories ready, and check its return eligibility in your order history. Amazon’s current US return policy generally allows 30 days from delivery, with exceptions. For example, new Apple-brand products have a shorter 15-day window. The eligibility shown for your purchase matters more than a general deadline.
Before handing over a phone, computer or other device, save anything you need and remove personal information using the manufacturer’s instructions. Check that the item and accessories in the package match the return. Do not mix products from separate orders or shipments in one box.
Start the Return in Your Orders
- Open Amazon.com or the Amazon Shopping app and sign in to the account used for the purchase. Open Your Orders; on the desktop website, Returns & Orders is a useful entry point.
- Find the purchase. Check the order date and item details so you do not select a similar product from another order.
- Select the item’s return control, such as Return or replace items or Return Items. If several products appear, select the one you actually want to send back.
- Choose the accurate return reason and supply any requested explanation. A damaged product, wrong item and unwanted purchase are different reasons.
- Review how the return will be processed. Choose the offered refund or replacement option that fits your request. Check the refund destination; an Amazon balance credit and a refund to your payment card are different outcomes.
- Select a return method from the choices shown. Review its fee, location, packaging requirements and deadline before confirming.
- Finish the prompts and keep the confirmation. You should receive instructions for that particular return, including a label or code when applicable.
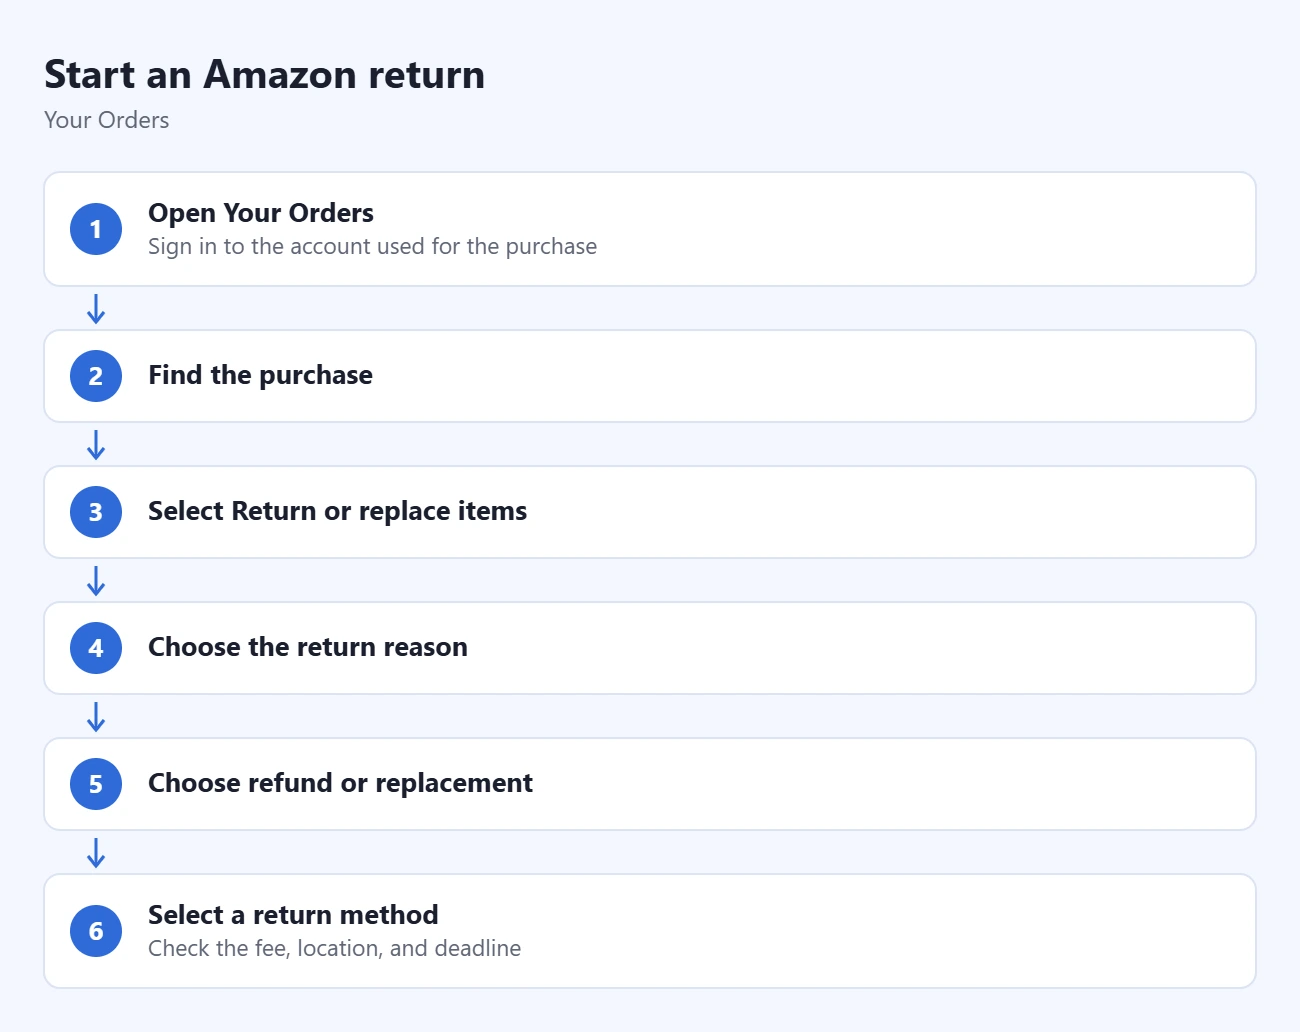
Amazon documents these stages in Return Items You Ordered. If a third-party seller must approve the request, follow that process and wait for its instructions instead of shipping to an Amazon warehouse yourself.
Use the Method You Selected
Label-Free, Box-Free Drop-Off
When your confirmation specifically offers this method, bring the item and the supplied QR code to the selected participating location. A QR code is a square code scanned to identify the return. Keep the manufacturer’s packaging and accessories required for the item; box-free means you do not need an additional shipping box.
Amazon’s Whole Foods return guide shows how an eligible drop-off works and confirms that location options depend on the product and your location. Keep the code accessible in the app or confirmation email before leaving home. Follow the counter or kiosk instructions when you arrive.
Return with a Printed Shipping Label
Print the documents provided for your selected method. Put any required authorization slip inside, pack the item securely and attach the shipping label outside as instructed. Use the carrier or drop-off named in the confirmation. Our Amazon return-label printing guide explains the printing checks and what to do when you only received a QR code.
Retain the drop-off receipt or tracking details. A return request means the process has started; it does not establish that the item has reached its destination.
If the Return Option Is Missing
- The order is not listed: check the account, shopping country and order date before trying another support route.
- The item is outside its window or non-returnable: review its eligibility and contact Amazon about a damaged, defective or incorrect delivery. Do not assume that a general tutorial overrides an item restriction.
- A seller is handling it: follow the seller’s approved method. Amazon’s third-party seller return instructions explain the separate process and assistance options.
- The listed drop-off is inconvenient: review the other options offered before choosing one. Availability and fees can vary; you cannot simply use a different store with the same code.
For unresolved problems, use the official support route described in our Amazon customer-service chat guide. Have the order and return reference ready.
Track the Return and Refund
Open Your Returns or use Return/Refund Status in the confirmation email. Amazon’s tracking instructions distinguish a requested return from an issued refund. Carrier tracking can help you check a prepaid-label shipment.
Refund timing varies. Amazon says receiving and processing a return can take up to 30 days, sometimes longer; the payment provider can need additional time after a refund is issued. Check the status and the timeframe for your order before following up.
Common Questions
Do I Need a Printer?
Only if your selected method requires printed documents. An eligible QR-code drop-off can avoid printing, but that choice must appear for your return. Review the methods before confirming.
Are All Returns Free?
No. Review the fee shown for your method and the item’s conditions. Shipping, late, damage or restocking fees can apply under the current policy. An early refund also does not cancel an instruction to send the item back.
What if It Was a Gift?
Use Amazon’s gift-return instructions. The recipient route uses a 17-digit order number from the packing slip or digital gift receipt. If it is missing, ask the giver for the receipt or contact support.
Before leaving for a drop-off, check the exact item, code or label, chosen location and return-by date together. Keep your confirmation and receipt until the refund is resolved.

Matthew Burleigh is the founder, head writer, and editor of Solve Your Tech, which he launched in 2012. He has written technology tutorials since 2008 and worked in IT since 2003, including small-business support, IT management, and consulting. He holds Bachelor’s and Master’s degrees in Computer Science from Arizona State University.
Matthew writes practical guides for Windows, iPhone and iPad, Microsoft Office, Outlook, Google apps, and Android. Solve Your Tech’s guides are tested on current devices or checked against official product documentation, with clear steps, sources, and update dates.
Read more about Matthew and how Solve Your Tech writes and updates its guides, or report a correction.