To convert a transparent Photoshop PSD to a PNG, choose File > Export > Quick Export as PNG, pick a folder if asked, and click Save. PNG keeps transparent areas transparent, which makes it a good format for logos and graphics on websites. Use File > Export > Export As when you want to check the transparency setting or pick a size first.
The steps follow Adobe’s Photoshop help pages on Quick Export as, Export As, and supported image file formats, plus Adobe’s PSD to PNG article.
Before You Export: Check the Background Layer
The most common reason a “transparent” PNG comes out with a white box is a locked, opaque Background layer at the bottom of the Layers panel. Delete it, or unlock it and then delete it, and make sure the canvas shows the gray-and-white checkerboard that means transparency.
How to Quick Export a Transparent PSD as a PNG
- Open the PSD in Photoshop and hide or delete the background layer so transparent areas show as a checkerboard.
- Choose File > Export > Quick Export as PNG.
- Choose a destination folder if Photoshop asks where to save.
- Enter a file name and click Save.
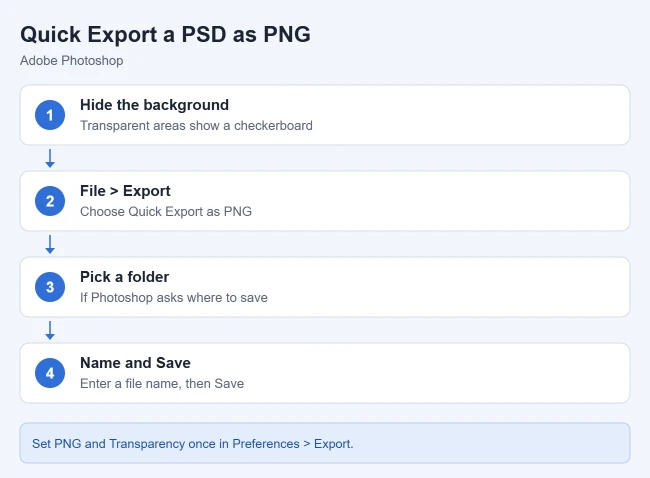
Result: Photoshop saves the image as a PNG file. Adobe says Quick Export applies your saved settings, so each export comes out the same way. To export only certain layers, select them in the Layers panel, right-click, and choose Quick Export as PNG.
How to Make Sure Quick Export Keeps Transparency
Adobe calls this a one-time setup:
- Choose Edit > Preferences > Export (Windows) or Photoshop > Preferences > Export (Mac).
- Set Quick Export Format to PNG.
- Choose Transparency rather than Smaller File (8-bit).
- Pick a Quick Export Location: ask each time, or export to an assets folder next to the document.
- Decide whether to convert to sRGB, then select OK.
Result: From now on, Quick Export as PNG saves transparent PNGs to the location you chose.
How to Use Export As for More Control
Adobe’s Export As page describes this route, which lets you check settings before saving:
- Choose File > Export > Export As.
- Choose PNG from the Format menu.
- Allow transparency for the PNG.
- Set a size. You can add more sizes with suffixes such as @2x.
- Select Export.
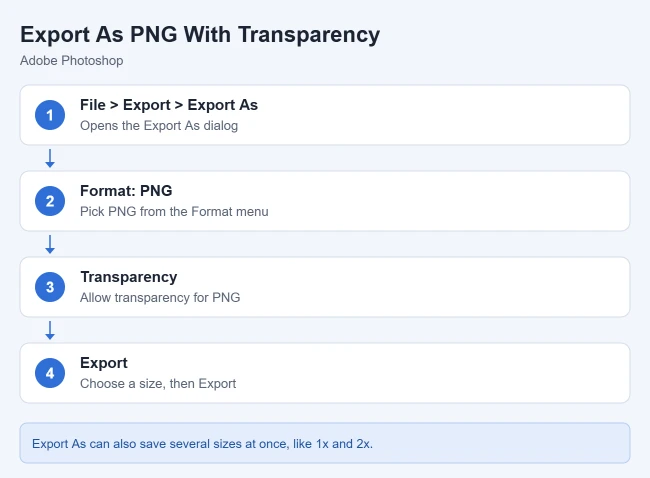
Result: Photoshop saves each chosen layer, group, or artboard as its own PNG at the sizes you picked. Adobe’s PSD to PNG article also describes saving with File > Save As and choosing PNG, with an interlace option that shows a low-resolution preview while the image downloads but makes the file larger.
Why PNG and Not JPG?
Adobe says PNG uses lossless compression, is made for web display, and preserves transparency in grayscale and RGB images. JPEG doesn’t support transparency at all, and it fills transparent pixels with white. Keep the original PSD too: A PNG is one flat image, so your layers aren’t saved in it.
How to Convert a PSD to PNG Without Photoshop
There are two free options. Photopea opens PSD files in your web browser and can export them as PNG with File > Export as > PNG. GIMP is a free desktop app that opens PSDs and exports PNGs with File > Export As. Command-line tools such as ImageMagick can convert many files at once.
Frequently Asked Questions
Why does my transparent PNG have a white background?
Usually the Background layer was still visible or got flattened into the image. Delete or hide it, then check that Transparency is selected in your export settings, not Smaller File (8-bit).
Can I export each layer as its own PNG?
Yes. Adobe says you can select layers, right-click, and choose Quick Export as PNG, or use Export As to save each layer, group, or artboard separately. See how to export each layer as a separate image.
More Photoshop Guides
- How to change Photoshop preferences
- How to remove text from a picture in Photoshop
- How to add a pattern in Photoshop
Before exporting product shots, you can brighten them quickly. See how to create a good product picture quickly.

Matthew Burleigh has been writing tech tutorials since 2008. His writing has appeared on dozens of different websites and been read hundreds of millions of times.
After receiving his Bachelor’s and Master’s degrees in Computer Science he spent several years working in IT management for small businesses. However, he now works full time writing content online and creating websites.
His main writing topics include iPhones, Microsoft Office, Google Apps, Android, and Photoshop, but he has also written about many other tech topics as well.