The clock on your Windows 7 computer can be adjusted in a couple of different ways. One of those available adjustments includes the option to specify the format of the clock, which means that it is possible to have a Windows 7 24 hour clock.
Whether your job, background, or geographic location has led you to prefer using the 24-hour clock format over the 12-hour format that Windows uses by default, it is possible to change this setting if you desire. So continue below to see how you can start using a 24-hour clock on your Windows 7 computer.
How to Enable the Windows 7 24 Hour Clock
This setting can be adjusted at any time. If you find that it is not as helpful as you had hoped, or if you were simply testing out a clock format change, you can always follow these steps again in the future if you would like to return to the default 12 hour clock format.
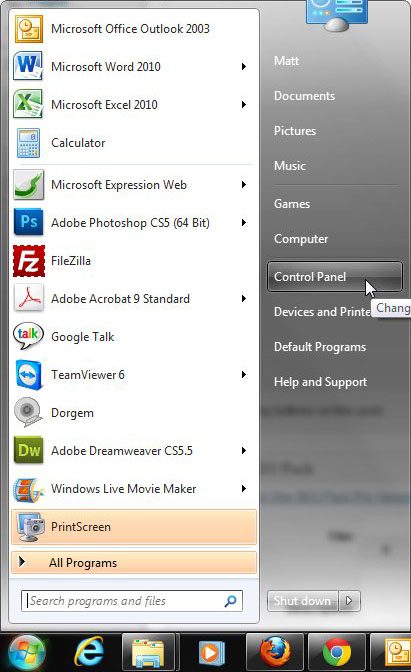
Step 1: Click the “Windows” button at the bottom-left corner of your screen, then click “Control Panel” at the right side of the menu.
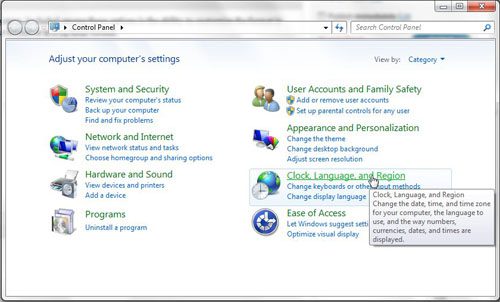
Step 2: Click the green “Clock, Language and Region” link.
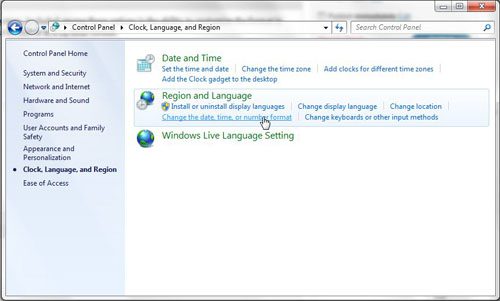
Step 3: Click the blue “Change date, time or number format” link under “Region and Language.
Step 4: Click the drop-down menu to the right of “Short Time,” then click the “HH:mm” option.
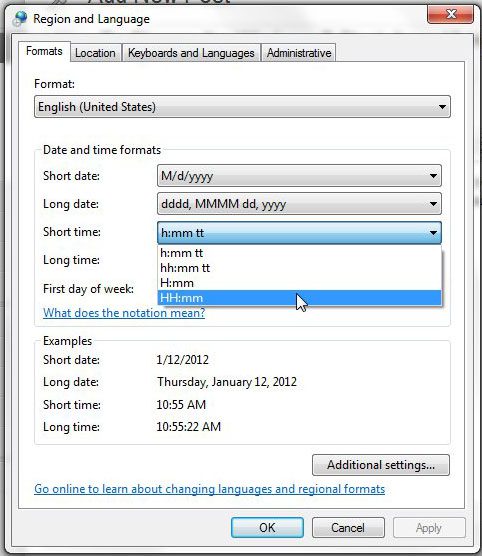
Step 5: Click the drop-down menu to the right of “Long Time,” then click the “HH:mm:ss” option.
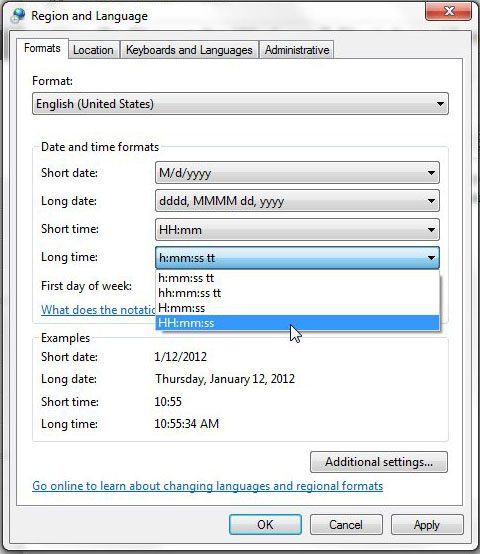
Step 6: Click the “Apply” button at the bottom of the window, then click the “OK” button.
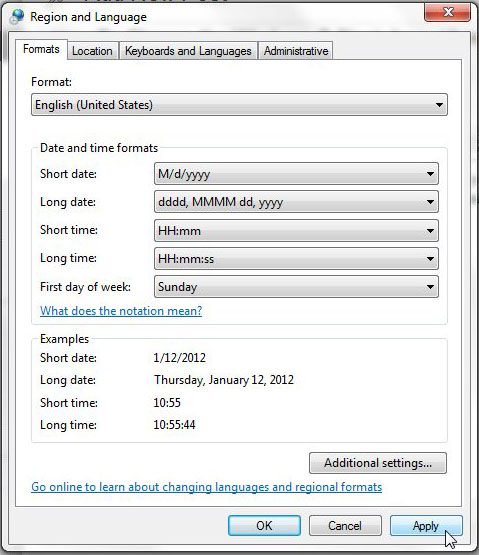
Now that you know how to change the Windows 7 clock from a 12-hour to a 24-hour version, you can use this setting to make sure that you are viewing your clock in the format you prefer.
Summary – How to use a 24 hour clock in Windows 7
- Click the Start button.
- Click Control Panel.
- Click Clock, Language and Region.
- Click the Change date, time or number format link.
- Click the Short Time dropdown menu, then click the HH:mm option.
- Click the Long Time dropdown menu, then click the HH:mm:ss option.
- Click the Apply button, then click OK.
Would you like to open a specific folder when you click the folder icon in your taskbar? Learn how to change the default Windows Explorer folder in Windows 7 and select any other folder location on your computer.

Matthew Burleigh has been writing tech tutorials since 2008. His writing has appeared on dozens of different websites and been read over 50 million times.
After receiving his Bachelor’s and Master’s degrees in Computer Science he spent several years working in IT management for small businesses. However, he now works full time writing content online and creating websites.
His main writing topics include iPhones, Microsoft Office, Google Apps, Android, and Photoshop, but he has also written about many other tech topics as well.