Excel has a lot of formatting options that you can modify to change the look of your data.
But there are a good number of options for changing how the spreadsheet prints, too.
If you’ve been adjusting these options to try and make your sheet fit better on the printed page, then our guide on how to fit a spreadsheet on one page in Excel can show you a quick way to accomplish that.
How to Make an Excel Worksheet Fit to a Single Page
- Open the spreadsheet.
- Click the File tab.
- Select the Print option.
- Choose the No Scaling button.
- Click Fit Sheet on One Page.
Our guide continues below with additional information on how to fit a spreadsheet to one page in Excel, including pictures of these steps.
Working with a large spreadsheet in Microsoft Excel 2010 can be a bit of a challenge when you are not able to view the entire spreadsheet on your monitor at one time. However, trying to fit a spreadsheet on one page in Microsoft Excel 2010 when you are printing can be even more frustrating.
If you print with regularity in Excel, then you have probably seen the multi-page print jobs where the last few pages contain a single column or two, and maybe you have even attempted to tape these pages together to try and present them in a cohesive fashion. This approach can be tedious, and it results in an unprofessional appearance. Fortunately you can adjust your print settings to fit your spreadsheet on one page.
You might also need to know how to expand all rows in Excel if you have a lot of data that is hidden behind other cells.
How to Fit Sheet on One Page in Excel 2010 (Guide with Pictures)
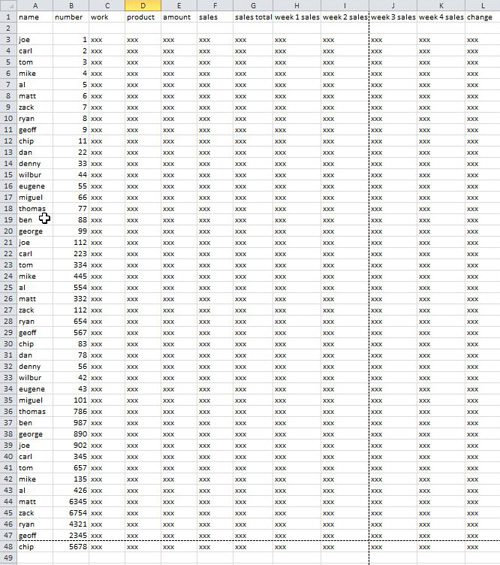
A spreadsheet that you are trying to fit on one page will probably look like the image below. Something that is just slightly too big to fit on a single sheet of paper, but that will still be readable if you can scale it down a little bit.
That is an important element of scaling your Excel spreadsheets for printing – you are going to be reducing the size of your data, so it is important that the resulting printout is still readable.
If you have an extraordinary amount of data in your spreadsheet, fitting it on one page might just not be realistic.
Looking for an easy way to combine data from multiple columns? Find out about the concatenate Excel formula and see if it can improve your experience with your spreadsheets.
Note that I have had to zoom out a bit using the Zoom tool on the View tab so that I can display all of the data. At regular size this spreadsheet would actually print out on four pages, which is unnecessary and hurts the presentation of the data.
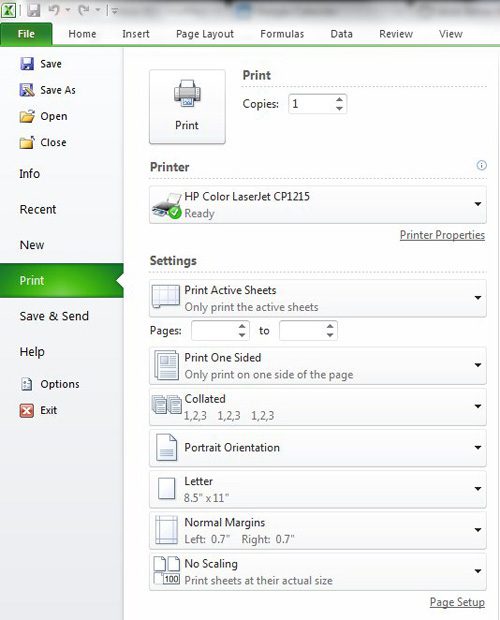
To adjust the print settings for a spreadsheet like this and fit it on one page, you need to click the File tab at the top left corner of the window, then click Print in the left column. You could also press Ctrl + P on your keyboard to bring up this print screen.
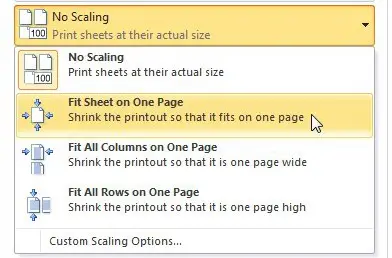
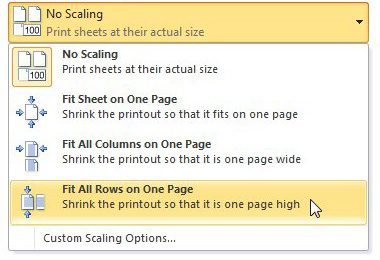
Click the No Scaling drop-down menu at the bottom of the window, then click the Fit Sheet on One Page option. This will change the Print Preview section at the right side of the window to display how your data will look once you have elected to fit the spreadsheet on one page.
If you are happy with how your spreadsheet looks, you can click the Print button at the top of the window to print out the spreadsheet. However, if you have too much data or want to find another option for adjusting your Excel printing, there are some additional options available to you.
Related: Microsoft Excel Create Table Guide
Other Options for Scaling Spreadsheet for Printing
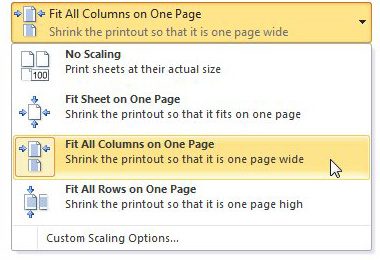
If your spreadsheet is only overflowing by a few columns, but you have hundreds and hundreds of rows, then fitting all of that data on one page is not practical. Therefore, you can try the Fit all columns on one page option that comes up when you click the No Scaling drop-down menu on the Print page. This will force all of the columns to one page, but will not do any additional page shrinking to accommodate the rows.
On the other side of the coin, if you have just a few too many rows, but far too many columns, you can use the Fit all rows on one page option on the No Scaling drop-down menu.
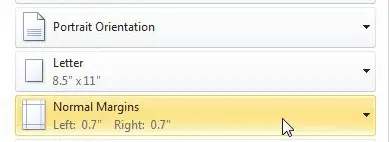
The last couple of items to consider adjusting when you are trying to customize your Excel printing are also located on the Excel print menu. Click the Orientation drop-down menu to choose between Portrait or Landscape, or click the Margins drop-down menu to reduce the size of the margins. Using a combination of orientation and margin adjustments can provide a considerable amount of aid in getting all of your Excel data into a more print-ready format.
Now that you know how to fit a spreadsheet on one page in Excel you will be able to quickly adjust the layout of your spreadsheets in the future so that you don’t need to waste a lot of time on print settings.
Additional Sources

Matthew Burleigh has been writing tech tutorials since 2008. His writing has appeared on dozens of different websites and been read over 50 million times.
After receiving his Bachelor’s and Master’s degrees in Computer Science he spent several years working in IT management for small businesses. However, he now works full time writing content online and creating websites.
His main writing topics include iPhones, Microsoft Office, Google Apps, Android, and Photoshop, but he has also written about many other tech topics as well.
