An Excel spreadsheet is a convenient way to organize and store data. The grid structure makes it easy to locate a specific bit of data so that you can use it in whatever way you need.
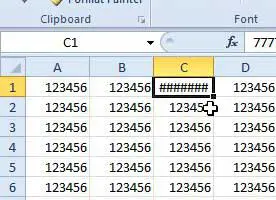
But occasionally the value in a cell might be replaced by a series of ###### symbols and you can’t see the numbers that should be there.
This might at first be troubling, but it is a perfectly normal behavior for Excel 2010 and it is something that you can fix easily.
This is happening because there is more information in the cell than can be displayed with the cell’s current width.
This issue can be resolved by expanding the width of the cell so that it is wide enough to display all of the numbers. So continue reading below to learn how to get rid of those symbols on your spreadsheet and show the numbers instead.
Excel can make it difficult to read data when the cells aren’t big enough to show everything. Our article on how to expand all rows in Excel can show you a quick way to fix that.
Show Numbers Instead of ###### In Excel 2010
We are going to explain how to automatically expand a column width in the tutorial below, which will remove the ###### symbols from your Excel spreadsheet.
However, this method is only going to work for one column at a time. You will need to repeat this process for each column that contains the symbols that you want to replace.
Step 1: Open the spreadsheet in Excel 2010.
Step 2: Locate the ###### symbols that you want to replace with your numerical values.

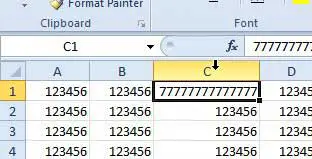
Step 3: Position your cursor on the right border of the column heading at the top of the sheet. Your cursor should be replaced by the symbol in the image below.

Step 4: Double-click your mouse to expand the column. The cell that previously contained the ###### symbols will now display the correct cell value.

Do you have columns in your Excel spreadsheet that you aren’t using, but you don’t want to delete? Learn how to hide columns in Excel 2010 so that they aren’t taking up space on your screen.
If you are having trouble adjusting your columns so that you can see all the data, then our how to autofit all columns in Excel article can show you how to fix it.

Matthew Burleigh has been writing tech tutorials since 2008. His writing has appeared on dozens of different websites and been read over 50 million times.
After receiving his Bachelor’s and Master’s degrees in Computer Science he spent several years working in IT management for small businesses. However, he now works full time writing content online and creating websites.
His main writing topics include iPhones, Microsoft Office, Google Apps, Android, and Photoshop, but he has also written about many other tech topics as well.