The steps in this article are going to show you how to embed an existing Microsoft Excel spreadsheet into a document in Microsoft Word 2016.
- Open your Word document.
- Click at the point in the document where you want the Excel file to appear.
- Click the Insert tab at the top of the window.
- Select Object in the Text section of the ribbon, then choose Object again.
- Select the Create from File tab.
- Click the Browse button.
- Find the Excel file, select it, then click OK.
- Click OK to insert the file into your document.
While Microsoft Word is often thought of as a text editor, it is much more than that. Word users are able to add pictures and videos, perform a lot of formatting and generally customize their documents in a variety of ways.
One way that you can achieve this customization is by including a Microsoft Excel spreadsheet directly within the document itself. This will display the contents of that spreadsheet in the document so that document readers can view the data in that file if it’s important to the document.
Our guide below will show you how to insert an Excel file as an object so that it appears within your Microsoft Word document.
Need to go the opposite way? Our convert Word table to Excel guide can help you to do it.
How to Insert Excel Into Word
The steps in this article were performed in Microsoft Word for Office 365, but will also work in other versions of Word such as Word 2016 or Word 2019. Note that this guide assumes you already have an Excel file that you wish to insert into Word.
Step 1: Open the Word document into which you wish to add the Excel file.
Step 2: Click at the point inside the document where you want to add the Excel file.
Step 3: Click Insert at the top of the window.
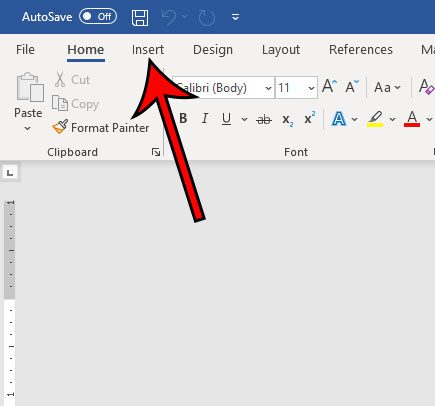
Step 4: Select the Object button in the Text section of the ribbon, then choose Object from the dropdown menu.
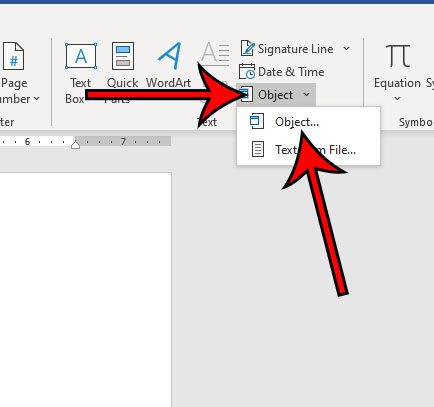
Step 5: Select the Create from File tab at the top of the window.
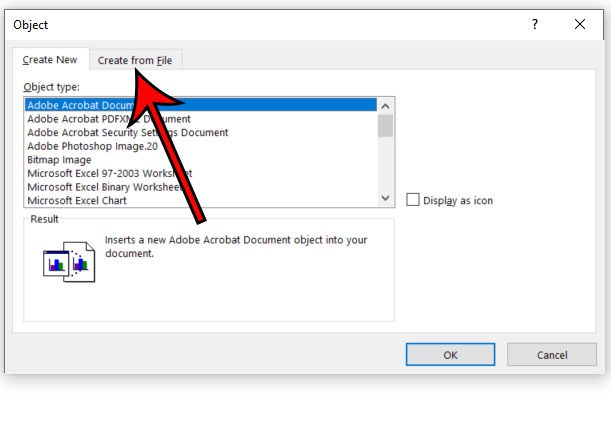
Step 6: Click the Browse button.
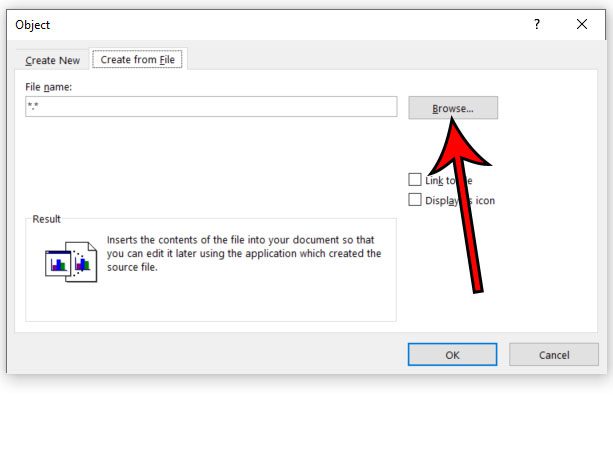
Step 6: Browse to the Excel file, select it, then click OK.
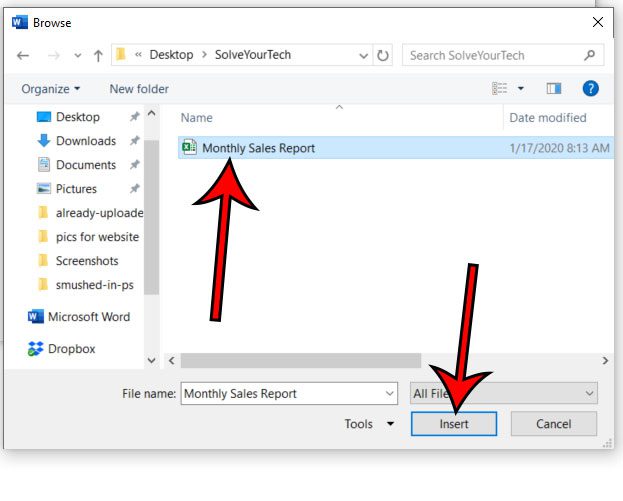
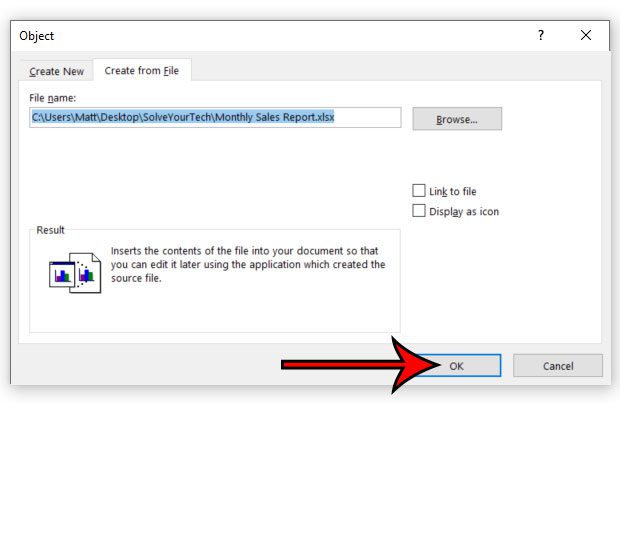
Step 7: Click OK at the bottom of the window to insert the file.
If you wish to make any changes to the data in the Excel file you can right-click the Excel object in the document, choose Worksheet Object, then click Edit.
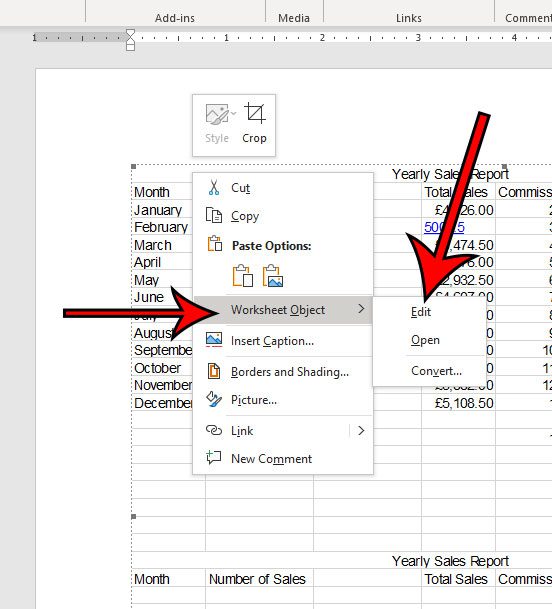
This opens the Excel file in Excel. Any changes you make to the file in Excel will cause the object in Word to update. Be sure to save the Excel file after making any changes.
Find out how to clear formatting in Word if you need to make a lot of formatting changes to your document and would rather not make each of those changes individually.

Matthew Burleigh has been writing tech tutorials since 2008. His writing has appeared on dozens of different websites and been read over 50 million times.
After receiving his Bachelor’s and Master’s degrees in Computer Science he spent several years working in IT management for small businesses. However, he now works full time writing content online and creating websites.
His main writing topics include iPhones, Microsoft Office, Google Apps, Android, and Photoshop, but he has also written about many other tech topics as well.