Correctly formatted data is very important when you are trying to get information into a database or if you are working with a formula in your Excel spreadsheet.
So if you encounter a column of data in a spreadsheet that contains information that you might need to be divided into two columns, the prospect of manually copying and pasting data into those two columns might seem overwhelming.
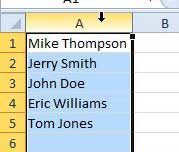
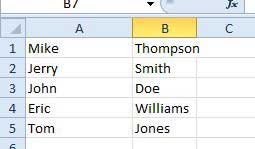
For example, if you have a column that contains full names, but you need that column split into first and last names.
Luckily you can learn how to split data in one column into two columns in Excel 2010, allowing you to quickly reformat your data.
Turn One Column of Data into Two with Excel 2010
While some people that create spreadsheets might think that they are simplifying the process by putting a lot of data into one column, that is usually not the case.
Information in spreadsheets is much simpler to manage, especially in large quantities, when you have your data as segmented as possible.
This provides more options for sorting and organizing data, plus it will make it easier for your database manager to use that data in their tables if necessary.
Continue reading to learn how to split single-column data into multiple columns in Excel 2010.
Step 1: Open the spreadsheet containing the column of data that you watn to split.
Step 2: Click the column heading at the top of the spreadsheet so that the column with the data to be split is highlighted.
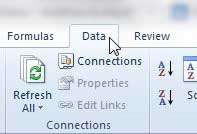
Step 3: Click the Data tab at the top of the window.
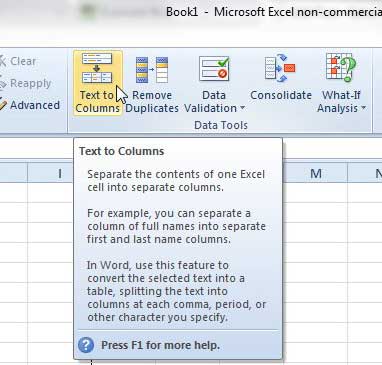
Step 4: Click the Text to Columns button in the Data Tools section of the ribbon at the top of the window.
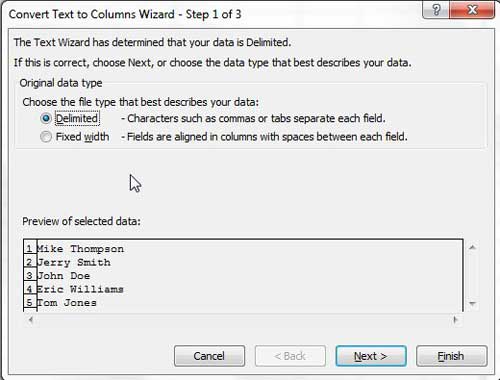
Step 5: Click the Delimited option if there is something separating the data that you want to split, like an empty space, or click the Fixed width option if you want to split the data at a set number of characters. Click the Next button to continue.
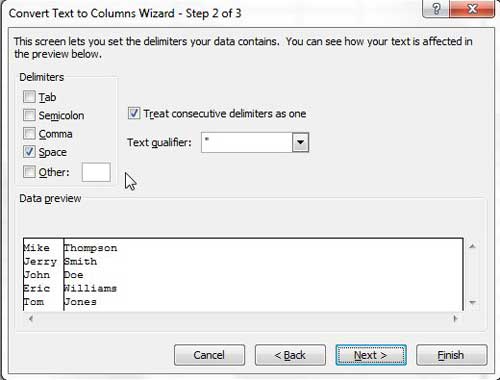
Step 6: Choose the character that you want to set as the split, then click the Next button. If you are using the Fixed width option, click the point where you want the split to occur.
Step 6: Choose the data format for each of the columns, then click the Finish button to split your column.
If your data did not split correctly, you can press Ctrl + Z on your keyboard to undo the split, then repeat the steps to make any necessary adjustments.
Now that you know how to split data from one column to two columns in Exccel 2010, you can save yourself a lot of manual editing if you had attempted to do this another way in the past.

Matthew Burleigh has been writing tech tutorials since 2008. His writing has appeared on dozens of different websites and been read over 50 million times.
After receiving his Bachelor’s and Master’s degrees in Computer Science he spent several years working in IT management for small businesses. However, he now works full time writing content online and creating websites.
His main writing topics include iPhones, Microsoft Office, Google Apps, Android, and Photoshop, but he has also written about many other tech topics as well.
