I love using OneNote to save all kinds of information.
Much of it isn’t particularly important or sensitive, but there are some things that I wouldn’t want a stranger to be able to see.
Our tutorial below will show you how to password protect a notebook section in OneNote 2013 so that it can’t be viewed easily by other people.
How to Put a Password on a OneNote Notebook
- Open OneNote.
- Select the notebook.
- Right-click the notebook section, then choose Password protect this section.
- Click Set Password.
- Enter a password, confirm it, then click OK.
Our guide continues below with additional information on how to password protect a notebook section in OneNote 2013, including pictures of these steps.
OneNote is a really convenient way to store your ideas and thoughts. It has many tools for organizing all of the notebooks, pages, emails, and web clippings that you might need later, and you can even leverage your free SkyDrive storage to make your notes accessible from different computers.
Accessing these notes through a Web browser will require you to know your Microsoft Account email address and password, but your notebooks can be viewed in the OneNote program on your computer by anyone that has access to it.
If you are storing sensitive information in one of the notebook sections that you are worried about someone seeing, it is a good idea to add some password protection.
How to Add Password Protection to a Notebook Section in OneNote 2013
Note that this password protection will apply to your notebook section wherever you access it.
So even when you open OneNote in a Web browser with your Microsoft Account password, you will still need the password for the protected notebook section to view the content.
Step 1: Launch OneNote 2013.
Step 2: Select your notebook from the drop-down menu at the top of the window.
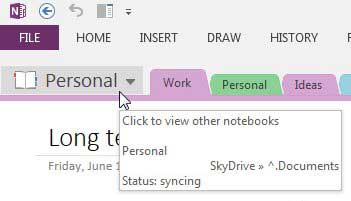
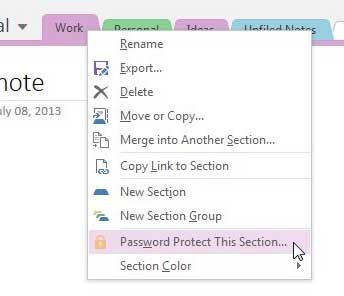
Step 3: Right-click the section tab to which you want to add password protection, then select the Password protect this section option.
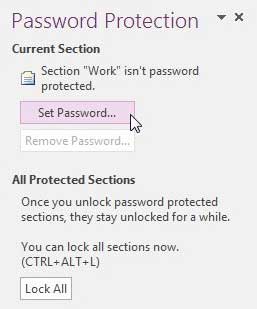
Step 4: Click the Set Password option at the right side of the window.
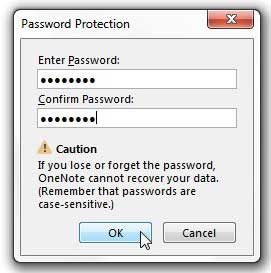
Step 5: Type your password into the Enter Password field, re-type it into the Confirm Password field, then click the OK button.
OneNote will then ask you how you want it to handle your existing backups that have a copy of the notebook section without password protection, so select the option that you prefer.
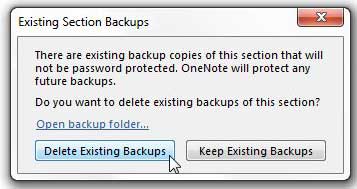
If you choose to delete the existing backups, you can always manually create a backup to ensure that the data is not lost. You can also manually lock your password-protected notebook sections at any time by pressing Ctrl + Alt + L on your keyboard.
Now that you know how to password protect a notebook section in OneNote 2013 you can use this method to secure the more important and sensitive information that you might be storing in the application.
If you have a lot of important data on your computer that you can’t afford to lose, then it’s a good idea to have a backup plan. Since a good backup plan requires you to store your backups on a different computer or hard drive, external hard drives are usually the most affordable options. Click here to check out some of the external hard drive options available on Amazon.

Matthew Burleigh has been writing tech tutorials since 2008. His writing has appeared on dozens of different websites and been read over 50 million times.
After receiving his Bachelor’s and Master’s degrees in Computer Science he spent several years working in IT management for small businesses. However, he now works full time writing content online and creating websites.
His main writing topics include iPhones, Microsoft Office, Google Apps, Android, and Photoshop, but he has also written about many other tech topics as well.