This post contains affiliate links. We may earn a commission from qualifying purchases, at no extra cost to you.
As you explore your iPhone and change your settings, you will occasionally encounter a setting or an option with which you aren’t familiar.
This could be something where the setting itself isn’t very descriptive, or maybe a little ambiguous, but you might also find options that include terms you don’t know.
One such setting can be found on the Settings > General menu, and is called VPN. A VPN is a virtual private network, and allows you to connect to the Internet through an encrypted tunnel. This serves the purpose of hiding your IP address, as well as making it more difficult for a third party to view the data that you send over the Internet.
There are many companies that provide VPN services (nordVPN is a popular one. You can find out more about them here), and typically require a monthly or yearly subscription. You can also set up a VPN on your home network, or your workplace may have a VPN that they might require you to use if you are using your phone for work.
How to Set Up a VPN on an iPhone 11
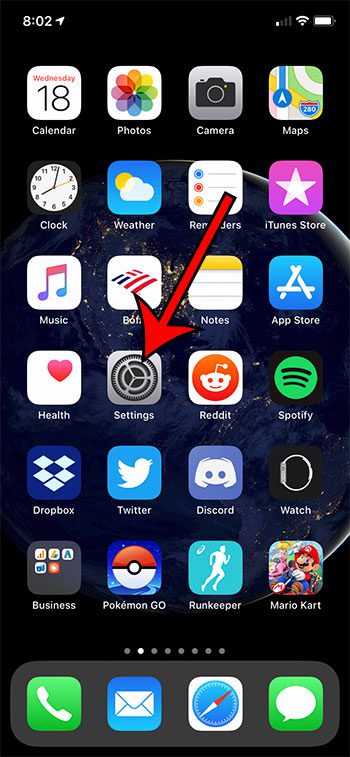
- Open Settings.
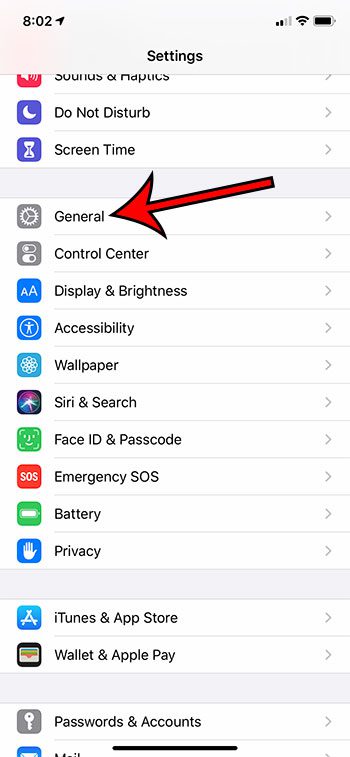
- Choose General.
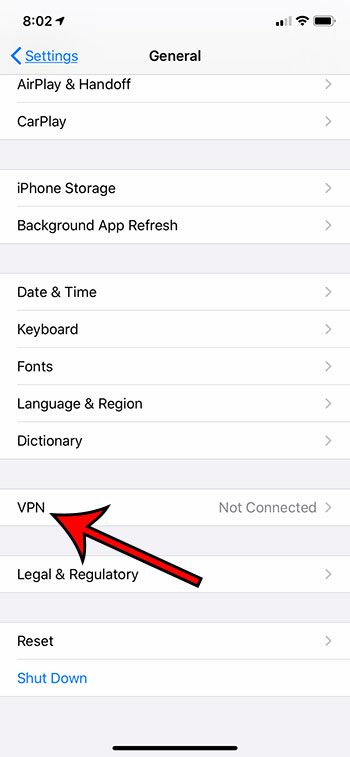
- Select VPN.
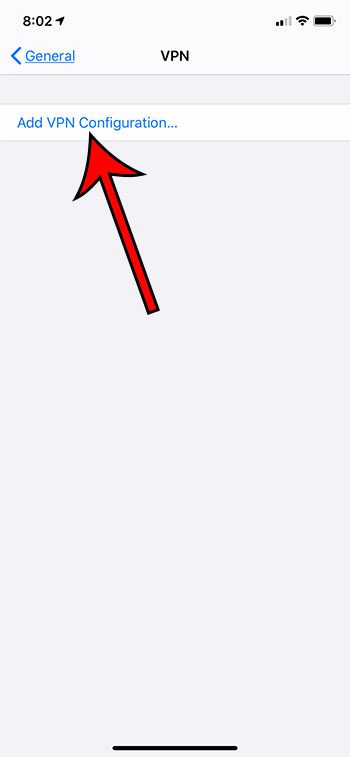
- Touch Add VPN Configuration.
- Enter your VPN details, then tap Done.
Our guide continues below with additional information on setting up a VPN on an iPhone 11, including pictures of these steps.
Where Do I Set Up a VPN on My iPhone? (Guide with Pictures)
The steps in this article were performed on an iPhone 11 in iOS 13.3. Note that you are going to need to know the details for your VPN before you complete these steps.
Step 1: Open the Settings app.
Step 2: Select the General option.
Step 3: Touch the VPN button.
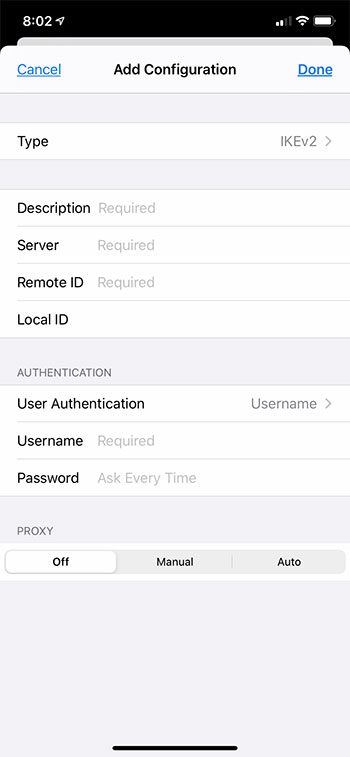
Step 4: Tap the Add VPN Configuration button.
Step 5: Enter all of the information for the VPN, then tap the Done button at the top-right of the screen.
Our tutorial continues below with additional discussion on using a VPN on an iPhone 11.
What is VPN on iPhone 11?
The VPN section on your iPhone’s Settings menu, as discussed above, is the same as it is on other iPhone models, as well as many computers or other smartphones, such as Android.
A VPN can be a good thing to start using if you have serious privacy concerns and would like to hide your location from places that you connect to on the Internet.
Once you have added a VPN configuration to your iPhone you will be able to select it and connect through that VPN by going to Settings > General > VPN.
Note that many VPNs will give you the ability to connect to the Internet through a different country. In some cases this won’t affect you very much, but it can cause some unintended problems, especially if you are streaming video. Rights and availability for streaming videos can vary significantly between different countries, meaning that some videos aren’t available everywhere. for example, Netflix’s catalog can vary significantly from country to country.
As some people take advantage of this to view videos that aren’t available in their country, many of the more popular video streaming services have mechanisms in place to detect VPN usage and block access.
You can have multiple VPN configurations on your iPhone 11. So if you have a personal VPN that you use to give you a more secure connection on public wi fi networks and you have a work VPN on your iPhone then you can easily choose which VPN connection to use based on your current situation.
Since you are sending Internet traffic through a VPN server when you connect with a VPN service or VPN app, you are often at the mercy of the Internet service providers for those VPN providers when you make the connection. This means that even if you have a strong Internet connection with your local Internet service provider you may see significantly worse performance when you connect through a VPN client.
Continue Reading
- How to delete apps on an iPhone 8
- How to check an iTunes gift card balance on an iPhone
- What is a badge app icon on an iPhone?
- How to make your iPhone louder

Matthew Burleigh is the founder, head writer, and editor of Solve Your Tech, which he launched in 2012. He has written technology tutorials since 2008 and worked in IT since 2003, including small-business support, IT management, and consulting. He holds Bachelor’s and Master’s degrees in Computer Science from Arizona State University.
Matthew writes practical guides for Windows, iPhone and iPad, Microsoft Office, Outlook, Google apps, and Android. Solve Your Tech’s guides are tested on current devices or checked against official product documentation, with clear steps, sources, and update dates.
Read more about Matthew and how Solve Your Tech writes and updates its guides, or report a correction.