To repeat something at the top of every page in Word, put it in the header: go to Insert > Header, pick a style, and type your text. It shows on every page. If you want a table’s header row to repeat on each page, select that row and click Table Layout > Repeat Header Rows.
This guide covers the Word desktop app for Windows and Mac. It follows Microsoft’s Insert a header or footer and Repeat table header on subsequent pages articles. Microsoft notes that Word for the web and the mobile apps have fewer header and footer options.
How to Repeat Text on Every Page (Page Header)
- Go to Insert > Header.
- Choose a header style, or click Edit Header to make your own.
- Type your text, or add a logo or page number.
- Click Close Header and Footer or press Esc.
Result: The header shows at the top of every page. Microsoft says headers are the same on each page by default. Some built-in header designs already include page numbers.
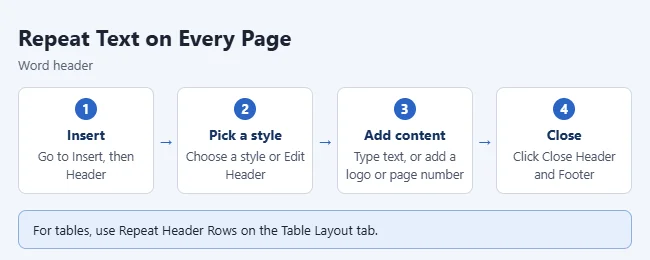
To change the header later, double-click it. To change its font, color or size, select the text and use the Font options on the Home tab. Microsoft covers more in Edit your existing headers and footers.
- Page numbers: Double-click the header, click where you want the number, select Page Number, and choose a style. Microsoft says you may need to tidy the formatting afterward.
- Footer: Go to Insert > Footer and pick a style, or choose Edit Footer. A footer repeats at the bottom of every page the same way a header repeats at the top.
- Logo or picture: Microsoft has a separate guide to add images to a header or footer.
How to Repeat a Table Header Row on Every Page
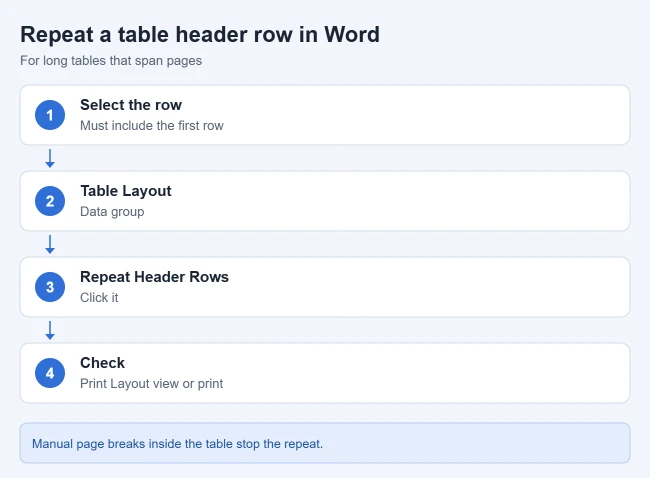
- Select the header row or rows you want to repeat. The selection must include the table’s first row.
- Go to Table Layout (or Layout next to Table Design).
- In the Data group, click Repeat Header Rows.
Result: When the table runs onto a new page, its header row appears at the top of that page too.
Another way: right-click in the row, choose Table Properties, open the Row tab, check Repeat as header row at the top of each page, and click OK.
Don’t See the Repeated Header?
- Microsoft notes that repeated table headers only show in Print Layout view or when you print.
- Word repeats the header after automatic page breaks, but not after a manual page break you insert inside a table.
- You can only edit the header row on the first page. The copies on later pages are locked and update automatically.
How to Skip the Header on the First Page
- Double-click the header area.
- On the Header & Footer tab, select Different First Page.
- Click Close Header and Footer or press Esc.
Result: The header disappears from the first page but stays on the rest. Microsoft notes that Different First Page is a toggle, so make sure you’re turning it on. See Delete the header or footer from the first page.
How to Use Different Headers on Odd and Even Pages
Double-click the header, then select Different Odd & Even Pages. Edit the header on an odd page, then on an even page. Microsoft’s odd and even pages article shows how to put the title and page number on opposite sides.
Frequently Asked Questions
How do I remove a header from every page?
Go to Insert > Header > Remove Header.
Why does my table header only show on the first page?
Check that Repeat Header Rows is on, that you’re in Print Layout view, and that there’s no manual page break inside the table.
Related: how to set 1-inch margins in Word.
Related: how to add a page in Word and how to insert a table of contents in Word.

Matthew Burleigh is the founder, head writer, and editor of Solve Your Tech, which he launched in 2012. He has written technology tutorials since 2008 and worked in IT since 2003, including small-business support, IT management, and consulting. He holds Bachelor’s and Master’s degrees in Computer Science from Arizona State University.
Matthew writes practical guides for Windows, iPhone and iPad, Microsoft Office, Outlook, Google apps, and Android. Solve Your Tech’s guides are tested on current devices or checked against official product documentation, with clear steps, sources, and update dates.
Read more about Matthew and how Solve Your Tech writes and updates its guides, or report a correction.