The header section of a Microsoft Word document is the ideal place to put page numbers and other important information about a document, as any information in the header will be repeated on each page.
But you might need to learn how to delete a header in Word if the information that is currently populating the header section of the document is either incorrect or unnecessary.
Luckily removing information from the document header is something that can be accomplished with just a few short steps, so continue reading our article below to learn how.
Deleting a Header in Word 2013
The steps in this article will assume that you have a Word document that already contains a header and that you want to delete that header.
The header section of a Word document is repeated at the top of every page, so you will only need to delete the header in your Word document on one of the pages, then that change will apply to every other page of the document.
Step 1: Open your document in Microsoft Word 2013.
Step 2: Locate the header at the top of the document, then double-click on it to open the header editing tool.
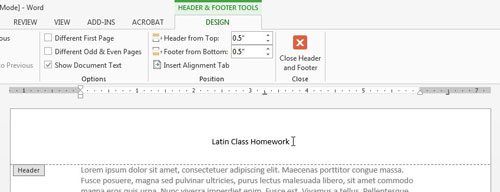
Step 3: Use the Backspace key on your keyboard to delete the existing header information. Once you have deleted the information in the header, you can double-click anywhere in the body text to exit the header editing tool and return to editing the body text of the document.
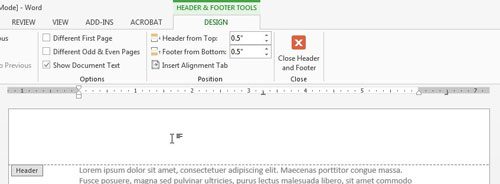
Summary – How to delete a header in Word 2013
- Open your document.
- Double-click inside the header section of the document.
- Delete the unwanted header text using the Backspace key on your keyboard.
- Double-click in the document body, or click the Close Header and Footer button to exit the header section.
If you don’t see the header section of your document, then you will need to change the View setting. Click the View tab at the top of the window, then click the Print Layout option.
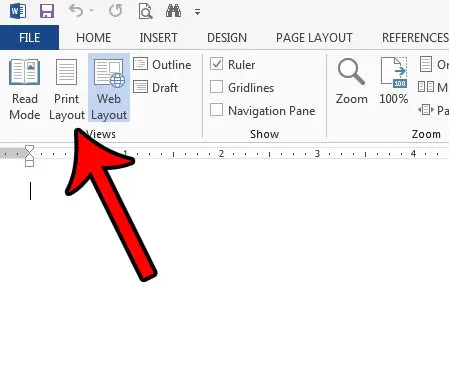
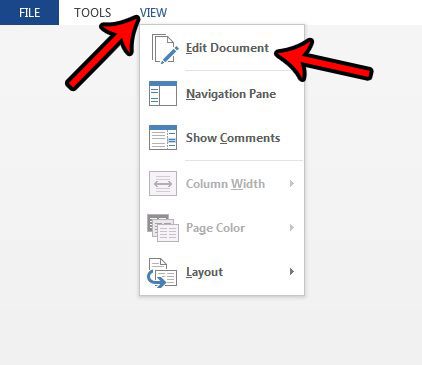
If you don’t see the ribbon section in the image above, then you may be in Read Mode. To exit this and delete your header, click View at the top of the window, then click Edit Document.
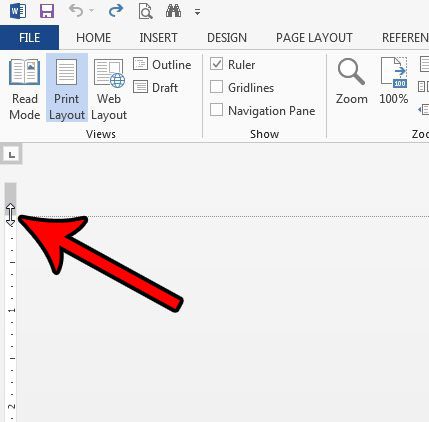
If you would like to delete the header section of the document, rather than the header content, then you can do so by manually adjusting the margins. Click at the bottom of the gray section of the ruler at the left side of the window, then drag it up.
Now that you know how to remove a header in Word 2013, you can quickly and easily remove that section and its contents from your document.
Do you have page numbers in your header, and would you like to remove the page number from only the first page? Learn about removing the page number from the title page of your document so that the page numbering starts on the second page.

Matthew Burleigh has been writing tech tutorials since 2008. His writing has appeared on dozens of different websites and been read over 50 million times.
After receiving his Bachelor’s and Master’s degrees in Computer Science he spent several years working in IT management for small businesses. However, he now works full time writing content online and creating websites.
His main writing topics include iPhones, Microsoft Office, Google Apps, Android, and Photoshop, but he has also written about many other tech topics as well.