You will need to know how to password-protect a Word for Mac 2011 document if you are creating something that contains sensitive information.
This is a feature that is shared among most versions of Microsoft Word, such as Word 2013, and it is a good solution if you have a document that you only want a few people to be able to read.
Our tutorial will explain how to locate the feature in Word 2011 that allows you to add and create a password for your document.
It is important to save the document when you have finished so that this setting applies to the document. You can then share the document and the password with anyone that you want to be able to read it.
Password Protect a Word for Mac 2011 Document
The steps in this article will allow you to add a password to a document with the Word for Mac 2011 program. Anyone that tries to open the document will need to know the password that you set in the steps below.
Step 1: Open your document in Word for Mac 2011.
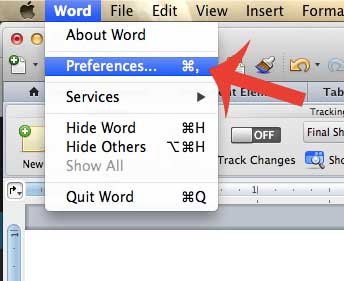
Step 2: Click Word at the top of the screen, then click Preferences.
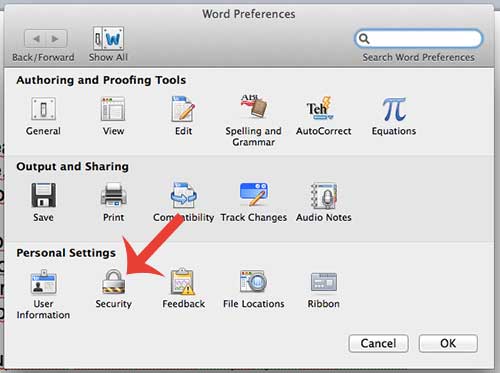
Step 3: Click the Security button at the bottom of the window.
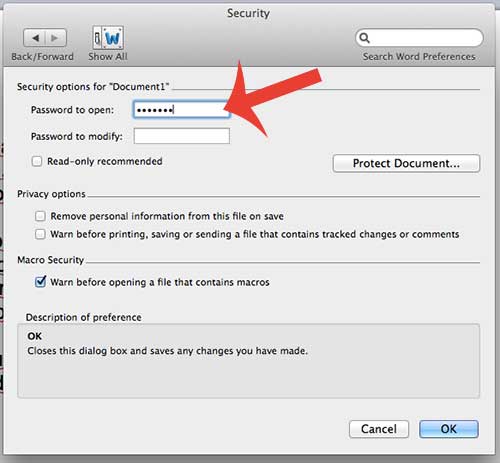
Step 4: Type the password that you want to require in order for anyone to open the document into the Password to open field, then click the OK button at the bottom of the window.
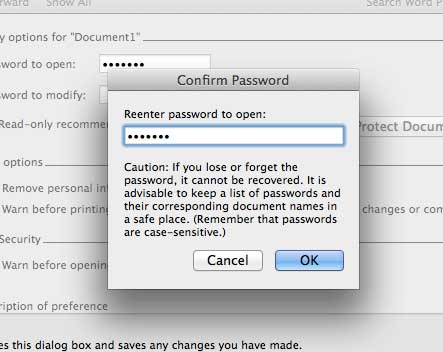
Step 5: Type the password again into the Reenter password to open field, then click the OK button.
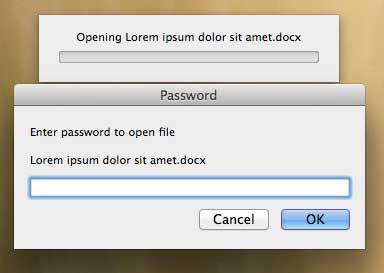
Step 6: Save the document to apply your changes. The next time you or anyone attempts to open the document, you will get a prompt like in the image below before it can be viewed.
Now that you know how to password protect a document in Word for Mac 2011, you can ensure that only the people to whom you have provided the password will be able to view the document’s content.
Do you need to send someone a PDF? You can save as a PDF in Word 2011 with just a couple of simple steps.

Matthew Burleigh has been writing tech tutorials since 2008. His writing has appeared on dozens of different websites and been read over 50 million times.
After receiving his Bachelor’s and Master’s degrees in Computer Science he spent several years working in IT management for small businesses. However, he now works full time writing content online and creating websites.
His main writing topics include iPhones, Microsoft Office, Google Apps, Android, and Photoshop, but he has also written about many other tech topics as well.