You may already know that Microsoft Word 2013 can check your document for spelling errors, but there are some other things for which it can check, too.
The options for the Spelling & Grammar checker are found on a menu in the Backstage area of Word 2013, and they include a passive voice checker.
The passive voice checker is not turned on in the program by default, but it can be enabled with just a few short steps.
So if you have a teacher, boss, or colleague that checks your work for grammar, then including a passive voice check before submitting your work can help eliminate some potential issues.
Check for Passive Voice in Microsoft Word 2013
These steps were performed in Microsoft Word 2013. You can follow the steps in this article to learn how to check for passive voice in Word 2010.
Step 1: Open Microsoft Word 2013.
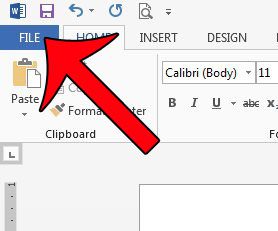
Step 2: Click the File tab at the top-left corner of the window.
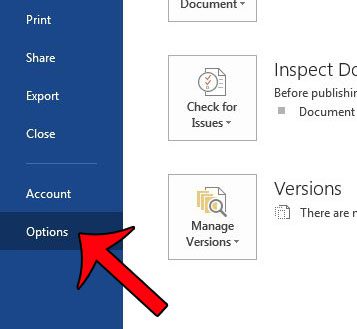
Step 3: Click the Options button in the column at the left side of the window.
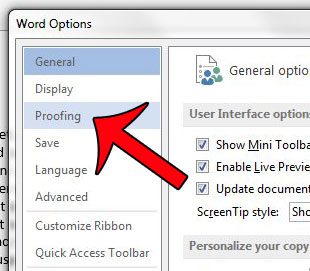
Step 4: Click the Proofing option in the column at the left side of the Word Options window.
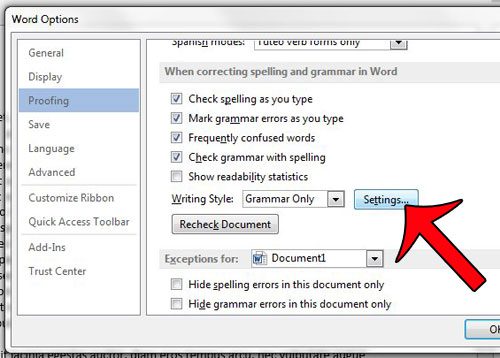
Step 5: Click the Settings button to the right of Grammar Only in the When correcting spelling and grammar in Word section of the window.
Step 6: Scroll down and check the box to the left of Passive sentences in the Style section of the window, then click the OK button.
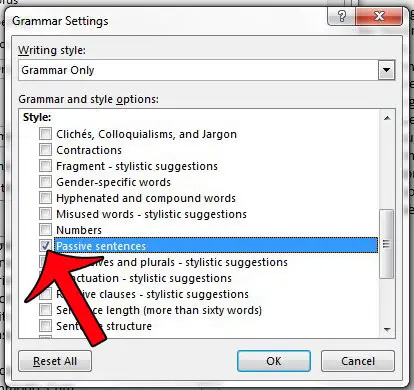
Now that you know how to use the passive voice checker in Word 2013 you can reduce the amount that you use that style of writing.
Anytime you run the Spelling and Grammar checker it will include a check for sentences written in the passive voice. You can read this article to learn how to check the spelling and grammar in your Word 2013 document.

Matthew Burleigh has been writing tech tutorials since 2008. His writing has appeared on dozens of different websites and been read over 50 million times.
After receiving his Bachelor’s and Master’s degrees in Computer Science he spent several years working in IT management for small businesses. However, he now works full time writing content online and creating websites.
His main writing topics include iPhones, Microsoft Office, Google Apps, Android, and Photoshop, but he has also written about many other tech topics as well.