Microsoft Word 2010 has a robust spelling and grammar checker that can help to resolve the most common mistakes.
The checkers can be run manually from the Review tab in Word 2010, but Word will also underline misspelled words so that you can correct them without even running the spell checker.
Unfortunately, all of the red underlines can make the document look messy or unprofessional, which is a problem when the spell checker identifies words that are not misspelled, such as brand names or slang.
Fortunately, you can adjust the settings in Word 2010 so that misspelled words are not underlined in a document.
How to Stop Word 2010 from Underlining Spelling Mistakes in a Document
The steps in this article were written for Microsoft Word 2010. However, these same steps will also work for Word 2007 and Word 2013.
This guide is going to remove the red underline from words that are misspelled in the current document. This is the ideal solution if you are creating a document that you need to share with others, and Word 2010 keeps underlining words that are not actually misspelled.
Step 1: Open your document in Word 2010.
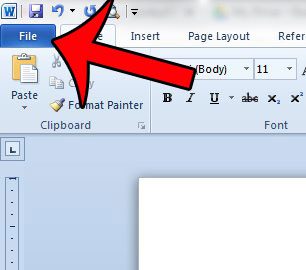
Step 2: Click the File tab at the top-left corner of the window.
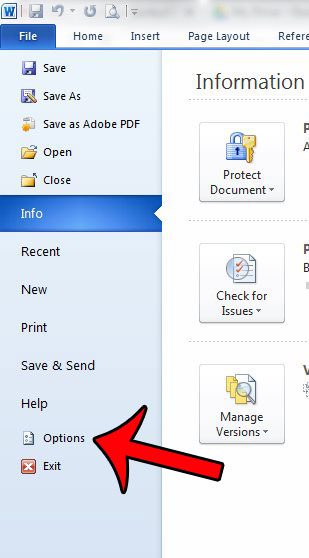
Step 3: Click the Options button in the column at the left side of the window. This will open the Word Options window.
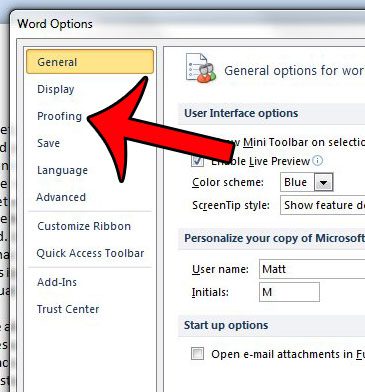
Step 4: Click the Proofing tab at the left side of the Word Options window.
Step 5: Scroll to the Exceptions for section at the bottom of the window, then check the boxes to the left of Hide spelling errors in this document only and Hide grammar errors in this document only.
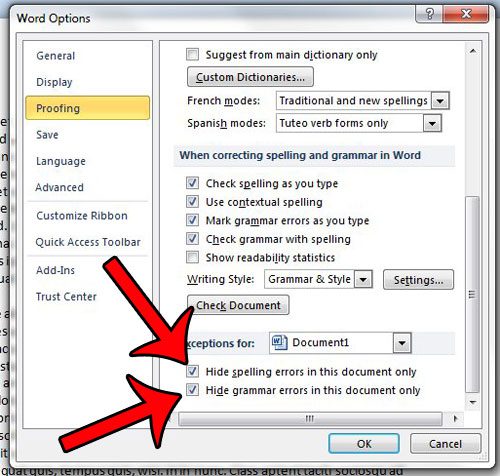
If you do not wish to see spelling or grammar errors in any Word document that you create on your computer, then you can click the boxes to the left of Check spelling as you type and Mark grammar errors as you type to remove the check marks. These options are in the When correcting spelling and grammar in Word section.
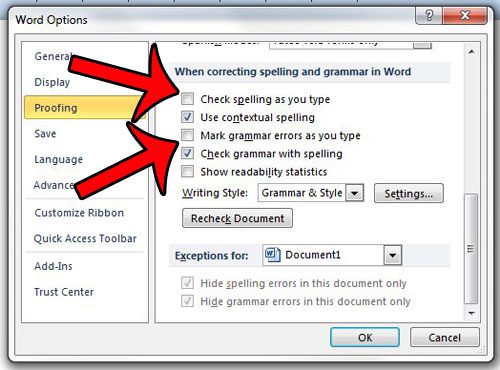
You can then click the OK button when you are done to save your changes.
Now that you know how to stop Word 2010 from underlining misspelled words, you can modify this setting if you don’t like the way those notifications look in your documents.
Do you need a simple way to check your documents for passive voice? Learn how to use the passive voice checker in Word 2010.

Matthew Burleigh has been writing tech tutorials since 2008. His writing has appeared on dozens of different websites and been read over 50 million times.
After receiving his Bachelor’s and Master’s degrees in Computer Science he spent several years working in IT management for small businesses. However, he now works full time writing content online and creating websites.
His main writing topics include iPhones, Microsoft Office, Google Apps, Android, and Photoshop, but he has also written about many other tech topics as well.