To mark all emails as read on iPad, open the Mail app, go to the mailbox, tap the More button (three dots), tap Select, then tap Select All or tap the messages you want. Tap the button at the bottom of the message list and choose Mark as Read. If your inbox is split into categories, switch to List View first so every message is in one list.
These steps follow Apple’s iPad User Guide pages on checking your email and Mail categories (iPadOS 27). Button icons and labels can vary slightly between iPadOS versions.
How to Mark All Emails as Read on iPad
- Open the Mail app. To clear every account at once, open the mailbox list and choose All Inboxes; otherwise open a single inbox or folder.
- If you see Primary, Transactions, Updates, and Promotions tabs at the top, tap the More button and choose List View. Apple lists this as the way to turn off categories.
- Tap the More button, then tap Select.
- Tap Select All, or tap each message you want to mark.
- Tap the button at the bottom of the message list (a flag icon in the lower-left corner).
- Tap Mark as Read.
Result: The blue unread dots disappear from the selected messages, and the unread count for that mailbox drops.
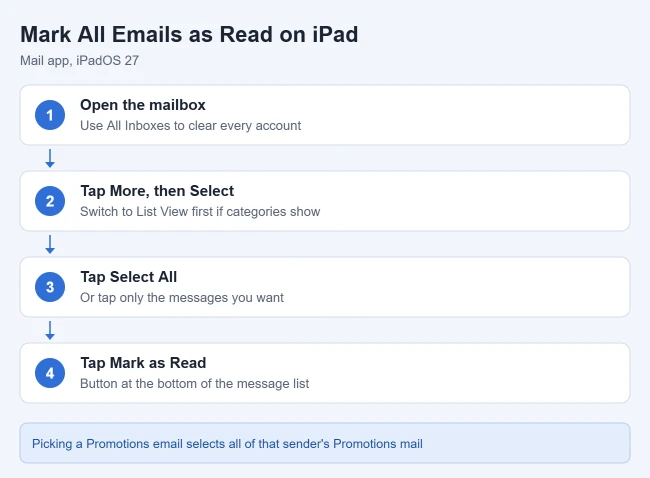
Apple warns that when you select a Transactions, Updates, or Promotions message, you are selecting every message in that category from that sender. That is handy for clearing a pile of newsletters, but check your selection before you mark it.
How to Mark Only Some Emails as Read
- Open the mailbox, tap the More button, and tap Select.
- Tap the messages you want. To grab a run of messages that sit next to each other, drag down through them; drag with two fingers to select several emails quickly.
- Tap the button at the bottom of the list and choose Mark as Read.
Result: Only the messages you picked are marked as read. You can search for specific emails first, then select and mark the results the same way.
Why Does the Unread Count Look Wrong?
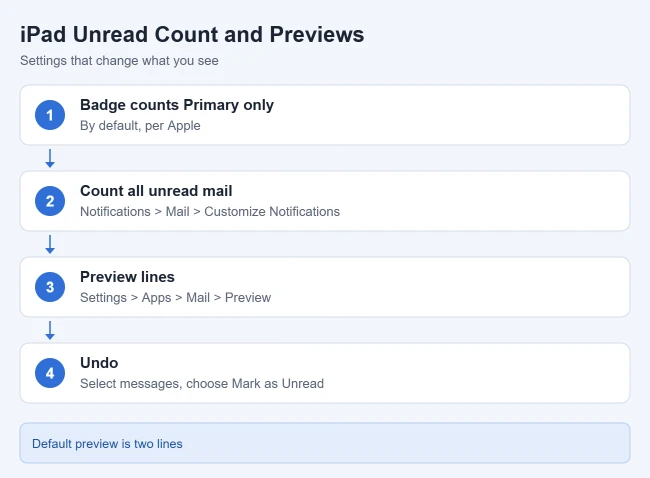
The badge on the Mail icon only counts unread messages in your Primary category, according to Apple. If you cleared Primary but still have unread Promotions or Updates, the badge can look lower than the real total. To count every unread email, go to Settings > Notifications > Mail > Customize Notifications and turn on All Unread Messages.
Result: The Home Screen badge now reflects unread messages in all categories.
How to Show More Emails and Longer Previews
- Open Settings > Apps > Mail.
- Tap Preview (below Message List).
- Choose None or 1 Line to fit more emails on screen, or up to 5 Lines to read more of each one without opening it.
Result: Mail shows the new number of preview lines for every message. Apple says the default is two lines. You can also touch and hold a Primary message to preview it without opening it.
How to Mark All Emails as Read on a Mac
The same shortcut works in Mail on a Mac: select a mailbox (or All Inboxes), then choose Mailbox > Mark All Messages as Read from the menu bar. You can also Control-click the mailbox to find the same command.
Frequently Asked Questions
Can I clear all the emails from one sender at once?
Yes, for Transactions, Updates, and Promotions mail. Apple says tapping one of those messages opens a digest view of every message in that category from the same sender, and you can take action on all of them from there. Primary messages are not grouped by sender.
Can I mark emails as unread again?
Yes. The same select-and-mark process with Mark as Unread chosen instead brings back the unread dots and the Mail badge.
Related Guides
- How to remove “Sent from my iPad”
- How to remove the Mail badge on iPad
- How to change Mail swipe options and inbox settings

Matthew Burleigh is the founder, head writer, and editor of Solve Your Tech, which he launched in 2012. He has written technology tutorials since 2008 and worked in IT since 2003, including small-business support, IT management, and consulting. He holds Bachelor’s and Master’s degrees in Computer Science from Arizona State University.
Matthew writes practical guides for Windows, iPhone and iPad, Microsoft Office, Outlook, Google apps, and Android. Solve Your Tech’s guides are tested on current devices or checked against official product documentation, with clear steps, sources, and update dates.
Read more about Matthew and how Solve Your Tech writes and updates its guides, or report a correction.