When you restart or power on your Windows computer, you may find that certain apps and services are starting automatically.
This is due to an option in the operating system where you can specify different applications that you use the most often so that you don’t need to open them manually.
If your computer is visibly slower with each successive start, then programs that have added themselves to the “Startup” menu might be the source of the problem.
Windows 7 includes an option for you to selectively enable and disable these items.
Adding a Program to the Windows 7 Startup
The steps in this article were performed in Windows 7. Most other versions of Windows have similar options, but the method for changing these startup programs can vary.
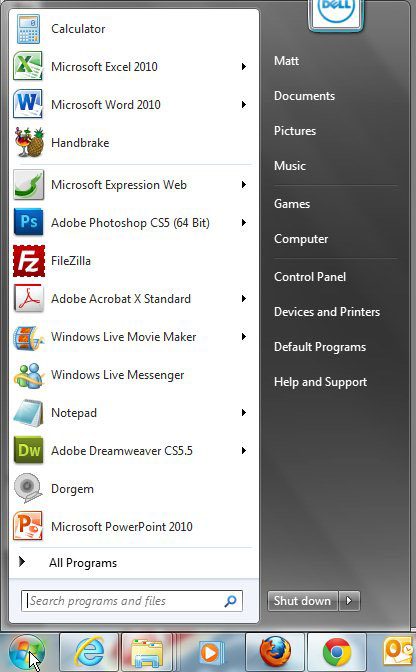
Step 1 – Click the “Start” button at the lower-left corner of your screen. The window that pops up is referred to as the “Start” menu.

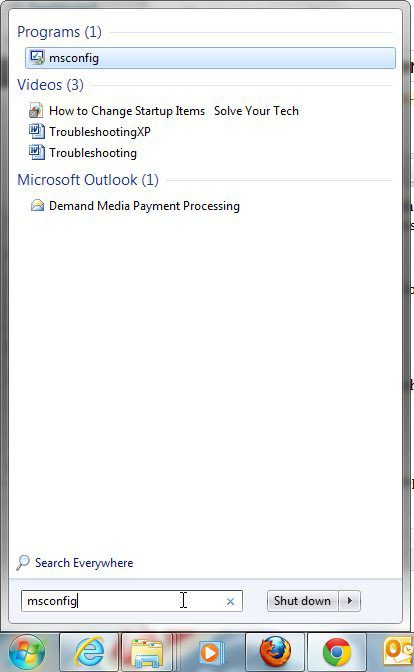
Step 2 – Type “msconfig” into the search field at the bottom of the “Start” menu, then press “Enter” on your keyboard.

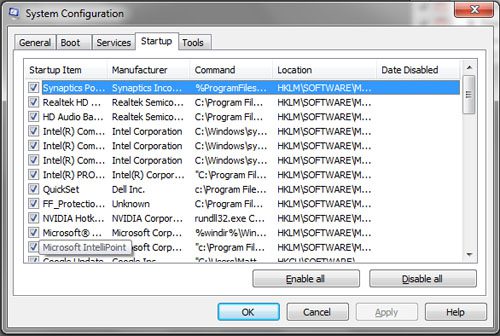
Step 3 – Click the “Startup” tab at the top of the window.

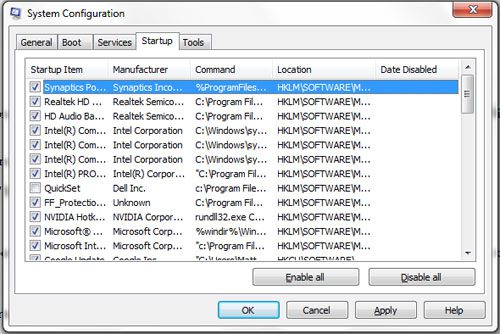
Step 4 – Scroll through the list of startup programs, then click the box to the left of each program that you want to enable. To disable programs, click that same box to remove the check mark.

Step 5 – Click “Apply,” then click “OK.”
Step 6 – Click “Restart” to restart your computer and begin the startup process with only the programs that you have specified.
Conclusion
Note that you might need to do this somewhat frequently, as many new apps that you install will try and be included at startup.
You might also change the way you use your computer, so a startup application might not be necessary in the future.
Continue Reading

Matthew Burleigh has been writing tech tutorials since 2008. His writing has appeared on dozens of different websites and been read over 50 million times.
After receiving his Bachelor’s and Master’s degrees in Computer Science he spent several years working in IT management for small businesses. However, he now works full time writing content online and creating websites.
His main writing topics include iPhones, Microsoft Office, Google Apps, Android, and Photoshop, but he has also written about many other tech topics as well.