If you’ve ever created an audio file in one format and needed to use it in another, then you may have encountered some third-party programs that were difficult to use.
Fortunately, iTunes has the capability to convert your .m4a file to an .mp3 file, and it’s a fairly simple process to use.
I have found it to be helpful with files recorded using the iPhone Voice Memos app that need to be shared with someone with strict audio file requirements.
So if you have an .m4a file that you need to convert to the .mp3 format on your Windows PC, then you can follow the steps below.
Converting an .m4a File to an .mp3 file in iTunes on a PC
Note that this tutorial assumes that you already have the iTunes program on your computer. If you do not, you can download it for free from here.
You will then need to install the program on your computer. So once you have the .m4a file on your computer along with the iTunes program, you are ready to go ahead and convert it to the .mp3 format.
Step 1: Right-click on the .m4a file, click Open With, then click iTunes.
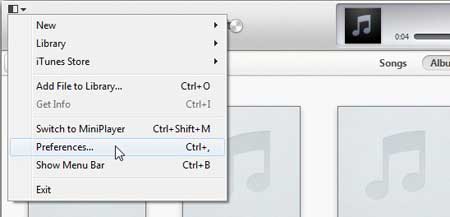
Step 2: Click the iTunes menu at the top-left corner of the window, then click Preferences.
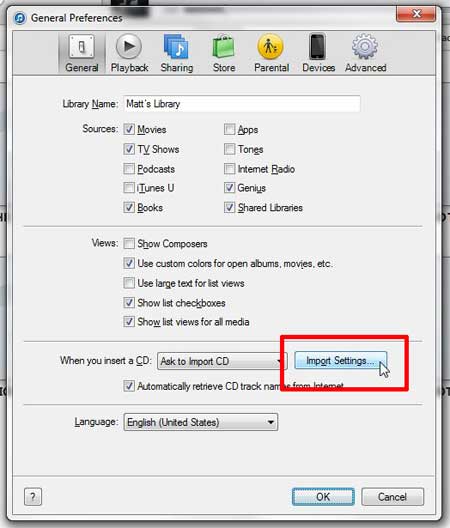
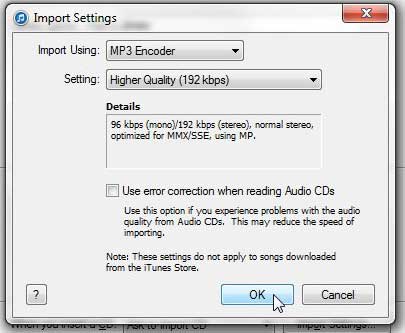
Step 3: Click the Import Settings button near the bottom of the window. Note that this is on the General tab of the Preferences menu, in case you don’t see it when you open Preferences.
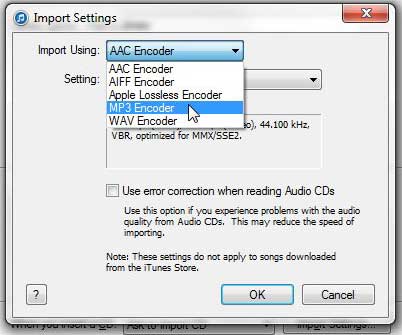
Step 4: Click the drop-down menu to the right of Import Using, then click the MP3 Encoder option.
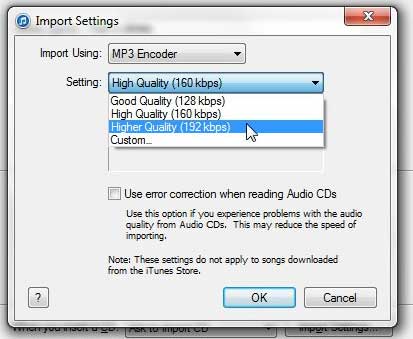
Step 5: Click the drop-down menu to the right of Setting, then select your preferred quality.
Step 6: Click the OK button to close this window.
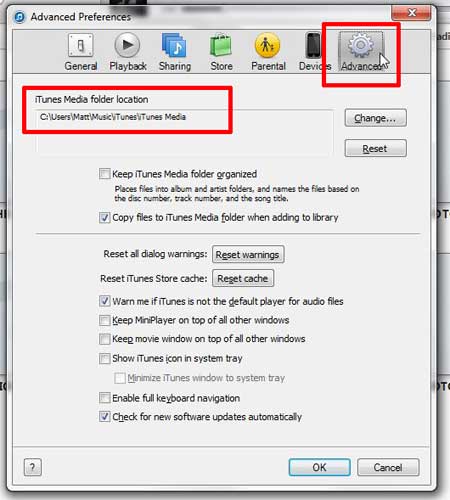
Step 7: Click the Advanced tab at the top of the window. This will allow you to see the location of your iTunes Media folder, which is where the converted file will be output. Click the OK button at the bottom of the window to close it.
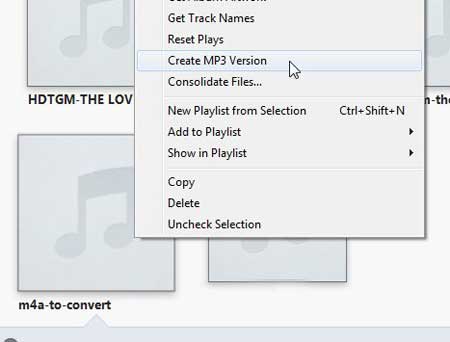
Step 7: Click the .m4a file to select it, then right-click it and choose the Create MP3 Version option.
The converted file will be added to your iTunes Media folder, whose location we identified earlier. In my case, the file was specifically placed in Music/iTunes/iTunes Media/Music/Unknown Artist/Unknown Album.
Now that you know how to convert an .m4a file to an .mp3 file in iTunes, you will be able to turn those types of media files into the audio format that you need.
Continue Reading

Matthew Burleigh has been writing tech tutorials since 2008. His writing has appeared on dozens of different websites and been read over 50 million times.
After receiving his Bachelor’s and Master’s degrees in Computer Science he spent several years working in IT management for small businesses. However, he now works full time writing content online and creating websites.
His main writing topics include iPhones, Microsoft Office, Google Apps, Android, and Photoshop, but he has also written about many other tech topics as well.