To feather a selection in Photoshop, make your selection, choose Select › Modify › Feather, enter a Feather Radius in pixels, and select OK. The edge of the selection becomes soft, so anything you fill, delete, copy, or mask fades out gradually instead of stopping at a hard line.
The shortcut for the same command is Shift+F6. If you would rather see the soft edge before you commit to it, use the Select and Mask workspace instead. Both routes are covered below, along with the fixes for the most common feathering problems.
What feathering does, and what you need
Feathering blurs the border of a selection. Adobe describes it as creating a transition zone between the selection and the pixels around it. Inside that zone, pixels are only partly selected, so an edit is applied at full strength in the middle and fades to nothing at the outside.
These steps apply to the current desktop version of Photoshop on Windows and Mac. The Feather command has been in the Select menu for many versions, so the first method should also match older copies such as CS5 and CS6, though menu wording can differ slightly.
- An open image with the correct layer selected in the Layers panel.
- An active selection, shown by the moving dashed outline often called marching ants.
- A rough idea of how wide the fade should be. The radius is measured in pixels, so the same number looks softer on a small image than on a large one.
Feather an existing selection
This is the shortest reliable route, and it works with a selection made by any tool.
- Make a selection with any selection tool, such as the Marquee, Lasso, or Quick Selection tool.
- Choose Select › Modify › Feather, or press Shift+F6. A small dialog box opens.
- Type a number in the Feather Radius box. Bigger numbers make a wider, softer edge.
- Select OK. The outline may look almost the same as before, which is normal.
- Use the selection. Fill it, delete it, copy and paste it, or add a layer mask, and the soft edge appears. A soft-edged fill also helps when you remove text from a picture in Photoshop.
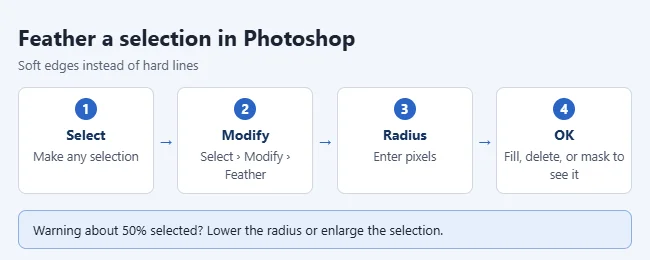
Adobe documents this command, and the options bar method in the next section, in Define feathered edges for selections.
The dialog box has no preview, so the first radius you type is a guess. If the result is too soft or not soft enough, undo it and try another number, or use Select and Mask.
Feather before you select
You can also set the feather first, so the selection is soft from the moment you draw it.
- Select a Marquee or Lasso tool from the toolbar.
- Find the Feather box in the options bar, the strip of settings across the top of the window.
- Type a value in pixels.
- Draw your selection. It is feathered by that amount straight away.
This setting only affects selections you make after you change it. It does not alter a selection that already exists, and it stays in place for that tool until you change it again. Set it back to 0 px when you want hard edges, or every new selection will keep coming out soft.
Adobe lists this option for the Marquee and Lasso tools. For a selection made with another tool, use the Feather command or Select and Mask after you select.
Feather with a live preview in Select and Mask
Select and Mask is a separate workspace for refining selection edges. It takes a few more clicks, but you can watch the edge change as you adjust it.
- Make a selection.
- Choose Select › Select and Mask, or select the Select and Mask button in the options bar while a selection tool is active.
- In the Properties panel on the right, open View Mode and pick a view that makes the edge easy to judge. On Black, On White, and Black and White all show a fade clearly.
- Drag the Feather slider until the edge looks right.
- Select OK to apply the change and return to your document.
- Use the selection as usual, for example with Edit › Copy and Edit › Paste to put the soft-edged piece on a new layer.
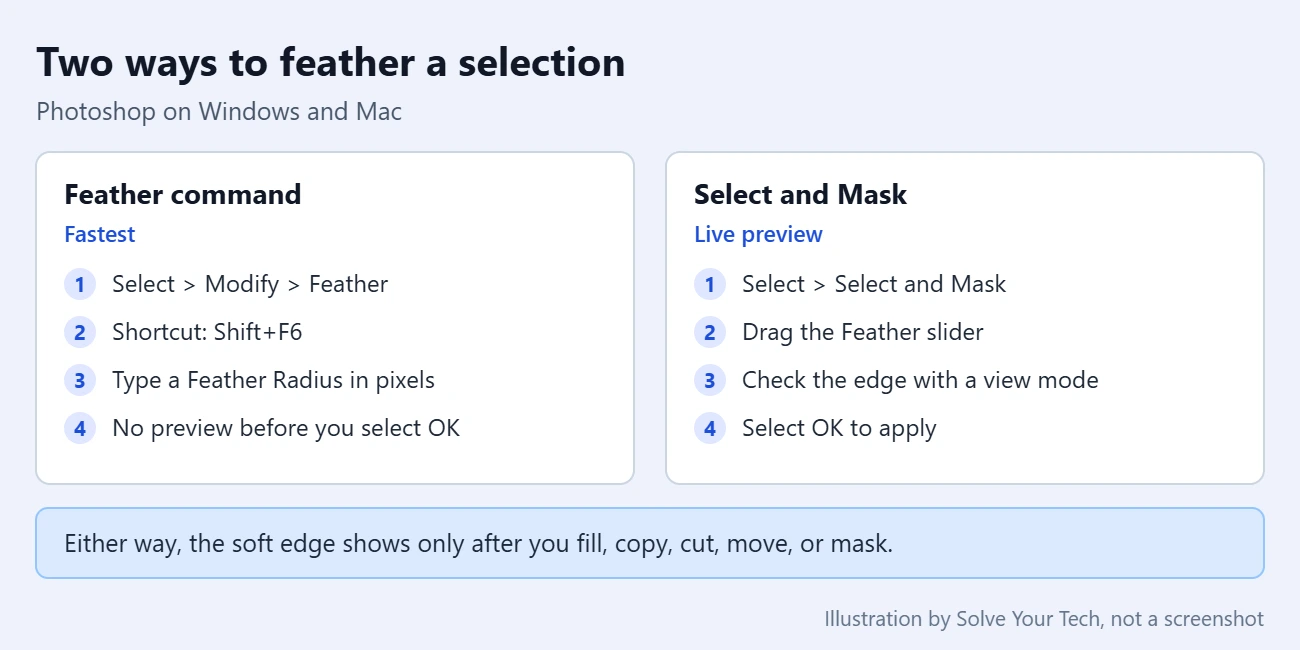
Adobe describes the workspace in Refine and soften selection edges, and its page on how to feather edges in Photoshop walks through the Feather slider.
Check and adjust the edge in Quick Mask mode
Quick Mask mode shows a selection as a colored overlay instead of an outline. By default, the areas that are not selected are covered in red at 50% opacity. A feathered edge shows up as a gradual fade in that overlay, which makes it a handy way to check your work.
- With a selection active, press Q or select the Quick Mask mode button in the toolbar.
- Look at the border of the red overlay. A sharp border means a hard edge. A gradual fade means the selection is feathered.
- To soften it further, choose Filter › Blur › Gaussian Blur and drag the slider. Adobe suggests this for making an edit that is feathered at the edges.
- Press Q again to return to the normal selection outline.
Feathering compared with anti-aliasing
Photoshop has two ways to soften a selection edge, and they are easy to mix up.
| Option | What it does | When you set it | Best for |
|---|---|---|---|
| Feather | Blurs the edge into a wide transition zone | Before or after you select | Vignettes, soft cutouts, blended fills |
| Anti-alias | Smooths jagged edge pixels only, with no detail lost | Before you select, in the options bar | Clean edges on curved or diagonal selections |
Anti-aliasing is a checkbox named Anti-alias in the options bar for tools such as the Lasso, Elliptical Marquee, and Magic Wand. It keeps an edge crisp but not jagged. Feathering is the one to use when you want a visible fade.
Confirm the feather worked, or undo it
Adobe notes that a feather only becomes visible after you move, cut, copy, or fill the selection. To confirm it without changing your image, press Q to look at it in Quick Mask mode, then press Q again.
To take a feather back, press Ctrl+Z on Windows or Command+Z on a Mac right after you apply it, or choose Edit › Undo. Press it again to step back further, for example past a fill you made with the soft selection. To drop the selection completely, choose Select › Deselect.
Keep in mind that deleting or filling pixels changes the layer itself. If you want to be able to adjust the edge later, add a layer mask from the feathered selection instead of deleting anything.
Fix common feathering problems
“No pixels are more than 50% selected”
Adobe says this message means the feather is too large for the selection. Reduce the feather radius or make the selection bigger. If you select OK anyway, the selection still exists, but its edges will not be visible on screen.
The selection looks the same after feathering
That is expected. The marching ants only mark the line between pixels that are more than 50% selected and those that are less, so the outline cannot show a fade. Fill the selection or check it in Quick Mask mode to see the soft edge.
Feather is grayed out in the menu
The commands under Select › Modify work on a selection, so this usually means nothing is selected. Make a selection first, then open the menu again.
Every new selection has soft edges
A value is still set in the Feather box in the options bar for that tool. Select the tool, change the box to 0 px, and draw the selection again.
Shift+F6 does nothing
On many laptops the function keys control things like volume and brightness by default, so you may need to hold Fn as well. The menu command does the same job if the shortcut will not respond.
The fade is too wide or leaves a halo
The radius is too high for the size of the image. Undo, then enter a smaller number, or use Select and Mask so you can see the result before you apply it.
Ways to use a feathered selection
- Vignette: select an oval with the Elliptical Marquee tool, choose Select › Inverse, feather the selection, and fill it with black on a new layer using Edit › Fill.
- Soft cutout: feather the selection, then select the layer mask icon in the Layers panel so the subject blends into a new background. This is useful when you edit a product picture for an online store.
- Blended fill: feather before you fill a selection with a color or a pattern, so the fill has no hard line.
- Glow outline: feather, then outline the selection on a new layer.
Blur a Photo Background With a Quick Mask Selection
For the manual method used in Photoshop CS5, open a copy of the image and select the layer containing the pixels to edit. Duplicate it if you want to retain an untouched layer. Enter Quick Mask with Q and use a black Brush to paint over the subject you want to protect, reducing the brush size and zooming in around its edges. With the default Masked Areas option, the protected subject has a red overlay. Adobe’s Quick Mask guide explains that black masks and white removes protection. If the overlay behavior differs, inspect Quick Mask Options rather than assuming its color means the same in every configuration.
Press Q again to leave Quick Mask, check that the background rather than the subject is selected, then select the image-layer thumbnail rather than a mask/channel. Choose Filter > Blur > Gaussian Blur, adjust Radius while reviewing the preview and click OK. Adobe’s filter guide explains the Gaussian Blur preview. Inspect subject edges and the blurred pixels, choose Select > Deselect, and save under a new filename to preserve the original. Undo or use the preserved layer for an unwanted effect. Applying Gaussian Blur while still in Quick Mask softens a selection mask instead of directly blurring the photo background; leave that mode first for this pixel-editing procedure.
Frequently asked questions
What feather radius should I use?
There is no single correct number, because the radius is in pixels and images vary in size. Start small for a subtle edge, use a larger value for a vignette, and undo and retry if it looks wrong. Select and Mask lets you set the amount by eye.
Can I feather a selection after I have made it?
Yes. Choose Select › Modify › Feather and enter a radius. The Feather box in the options bar only affects selections you draw afterward.
What is the shortcut to feather a selection in Photoshop?
Press Shift+F6 with a selection active to open the Feather Selection dialog box. It is the same as choosing Select › Modify › Feather.
Does Photoshop have a Feather tool?
No. Adobe says Photoshop does not have a dedicated feathering tool. You feather through the options bar, the Feather command, or the Feather slider in Select and Mask.
Why won’t Define Pattern work after feathering?
Adobe’s steps for defining a pattern call for a Rectangular Marquee selection with Feather set to zero pixels. Set Feather to 0 px in the options bar, draw the selection again, and then choose Edit › Define Pattern.
Does feathering change my image?
Not on its own. Feathering only changes the selection. The image changes when you then fill, delete, move, or paste with that selection.
Next step
Try the same selection twice, once with the Feather command and once in Select and Mask, and compare the edges. Once the fade looks right, you can copy the layer into another image to build a composite.

Matthew Burleigh is the founder, head writer, and editor of Solve Your Tech, which he launched in 2012. He has written technology tutorials since 2008 and worked in IT since 2003, including small-business support, IT management, and consulting. He holds Bachelor’s and Master’s degrees in Computer Science from Arizona State University.
Matthew writes practical guides for Windows, iPhone and iPad, Microsoft Office, Outlook, Google apps, and Android. Solve Your Tech’s guides are tested on current devices or checked against official product documentation, with clear steps, sources, and update dates.
Read more about Matthew and how Solve Your Tech writes and updates its guides, or report a correction.