The Brother HL-2270DW is an efficient, inexpensive black and white laser printer, with some of the lowest per-page printing costs around. But it has been around for a few years, and even great printers wear down over time. The HL-2270DW also does not work perfectly 100% of the time, for 100% of users, so inevitably it will need to be uninstalled from computers.
Fortunately it is a short process to uninstall a printer from a Windows 7 computer, and the same process can be followed for nearly any printer installed in Windows 7. Our guide below will walk you through the steps needed to uninstall the HL-2270DW from your computer.
Removing a Brother HL-2270DW Printer
This tutorial will show you how to uninstall your Brother HL-2270DW printer from your Windows 7 computer, which means that you will no longer be able to print to it once you have completed these steps. If you need to print from it after following these steps, then you will need to reinstall it. This guide will show you how to do a wireless installation of the HL-2270DW printer.
To insure that the process goes as smoothly as possible, it is best to turn off the printer before following this guide. Additionally, disconnect the USB cable (if you installed with a USB connection) from the back of the computer after turning off the printer.
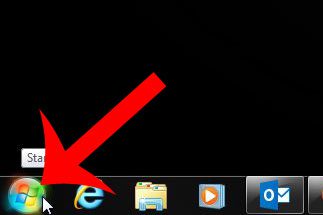
Step 1: Click the Start button at the bottom-left corner of the screen.
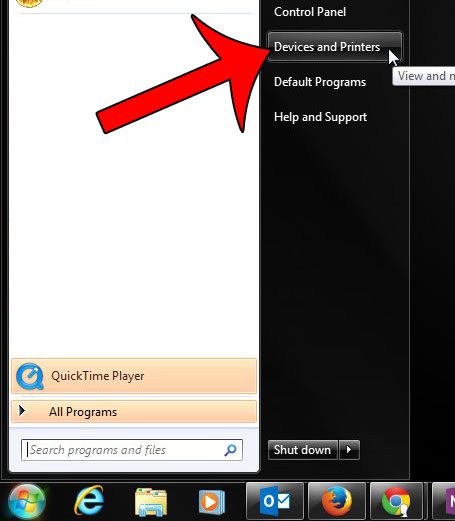
Step 2: Click the Devices and Printers option in the column at the right side of the menu.
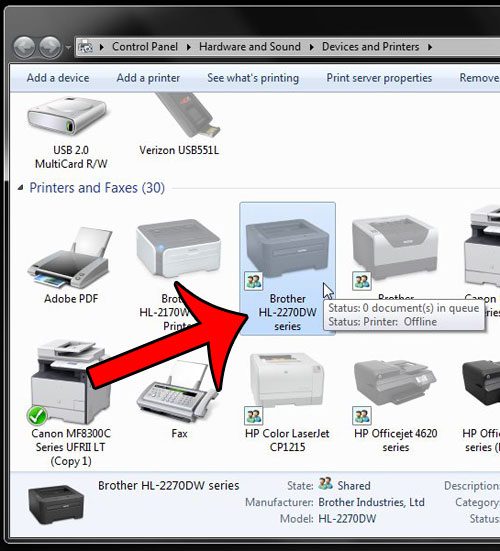
Step 3: Locate the HL-2270DW icon in the Printers and Faxes section of the window.
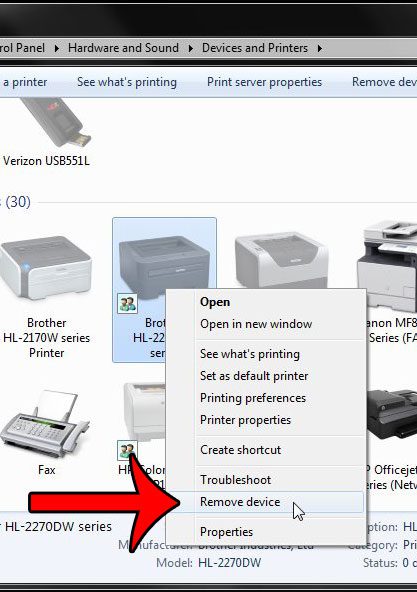
Step 4: Right-click the printer icon, then click the Remove Device option.
Step 5: Click the Yes button to confirm that you wish to remove the device.
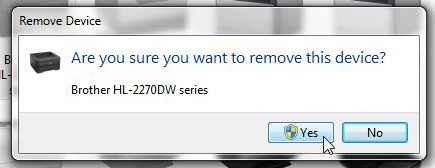
After a few seconds (or minutes, depending upon your computer) the printer will be uninstalled, and the icon will be removed from the Devices and Printers window.
If you have been having difficulties with printers on your computer, then it might be due to some other issues on the computer. Read our general guide to printer troubleshooting for some tips that can help with common printer issues.
For some more advanced tips on completely removing a printer in Windows 7, especially if you are trying to re-install the same printer, read this tutorial on completely removing printers in Windows 7.
A faulty printer is a common problem that many people face.
Fortunately, most of these issues can be resolved with a few simple troubleshooting procedures, which we will go through below.
How to Fix an Offline Windows Printer
A printer may appear offline in Windows 7 for a variety of reasons. They can include issues with electricity and network access, in addition to print driver issues.
See our Windows 7 network printers offline page for more troubleshooting possibilities.
If your printer is now showing as offline, try the procedures below.
- Press Start.
- Select your Devices and Printers menu.
- Select See what’s printing from the right-click menu on the printer icon.
- To bring the printer online, click the Printer tab, then Use printer offline.
If it doesn’t work, try resetting the printer and computer, unplugging all of the printer’s wires, and reinstalling the printer.

Matthew Burleigh has been writing tech tutorials since 2008. His writing has appeared on dozens of different websites and been read over 50 million times.
After receiving his Bachelor’s and Master’s degrees in Computer Science he spent several years working in IT management for small businesses. However, he now works full time writing content online and creating websites.
His main writing topics include iPhones, Microsoft Office, Google Apps, Android, and Photoshop, but he has also written about many other tech topics as well.