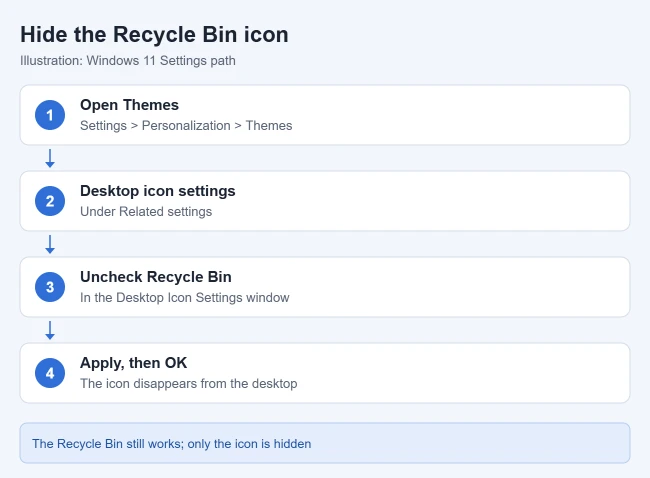
To remove the Recycle Bin from your desktop in Windows 11, go to Settings > Personalization > Themes, select Desktop icon settings, uncheck Recycle Bin, and select OK. The icon disappears, but the Recycle Bin keeps working in Windows 11 Home and Pro and still holds deleted files.
How to Hide the Recycle Bin Icon
- Open Settings and select Personalization. You can also right-click an empty spot on the desktop and select Personalize. The Personalization page opens.
- Select Themes.
- Scroll to Related settings and select Desktop icon settings. A small Desktop Icon Settings window opens.
- Uncheck Recycle Bin.

- Select Apply, then OK. The Recycle Bin icon disappears from the desktop right away.

The same window controls the Computer, User’s Files, Network, and Control Panel icons, so you can add or remove those at the same time. If a theme you apply later changes your desktop icons, clear Allow themes to change desktop icons in that window.
Example: The Desktop Icon Settings Window
On an Alienware m16 R2 running Windows 11 Home 25H2, Settings > Personalization > Themes had a Desktop icon settings link under Related settings. It opened the older Desktop Icon Settings window rather than a Settings page.
Recycle Bin was the only box checked under Desktop icons; Computer, User’s Files, Network and Control Panel were all unchecked. Clearing the Recycle Bin box and clicking OK is what removes it from the desktop. The Allow themes to change desktop icons box was also checked, which matters if a theme ever changes the icons back.

How to Bring the Recycle Bin Back
Repeat the steps and check Recycle Bin again, then select OK. Microsoft describes the same setting in its guide to finding the Recycle Bin in Windows. If no icons show on your desktop at all, right-click the desktop, select View, and make sure Show desktop icons is checked.
How to Open the Recycle Bin After You Hide It
- Start search: type Recycle Bin in the Start menu search and open it.
- File Explorer: in File Explorer, type Recycle Bin in the address bar and press Enter.
- Run box: press Windows + R, type
shell:RecycleBinFolder, and press Enter. - Pin it first: before hiding the icon, right-click it and select Pin to Start, so it stays one click away in the Start menu.

Put a Recycle Bin shortcut on the taskbar
Windows won’t pin the Recycle Bin itself to the taskbar, but there is a workaround with a shortcut:
- Right-click the desktop and select New > Shortcut.
- Enter
explorer.exe shell:RecycleBinFolderas the location, select Next, name it Recycle Bin, and select Finish.

- Optional: right-click the shortcut, select Properties > Change Icon, and pick a trash can icon from
%SystemRoot%\System32\imageres.dll. - Right-click the shortcut and select Pin to taskbar. Clicking it opens the Recycle Bin. You can then delete the desktop shortcut.
For more icon choices, including your own .ico files, read about changing app icons on Windows 11.
Hide All Desktop Icons Instead
Right-click the desktop, select View, and uncheck Show desktop icons. This hides everything on the desktop, including files and shortcuts, but doesn’t delete them. Check it again to show them.
If other parts of your desktop look wrong too, here is how to get back to the normal desktop.
The same View menu is also where you change the size of desktop icons.
The Spotlight photo icon isn’t in Desktop icon settings; here’s how to get rid of Learn about this picture.
To clear app shortcuts but keep other icons, follow the steps for removing apps from the desktop without deleting them.
Change How the Recycle Bin Works
Hiding the icon doesn’t change what the Recycle Bin does. To adjust that, right-click the Recycle Bin icon and select Properties. If you’ve already hidden it, turn the icon back on for a moment, change the settings, then hide it again.

- Custom size: set the maximum space the Recycle Bin can use on each drive. When it fills, the oldest files are removed first.
- Don’t move files to the Recycle Bin: deleted files are removed immediately. You can do this if you hide the icon, but it means you can’t undo a deletion, so use it with care.
- Display delete confirmation dialog: turn this on to be asked before each deletion.
To empty it, open the Recycle Bin and select Empty Recycle Bin. Storage Sense can also delete old Recycle Bin items automatically on a schedule you choose in Settings > System > Storage.
For every method, including Settings and PowerShell, read about emptying the Recycle Bin in Windows 11.
For Windows 11 Pro: Hide It With Group Policy
On Pro, Enterprise, and Education editions, a Group Policy setting hides the icon for a user, which is useful if you manage several PCs.
The steps for opening Local Group Policy Editor in Windows 11 show how to check your edition and other ways to launch it.
- Press Windows + R, type
gpedit.msc, and press Enter. - Go to User Configuration > Administrative Templates > Desktop.
- Double-click Remove Recycle Bin icon from desktop, select Enabled, and select OK. Set it back to Not Configured to undo it.

- Sign out and back in if the icon doesn’t disappear right away.
Windows 11 Home doesn’t include the Group Policy Editor, so use the Settings method. We don’t recommend the registry edits some sites suggest, because the Settings method does the same thing safely.
Desktop Recycle Bin Questions
Does hiding the Recycle Bin turn it off?
No. Files you delete still go to the Recycle Bin. Only the desktop icon is hidden.
Can I delete the Recycle Bin?
No. It’s part of Windows. You can only hide its icon.
Will hiding the Recycle Bin delete my files?
No. Files in the Recycle Bin stay there until you empty it. Need something back later? Finding deleted files on Windows 11 can help.
Why did the Recycle Bin disappear on its own?
The icon may have been turned off in Desktop icon settings, desktop icons may be hidden from the View menu, or a work or school policy may hide it. Check the first two settings above.

Matthew Burleigh is the founder, head writer, and editor of Solve Your Tech, which he launched in 2012. He has written technology tutorials since 2008 and worked in IT since 2003, including small-business support, IT management, and consulting. He holds Bachelor’s and Master’s degrees in Computer Science from Arizona State University.
Matthew writes practical guides for Windows, iPhone and iPad, Microsoft Office, Outlook, Google apps, and Android. Solve Your Tech’s guides are checked step by step against the device or app maker’s own documentation and tested on his own devices whenever he has the hardware or software, with clear steps, sources, and update dates.
Read more about Matthew and how Solve Your Tech writes and updates its guides, or report a correction.