If you’ve ever clicked the wrong tool in Photoshop then you aren’t alone.
I do this all the time and it can be really frustrating if you try and use the tool and something unexpected happens.
Photoshop provides you with a way to reorganize the tools in the toolbar, which we will show you how to do with our tutorial below.
Summary – How to Edit the Photoshop Toolbar
- Open Photoshop.
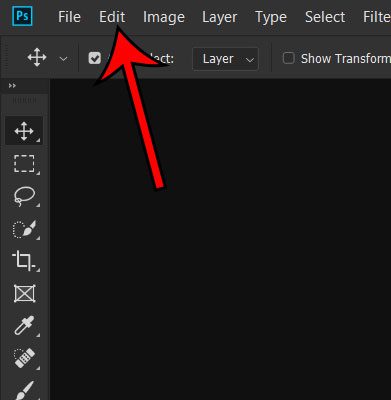
- Click the Edit tab.
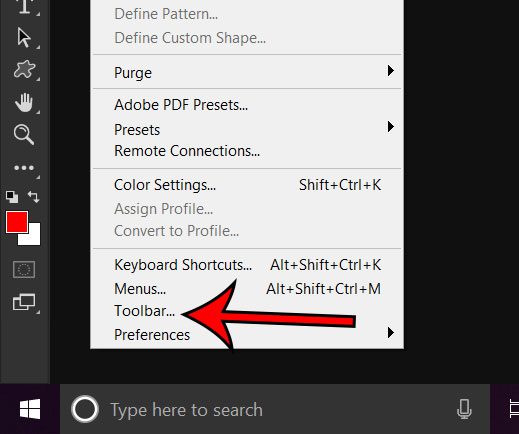
- Select the Toolbar option.
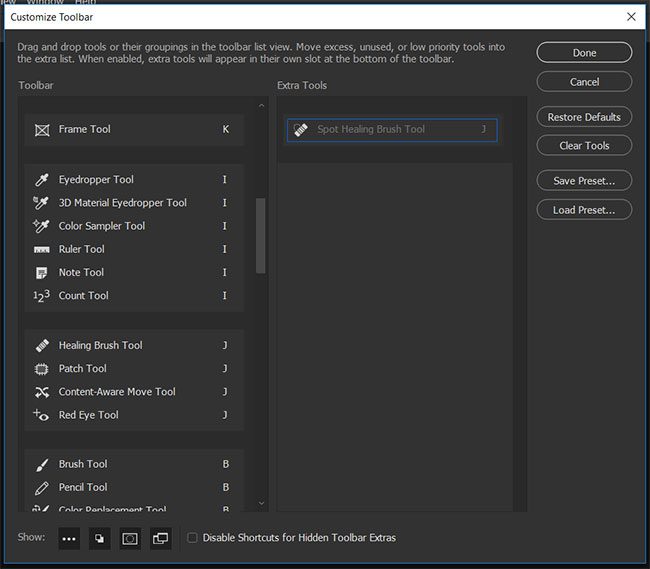
- Drag the unwanted tool from the left column to the right column.
- Click Done.
Our guide continues below with additional information on removing tools from the toolbar in Photoshop, including pictures of these steps.
When you are working in Photoshop, the toolbar at the left side of the window is arguably the most important thing that you are using.
It provides access to all of the assorted tools that let you create and edit the images that you are working on.
But there may be tools in that toolbar that you never use, and you would like to tidy up the toolbar so that you can be more efficient.
Fortunately, Photoshop CC offers a way for you to edit this location and remove the tools that you don’t want or need.
The Move tool can come in really handy for almost any type of layer you have. Visit this how to move text in Photoshop guide to see how to use it with words in your image.
How to Move Unwanted Tools in Photoshop CC (Guide with Pictures)
Photoshop CC doesn’t provide a way for you to completely remove a tool from the toolbar.
However, it does let you move it to the “Extra Tools” section located at the bottom of the toolbar.
This effectively removes it from the default toolbar view, but leaves it accessible in the event that you find later that you actually do need that tool.
Step 1: Open Photoshop CC.
Step 2: Choose the Edit tab at the top of the window.

Step 3: Select the Toolbar option at the bottom of this menu.

Step 4: Click on the tool that you don’t want in the left column, then drag it to the right column.
Once you have finished dragging and dropping tools, click the Done button at the top-right of the window.

Now that you know how to customize the Photoshop toolbar you can really streamline your workflow by ensuring that you have access to the different Photoshop tools that you use the most.
Have you noticed that there is some text already present when you create a new text layer? Find out how to remove this placeholder text if you would prefer to start with a blank text layer instead.

Matthew Burleigh has been writing tech tutorials since 2008. His writing has appeared on dozens of different websites and been read over 50 million times.
After receiving his Bachelor’s and Master’s degrees in Computer Science he spent several years working in IT management for small businesses. However, he now works full time writing content online and creating websites.
His main writing topics include iPhones, Microsoft Office, Google Apps, Android, and Photoshop, but he has also written about many other tech topics as well.