A common way to format a spreadsheet is to include a row of cells at the top or a column of cells at the left of the spreadsheet that identify the type of information that will be contained in those cells.
This allows for a structured data layout that is easy for anyone viewing the spreadsheet to follow. This layout is so common, in fact, that the cells in that row or column are often called “titles.”
When working with large spreadsheets that need to be printed, it can be difficult to determine which row or column contains which type of data.
This problem is increased as you move to pages beyond the first, as your titles are no longer visible by default. Fortunately, however, Excel 2010 has an option that will allow you to print your titles at the top or left of every page to make it easier for readers to correctly identify data.
Print Titles That Repeat on Every Page in Excel 2010
The steps in this article will show you how to select a row or column of your spreadsheet so that the row or column is printed at the top or left of every page of your spreadsheet.
Note that titles are different from headings. Headings are the letters at the top of your spreadsheet and the numbers at the left of your spreadsheet. You can learn how to print headings here. Titles are the actual cells in your spreadsheet, and contain data that you have entered.
Step 1: Open your spreadsheet in Excel 2010.
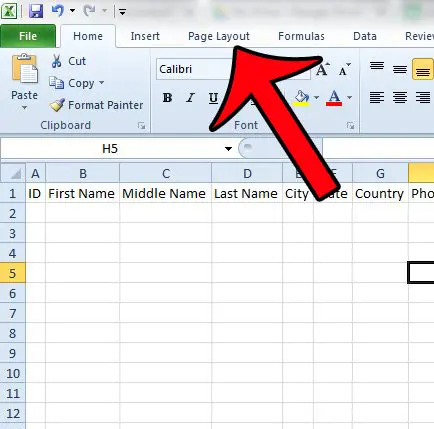
Step 2: Click the Page Layout tab at the top of the window.
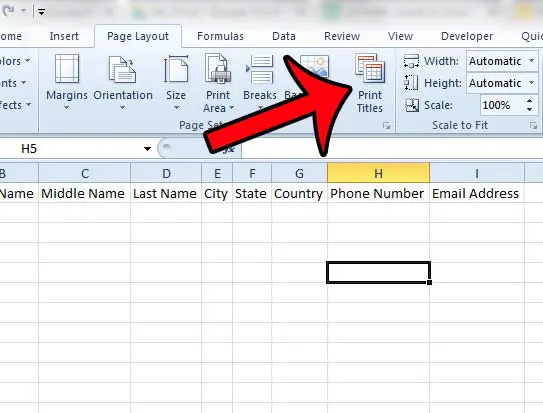
Step 3: Click the Print Titles button in the Page Setup section of the Office ribbon.
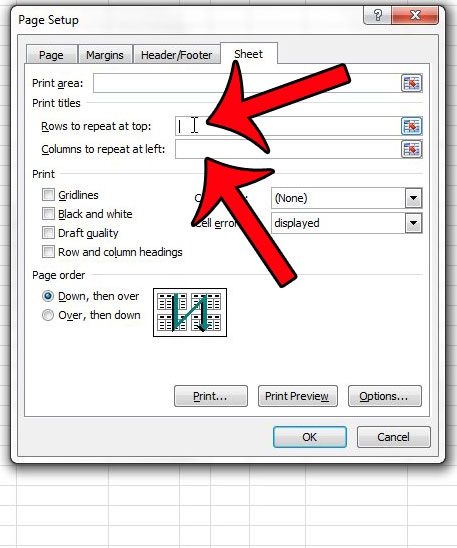
Step 4: Click inside the Rows to repeat at top field if you want to print a row at the top of every page, or click inside the Columns to repeat at left field if you wish to repeat a column at the left side of every printed page.
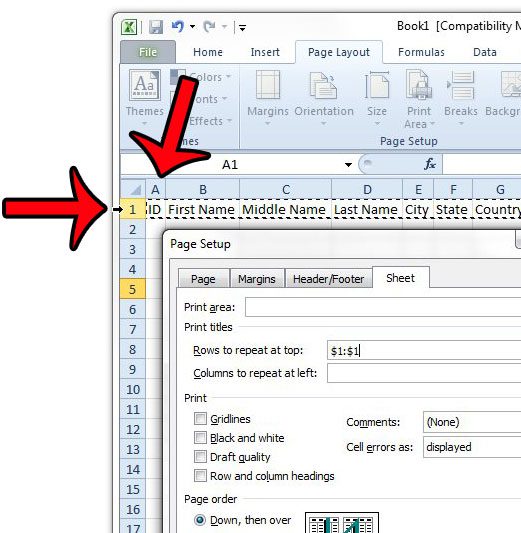
Step 5: Click the row number(s) or column letter(s) of the row(s) or column(s) that you want to repeat. This will fill in the field that you selected in Step 4.
Step 6: Click the OK button at the bottom of the window to save your settings.
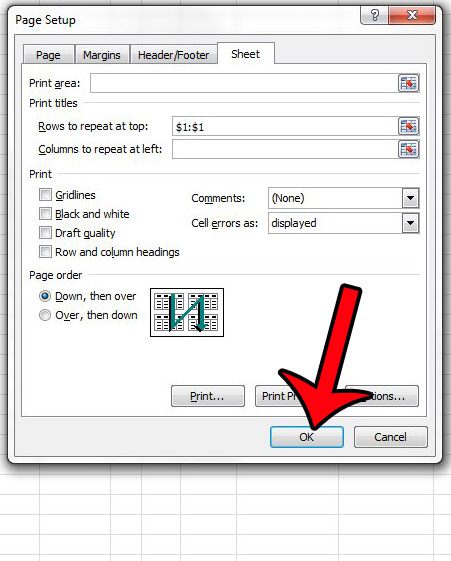
Now when you go to Print Preview or print your pages, your selected rows or columns will be printed on every page.
Are you looking for ways to make your printed spreadsheet look better? This guide will show you some suggestions for settings or adjustments that you can make to your file.

Matthew Burleigh has been writing tech tutorials since 2008. His writing has appeared on dozens of different websites and been read over 50 million times.
After receiving his Bachelor’s and Master’s degrees in Computer Science he spent several years working in IT management for small businesses. However, he now works full time writing content online and creating websites.
His main writing topics include iPhones, Microsoft Office, Google Apps, Android, and Photoshop, but he has also written about many other tech topics as well.