Excel spreadsheets rarely print how you want them to, and properly configuring a spreadsheet for the physical page is often cited as one of the bigger frustrations for Excel users.
There are some quick ways to simplify the process, such as fitting a spreadsheet to one page, but that isn’t always practical for larger worksheets.
An alternative is to minimize the amount of data that you actually print. But rather than deleting or hiding rows and columns, you can consider setting a print area instead.
This allows you to highlight a group of cells and define them as the print area. Then, when you go to print the file, only that print area will be included.
You can even clear the print area when you’re done if it’s only a temporary thing. Our guide below will walk you through the steps to make this happen.
Here is how to set the print area in Excel 2013 –
- Open your spreadsheet in Excel 2013.
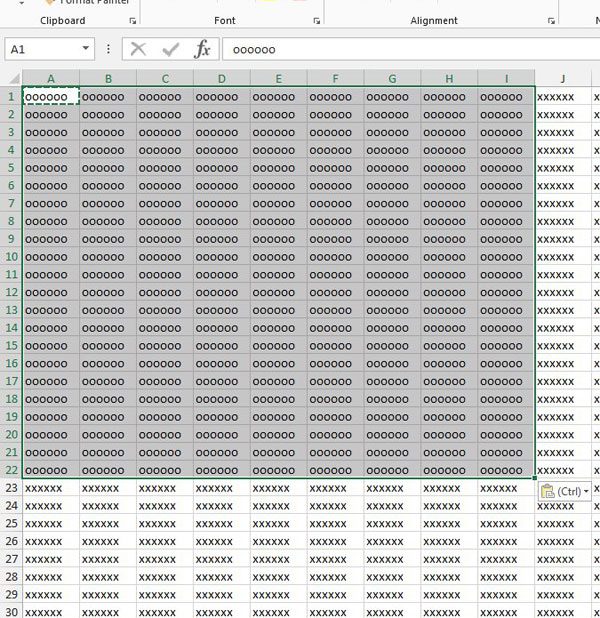
- Click on the top-left cell that you want to include in your print area, then drag your mouse until everything that you want is selected.
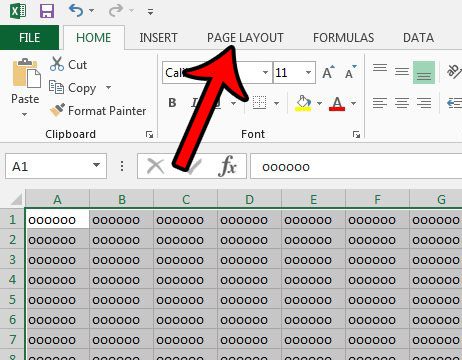
- Click the Page Layout tab.
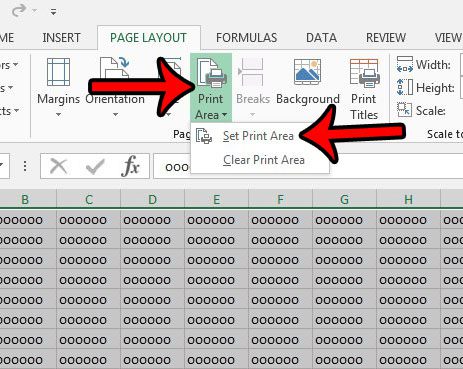
- Click the Print Area button in the Page Setup section of the ribbon, then click Set Print Area.
These steps are also shown below with pictures –
Step 1: Open the file containing the cells that you want to set as a print area.
Step 2: Use your mouse to highlight the cells that will be the print area.

Step 3: Click the Page Layout tab at the top of the window.

Step 4: Click the Print Area button in the Page Setup section, then click the Set Print Area option.

If you wish to clear this print area in the future, so that the rest of the spreadsheet prints as well, then simply repeat Step 4, but choose the Clear Print Area option instead. If you wish to see what you have set as the print area for a particular worksheet, then this guide will show you how to find out.
***You can select separated cells, rows, or columns for a print area by holding down the Ctrl key as you click the cell, row number, or column letter. However, each separate “group” of cells will print on separate pages, which may not be your intended result. In these cases, you are often better served by hiding the rows and columns that you don’t want to print.***
Now that you know how to set a print area in Excel 2013, you can reduce the amount of unnecessary pages that are printing if you only need some of the data to print in a particular spreadsheet.
If you are having trouble getting an Excel spreadsheet to print well, then there are a number of different settings that you can adjust. Read our guide to better printing in Excel to see some of the more useful print settings that you can change.

Matthew Burleigh has been writing tech tutorials since 2008. His writing has appeared on dozens of different websites and been read over 50 million times.
After receiving his Bachelor’s and Master’s degrees in Computer Science he spent several years working in IT management for small businesses. However, he now works full time writing content online and creating websites.
His main writing topics include iPhones, Microsoft Office, Google Apps, Android, and Photoshop, but he has also written about many other tech topics as well.