If you have installed CrashPlan on your computer to manage all of the backups for your computers, then you know how simple and effective the program is.
One of the most appealing elements of CrashPlan is its ability to take over the backup process with little to no interaction from you.
It is basically a “set it and forget it” type of program, which is something that I personally look for when backing up my data.
An aspect of this automation is when CrashPlan sends you emails alerting you that one of the computers on your account has not been backed up.
This is especially helpful if the computer should be backing up, but is not able to do so for some reason.
However, if you have replaced a computer and CrashPlan is still attempting to back the old computer up, the constant alerts can be a bit if an annoyance.
Fortunately, the CrashPlan remove computer procedure can be accomplished in a few short steps.
CrashPlan Remove Computer Procedure
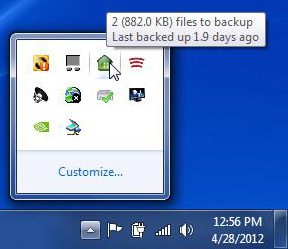
To begin the process of removing a computer in CrashPlan, you need to open the program interface. This can be accomplished through the All Programs list on the Start menu, or by double-clicking the CrashPlan icon in your system tray.
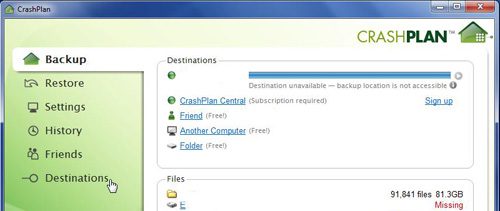
Once CrashPlan opens on your computer, you need to click the Destinations button at the left side of the window.
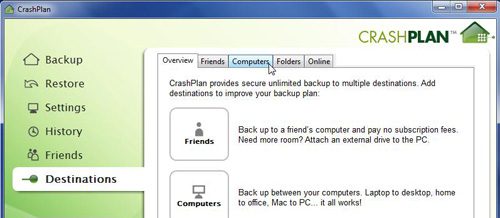
The CrashPlan Destinations menu displays all of the backup location options that you have available to you. You can view the list of computers linked to your CrashPlan account by clicking the Computers tab at the top of the window.
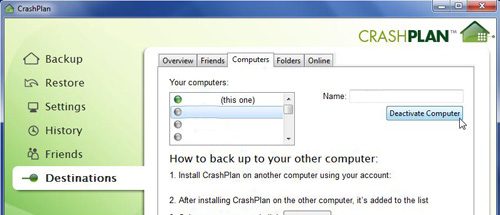
Click the name of the computer that you want to remove from your CrashPlan account, which will populate the field at the top-right corner of the window. When the correct computer name is displayed in this field, click the Deactivate Computer button.
The next thing that you will see is a warning that the removal of this computer will eliminate all traces of the backups that CrashPlan has created for it. This includes any backup sets that you have created online, on other linked computers, or on any external drives. Check the box to the left of I understand, then click the OK button.
Now that you know how to remove a computer from your Crashplan account, you can make it a bit easier to control the data being backed up.
If you are not willing to have CrashPlan delete the backup sets for the computer that you are removing or deactivating, then you can change the notification settings instead of following the CrashPlan remove computer instructions.
The notification settings can be found on the Settings menu at the left side of the window. I prefer to use the Email notifications so, for example, I would click the Configure button to the right of Email.
I could then click the box to the left of Send backup status report every, Send warning alert when not backed up for and Send critical alert when not backed up for to remove the check mark from the box, and stop CrashPlan from sending you emails for these alerts.

Matthew Burleigh has been writing tech tutorials since 2008. His writing has appeared on dozens of different websites and been read over 50 million times.
After receiving his Bachelor’s and Master’s degrees in Computer Science he spent several years working in IT management for small businesses. However, he now works full time writing content online and creating websites.
His main writing topics include iPhones, Microsoft Office, Google Apps, Android, and Photoshop, but he has also written about many other tech topics as well.


