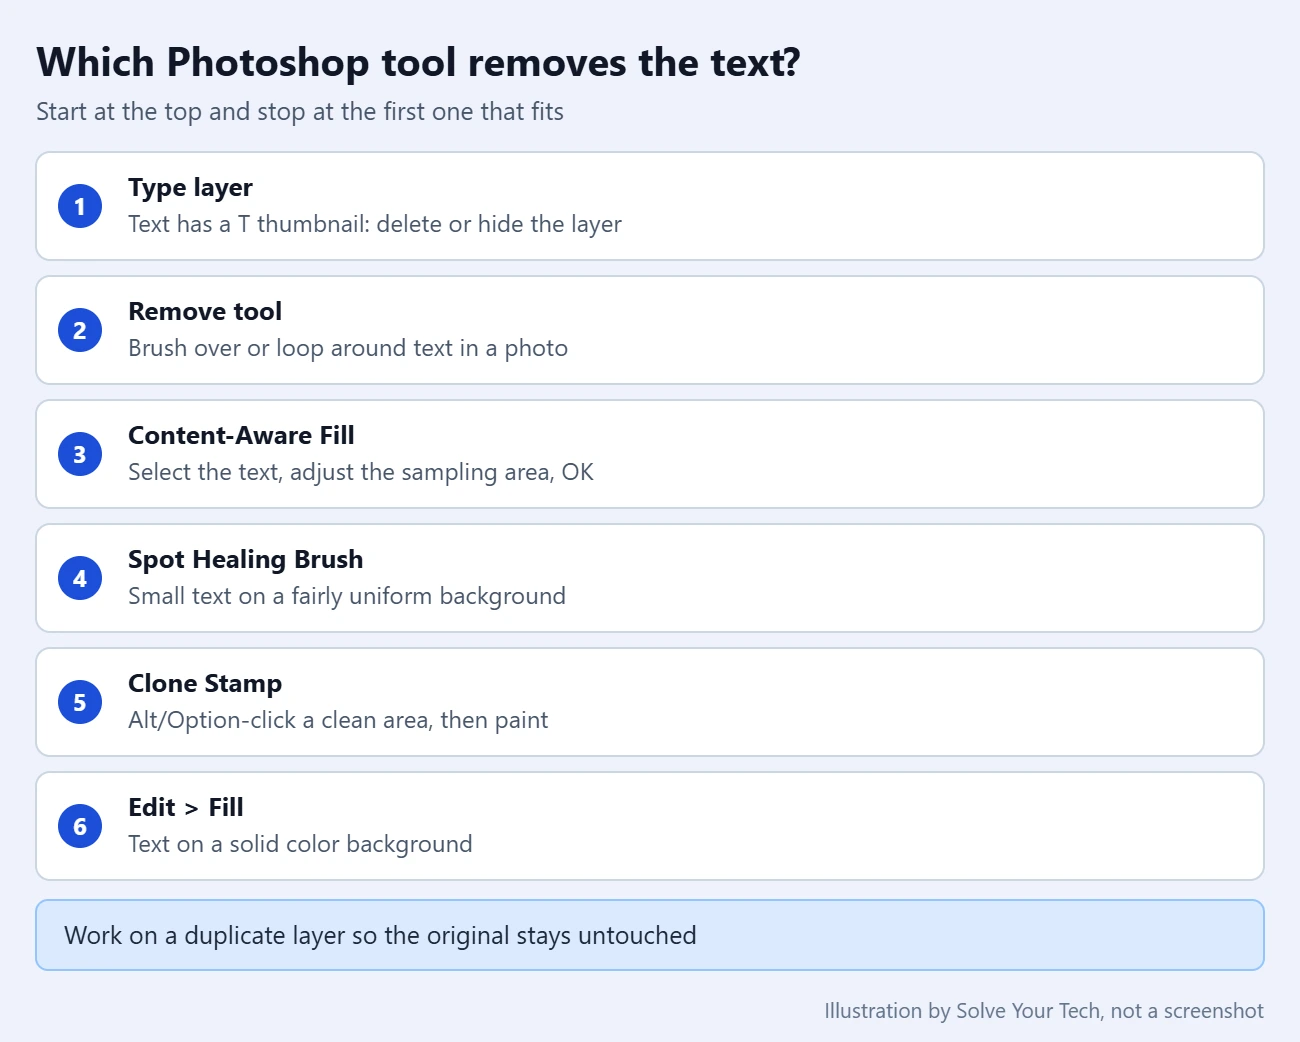
To remove text from a picture in Photoshop, select the Remove tool, set the brush a bit larger than the letters, and paint over or loop around the text. Photoshop fills the area with matching background, as Adobe explains in its Remove tool guide. If the text is on its own type layer, delete that layer instead. In older versions such as CS5, use Content-Aware Fill or the Clone Stamp tool.
Only remove text or watermarks from images you own or have permission to edit.
What you need before you start
- Photoshop on desktop. The steps below follow Adobe’s current documentation for Photoshop on Windows and Mac. Older versions have fewer tools, and some menu names differ.
- A copy of the image. Most of these tools change pixels permanently once you save and close the file, so work on a duplicate layer or a copy of the file.
- The Layers panel. If you cannot see it, open it from the Window menu, or reset the Photoshop workspace to restore the default panel layout.
- An internet connection for some features. The Remove tool may need to download components the first time you select it, and its cloud-based generative AI mode needs a connection.
Check whether the text is an editable layer
Look in the Layers panel first. A layer with a T thumbnail is a type layer, which means the words are still live text that sits above the picture. Select that layer and press Delete, or turn off the eye icon next to it to hide the text without deleting it.
You only need the tools on this page when the text is part of the photo itself, such as a JPG or PNG with a caption, date stamp, or sign baked into the pixels. In that case there is nothing to delete. Photoshop has to rebuild the background that the letters are covering.
Remove text with the Remove tool
The Remove tool is the shortest route in current versions of Photoshop. You mark the text and Photoshop replaces it.
- Open the image with File > Open.
- Select the image layer in the Layers panel and choose Layer > Duplicate Layer, then select OK. You now have a spare copy underneath. The same command can also copy a layer to another image.
- Select the Remove tool in the Tools panel. A small floating bar called the Contextual Task Bar appears with the most common controls.
- In the options bar at the top, set the brush slightly larger than the height of the letters.
- Paint over the text, or draw a loop around it. You do not have to fill in the loop.
- Release the mouse button. If Remove after each stroke is turned on, Photoshop fills the area right away. If it is off, you can mark several words before the removal is applied.
- Go back over any leftover marks with a smaller brush.
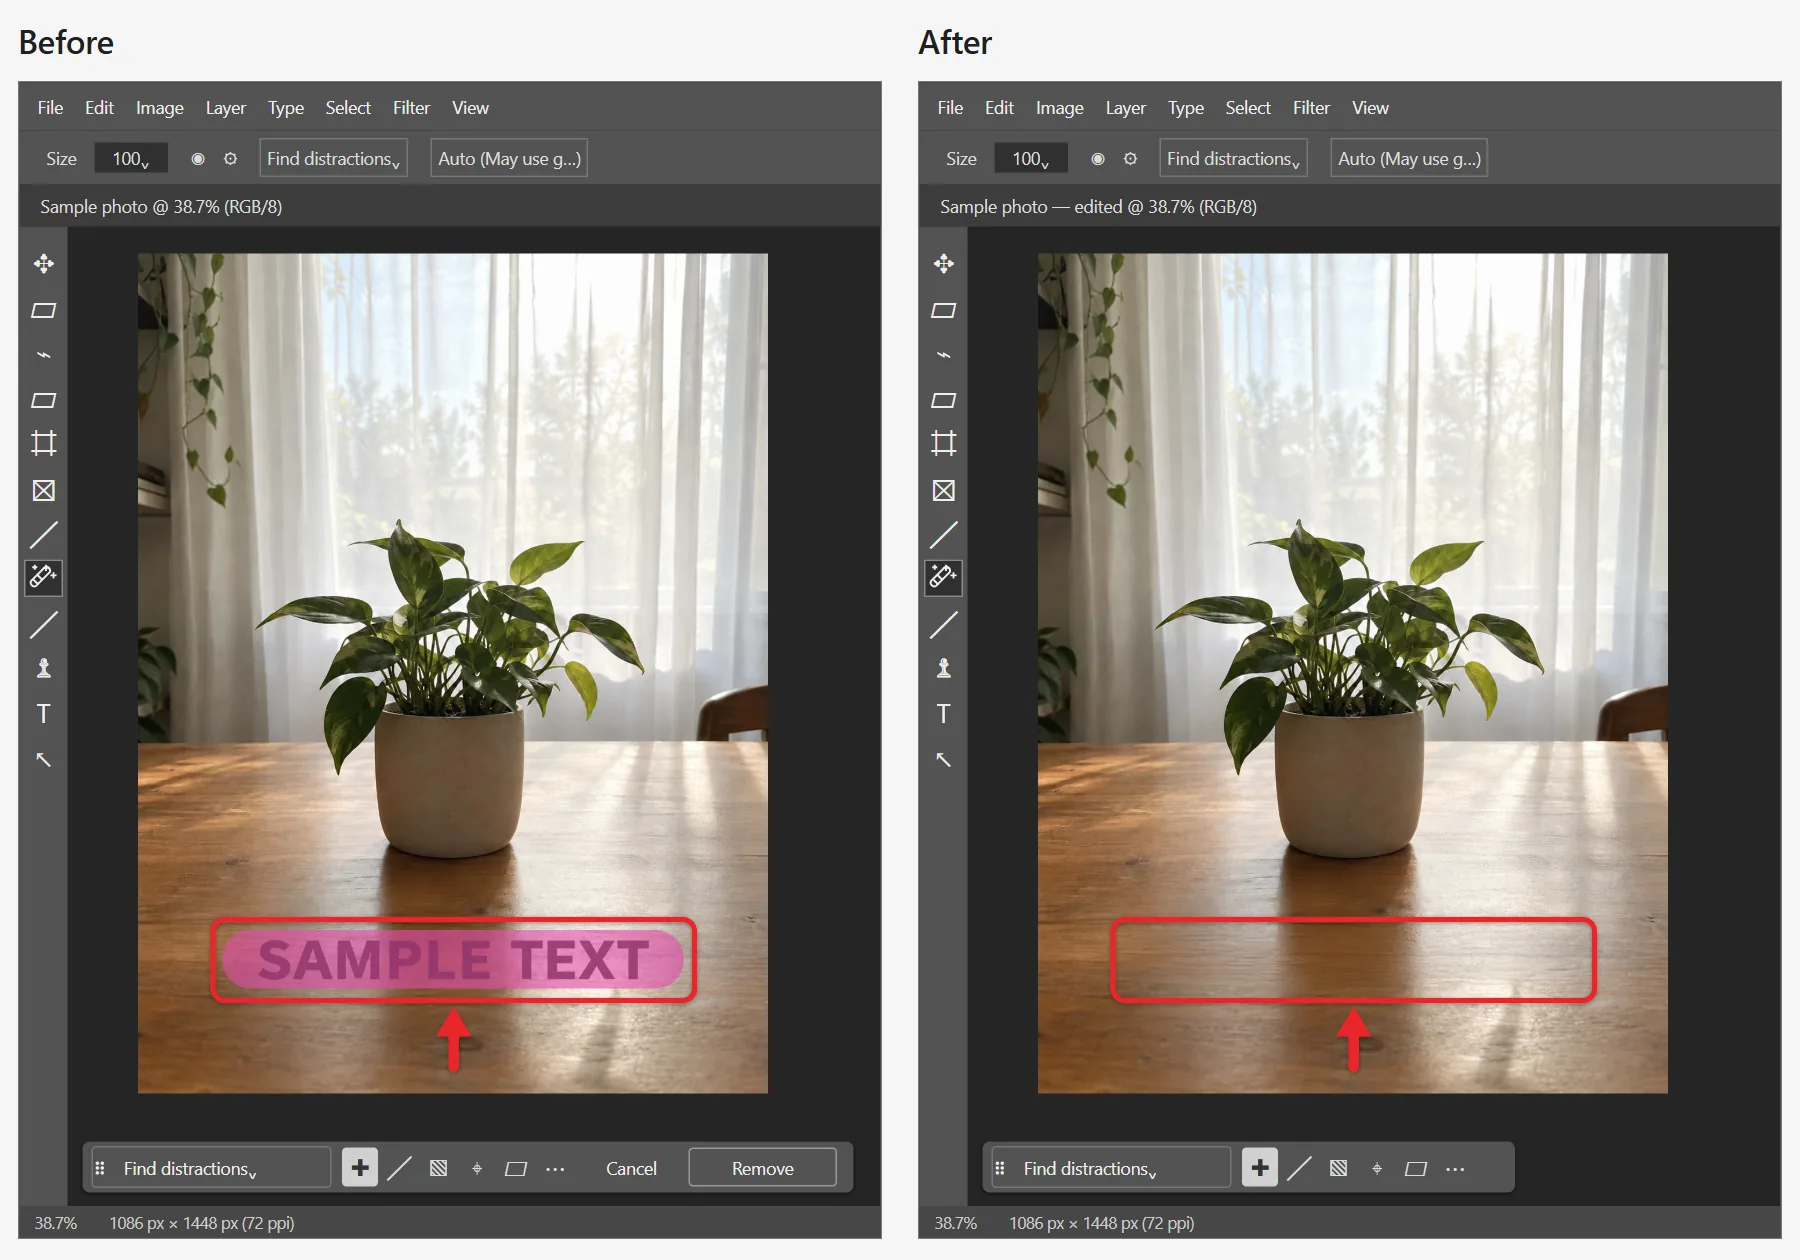
The Contextual Task Bar also has Add to and Subtract from controls for adjusting the marked area, and a Create new layer option that puts the repair on a separate layer so the photo underneath is not changed. Adobe’s Remove objects page explains every control.
Choose whether the Remove tool uses generative AI
The Mode option in the options bar controls how the fill is created. Auto lets Photoshop pick a method and may use generative AI. You can also turn generative AI on or off yourself. When it is on, you can choose Cloud processing or Device, which runs on your own computer after a one-time model download. The Device option is unavailable if your computer does not meet Adobe’s hardware requirements for the Remove tool.
Remove text with Content-Aware Fill
Content-Aware Fill replaces a selected area with pixels sampled from the rest of the picture, and it lets you decide which parts of the picture are used. It is a good choice for a large caption or a block of text.
- Select the text with a selection tool. You can use the Object Selection tool, the Quick Selection tool, or the Magic Wand tool. A loose outline drawn with a Lasso or Marquee tool also works.
- Choose Select > Modify > Expand, enter a small value such as 2 or 3 pixels, and select OK. This pushes the selection just past the edges of the letters so no outline is left behind. Photoshop accepts values from 1 to 100.
- Right-click inside the selection and choose Content-Aware Fill. The Content-Aware Fill workspace opens with a preview.
- Adjust the sampling area, which is the part of the image Photoshop is allowed to copy from. Take out anything that should not be repeated, such as a face or another line of text.
- Select OK to apply the fill.
Adobe’s steps are in Remove objects with Content-Aware Fill. For a faster version with no settings, right-click the selection and choose Delete and Fill Selection, which removes the selected area and fills it in one step.
Older versions of Photoshop do not have this workspace. Look for a content-aware choice in the Edit > Fill dialog box instead. The exact wording depends on your version.
Paint over text with the Clone Stamp tool
The Clone Stamp tool copies pixels from one spot and paints them onto another. It is slower than the automatic tools, but you control exactly what covers the text, which helps on patterned backgrounds such as brick, fabric, or grass. It is also available in old versions.
- Select the Clone Stamp tool from the toolbar.
- In the options bar, check Opacity and Flow. Lower values build up the cover more gradually.
- Open the Sample menu. Choose Current & Below or All Layers if you want to paint onto a new, empty layer above the photo.
- Hold Alt (Windows) or Option (Mac) and click a clean area next to the text. This sets the source point.
- Drag over the text to paint the sampled pixels on top of it.
- Set a new source point often, so the same patch of background is not repeated in an obvious way.
The Clone Stamp tool does not work on adjustment layers, so make sure an image layer or an empty layer is selected. See Adobe’s Clone Stamp tool guide for every option.
Other ways to remove text
- Spot Healing Brush: press J or select the tool, choose Content-Aware from the Type menu in the options bar, make the brush slightly larger than the text, and drag over it. This tool works best for small elements on fairly uniform backgrounds, so use it for a date stamp or a short word. The [ and ] keys change the brush size.
- Patch tool: hold down the Healing Brush tool in the toolbar and select Patch. Draw around the text, keep Source selected in the options bar, then drag the selection to a clean area and release.
- Generative Fill: select the text, select Generative Fill, leave the prompt blank, and select Generate. Photoshop fills the selection using the surrounding pixels and offers variations in the Properties panel. This is a generative AI feature. Adobe covers it in Edit images with Generative Fill.
- Solid color background: if the text sits on one flat color, pick that color as the foreground color, select the text, and choose Edit > Fill with Foreground Color under Contents. For a repeating background, the same dialog can fill a selection with a pattern in Photoshop.
Which method should you use?
| Situation | Try first | Why |
|---|---|---|
| Text is on a type layer | Delete or hide the layer | Nothing has to be rebuilt |
| Text over a photo, current Photoshop | Remove tool | Fewest steps |
| Large caption or text block | Content-Aware Fill | You choose the sampling area |
| Small date stamp or single word | Spot Healing Brush | One drag on a uniform background |
| Repeating pattern or texture | Clone Stamp tool | You choose every source point |
| Flat, single-color background | Edit > Fill | An exact color match |
Check the result and undo mistakes
Zoom in on the repaired area and look for smears, repeated shapes, or a faint outline of the letters. Hide and show the edited layer with its eye icon to compare it with the untouched copy underneath.
- Press Ctrl + Z (Windows) or Command + Z (Mac) to undo the last action.
- Choose File > Revert to throw away every change since the last save.
- If you worked on a duplicate or a new layer, delete that layer to return to the original picture.
When you are happy with the picture, save it under a new file name so the original file with the text stays available. If the picture shows an item you are selling, these quick product photo edits in Photoshop can brighten it and clean up the background.
If you kept the repair on its own layer, you can also export each layer as a separate image.
Tips for a clean result
- Work in small sections on detailed backgrounds instead of removing a whole sentence in one pass.
- If a fill leaves a hard line around the area, feather the selection before you fill it.
- Combine tools. Let the Remove tool or Content-Aware Fill do most of the work, then tidy the edges with the Clone Stamp tool.
- Zoom in to check edges, and switch screen modes if you need more room.
- Want to add new words afterward? Here’s how to change the font in Photoshop.
Troubleshooting
The Remove tool is missing
The Remove tool is only in recent versions of Photoshop, so update the app through Creative Cloud if you can. It may also be grouped with the other healing tools in the toolbar, so click and hold that tool group to check. In a version without the tool, use Content-Aware Fill or the Clone Stamp tool.
A message says required components are being downloaded
The Remove tool downloads its components once. Wait for the download to finish and do not cancel it. If you see a download error, Adobe’s advice is to check your internet connection, make sure you have at least 1 GB of free disk space, then restart Photoshop and select the tool again. Fixes for crashes and other problems are listed in Remove tool known issues.
Content-Aware Fill is grayed out or missing from the right-click menu
The command works on a selection, so select the text first and right-click inside the selection. Also check that the layer holding the photo is selected in the Layers panel, not a type layer or an adjustment layer. If you are painting on an empty layer with the Clone Stamp tool, set Sample to Current & Below or All Layers.
Frequently asked questions
Does removing text need an internet connection?
Not always. The Clone Stamp tool, Spot Healing Brush, Patch tool, and Edit > Fill do not rely on generative AI. The Remove tool can use cloud-based generative AI, but its Mode option lets you turn generative AI off or, on supported hardware, run it on your device.
Is it okay to remove watermarks?
Only if you own the image or have permission to edit it. Watermarks usually protect someone else’s work. If you need a clean version of a stock photo, license it from the source instead.
Why does the fill look blurry or repeated?
The background around the text may be too busy for an automatic fill. Try smaller strokes, a different sampling area in Content-Aware Fill, or the Clone Stamp tool with a new source point every few strokes.
Can I remove text without changing the original photo?
Yes. Duplicate the layer before you start, or use the Remove tool’s Create new layer option. With the Clone Stamp tool or Spot Healing Brush, add an empty layer above the photo and set the tool to sample from the layers below. The repair then sits on its own layer that you can hide or delete.
How do I remove text in Photoshop CS5 or another old version?
Old versions do not have the Remove tool or Generative Fill. Select the text and try a content-aware fill from the Edit > Fill dialog box, or cover the text by hand with the Clone Stamp tool. The Clone Stamp steps above use the same Alt-click or Option-click sampling.
Next step
Open the Layers panel and check for a type layer. If there is none, duplicate the image layer and try the Remove tool on the text, then clean up anything it misses with the Clone Stamp tool.

Matthew Burleigh is the founder, head writer, and editor of Solve Your Tech, which he launched in 2012. He has written technology tutorials since 2008 and worked in IT since 2003, including small-business support, IT management, and consulting. He holds Bachelor’s and Master’s degrees in Computer Science from Arizona State University.
Matthew writes practical guides for Windows, iPhone and iPad, Microsoft Office, Outlook, Google apps, and Android. Solve Your Tech’s guides are checked step by step against the device or app maker’s own documentation and tested on his own devices whenever he has the hardware or software, with clear steps, sources, and update dates.
Read more about Matthew and how Solve Your Tech writes and updates its guides, or report a correction.