You have probably noticed that the information that you enter into Microsoft Excel is typically aligned to the left if it is text, or it is aligned to the right if it is a number.
But you have control over the way that your data is horizontally aligned within your cells, and you can elect to center your cell data.
Our tutorial below will show you where the center button is located so that you can use it in the future to center cell data whenever you need.
Center Cell Data Horizontally in Microsoft Excel 2013
The steps in this article will assume that you have already created a spreadsheet containing cell data that you want to center.
We will show you how to use the Center button in the navigational ribbon, but you can also center data in a selected cell by pressing Alt + H, then A, then C on your keyboard.
Step 1: Open your spreadsheet in Excel 2013.
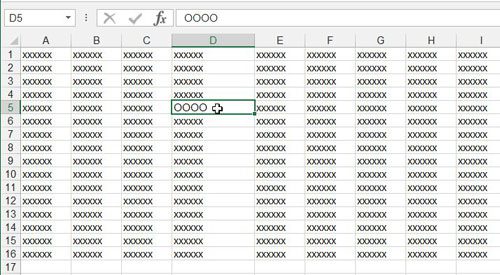
Step 2: Select the cell containing data that you wish to center horizontally. Note that you can select multiple cells to center the data in each of those cells as well

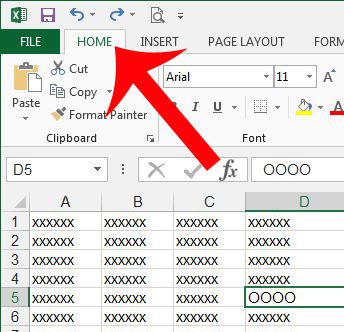
Step 3: Click the Home tab at the top of the window.

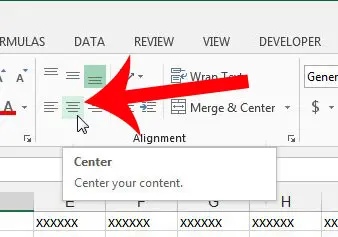
Step 4: Click the Center button in the Alignment section of the ribbon at the top of the window.

Now that you know how to center horizontally in Excel 2013, you can use this formatting option to put your data in the middle of the cells in your spreadsheet.
You can use a similar method to center data vertically instead. Click here to learn how.

Matthew Burleigh has been writing tech tutorials since 2008. His writing has appeared on dozens of different websites and been read over 50 million times.
After receiving his Bachelor’s and Master’s degrees in Computer Science he spent several years working in IT management for small businesses. However, he now works full time writing content online and creating websites.
His main writing topics include iPhones, Microsoft Office, Google Apps, Android, and Photoshop, but he has also written about many other tech topics as well.