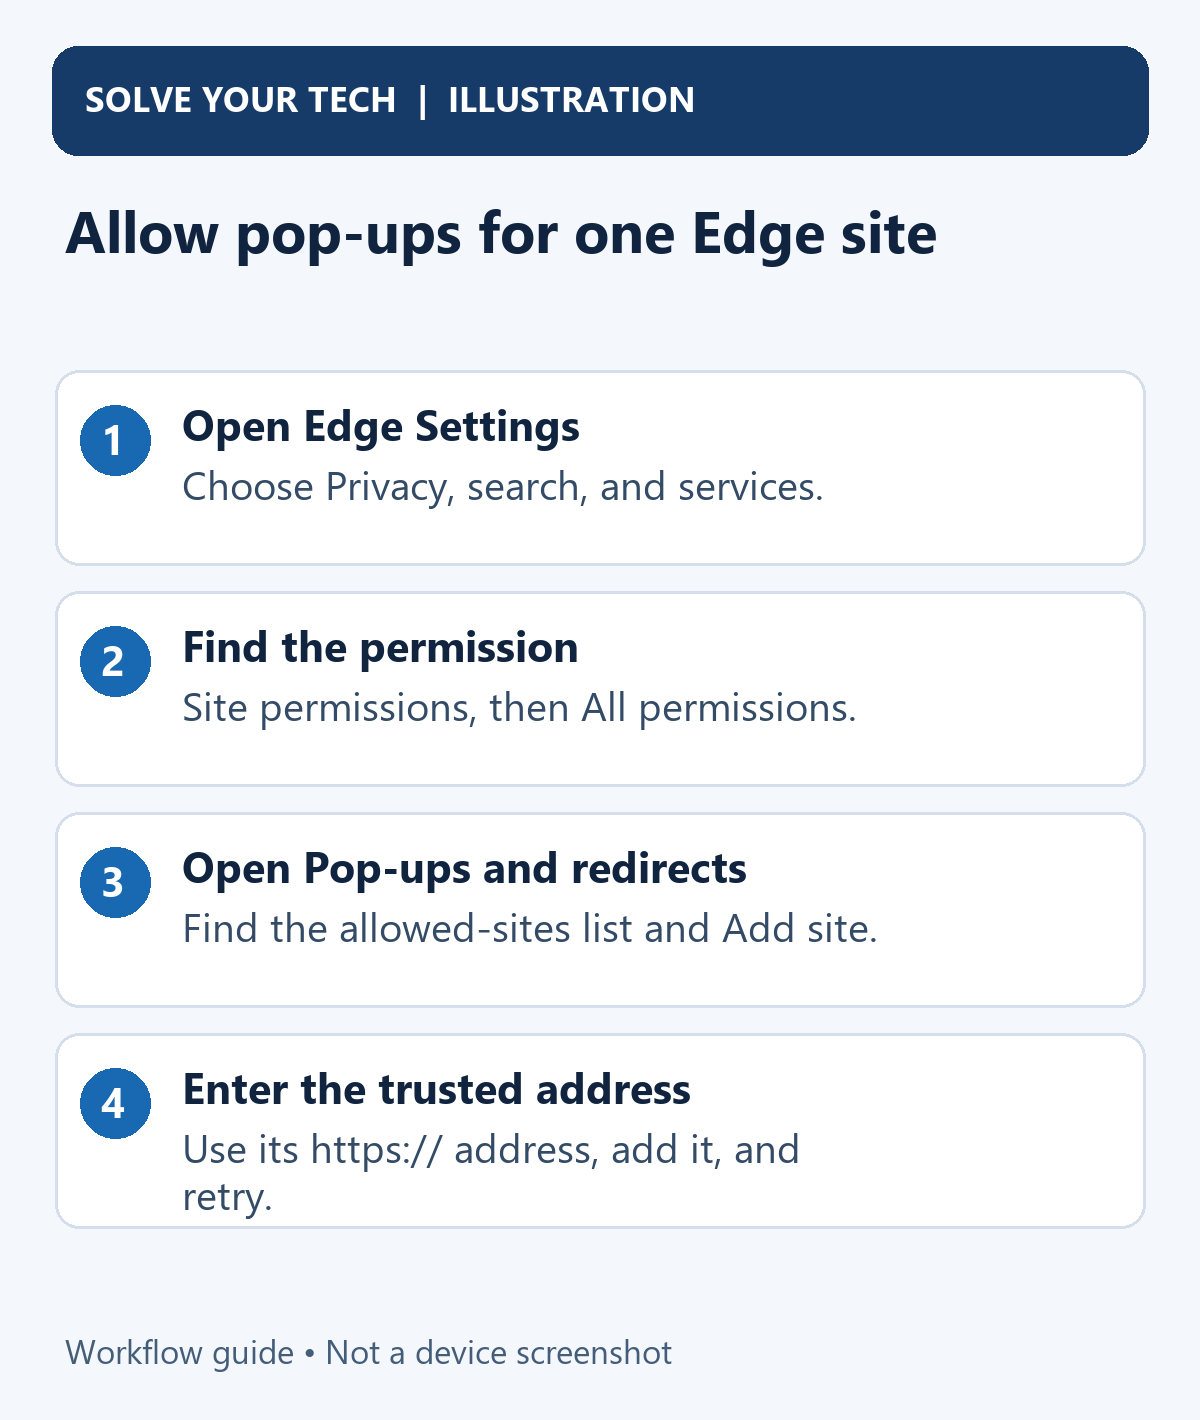
To stop Microsoft Edge from blocking pop-ups on a site you trust, open Settings and more (…) > Settings > Privacy, search, and services > Site permissions > All permissions > Pop-ups and redirects. Next to Allowed to send pop-ups and use redirects, select Add site, type the site’s address starting with https://, and select Add.
These steps are for the current version of Microsoft Edge on Windows 11 and Mac, with separate sections for the Edge apps on iPhone, iPad, and Android. Windows 10 reached end of support on October 14, 2025, but Edge on Windows 10 uses the same settings pages shown here.
Allow One Site or Turn the Blocker Off?
Allowing one site is the better choice almost every time. Edge keeps blocking pop-ups everywhere else, so a random page cannot start opening windows just because your bank needed one. Turning the blocker off completely affects every site you visit, and Microsoft marks the blocking setting as Blocked (recommended).
Two terms help here:
- A pop-up is a new window or tab that a site opens on its own, such as a statement viewer, a sign-in window, a shipping label, or a payment step.
- A redirect sends the browser to a different address. Edge controls both behaviors with the same permission.
Microsoft’s pop-up support article confirms that the blocker is on by default. It also notes that the blocker does not stop windows that open when you select a button or link yourself, and it cannot block ads that are part of a page.
Add the real site’s address, typed by you or copied from a page you opened on purpose. An exception lets that site open windows. It does not make the site safe.
Allow Pop-Ups for One Website
- In Edge, select Settings and more (the three dots at the top right), then select Settings. The Settings page opens in a new tab.
- Select Privacy, search, and services in the left pane, then select Site permissions, then All permissions. A list of permissions such as Location, Camera, and Notifications appears.
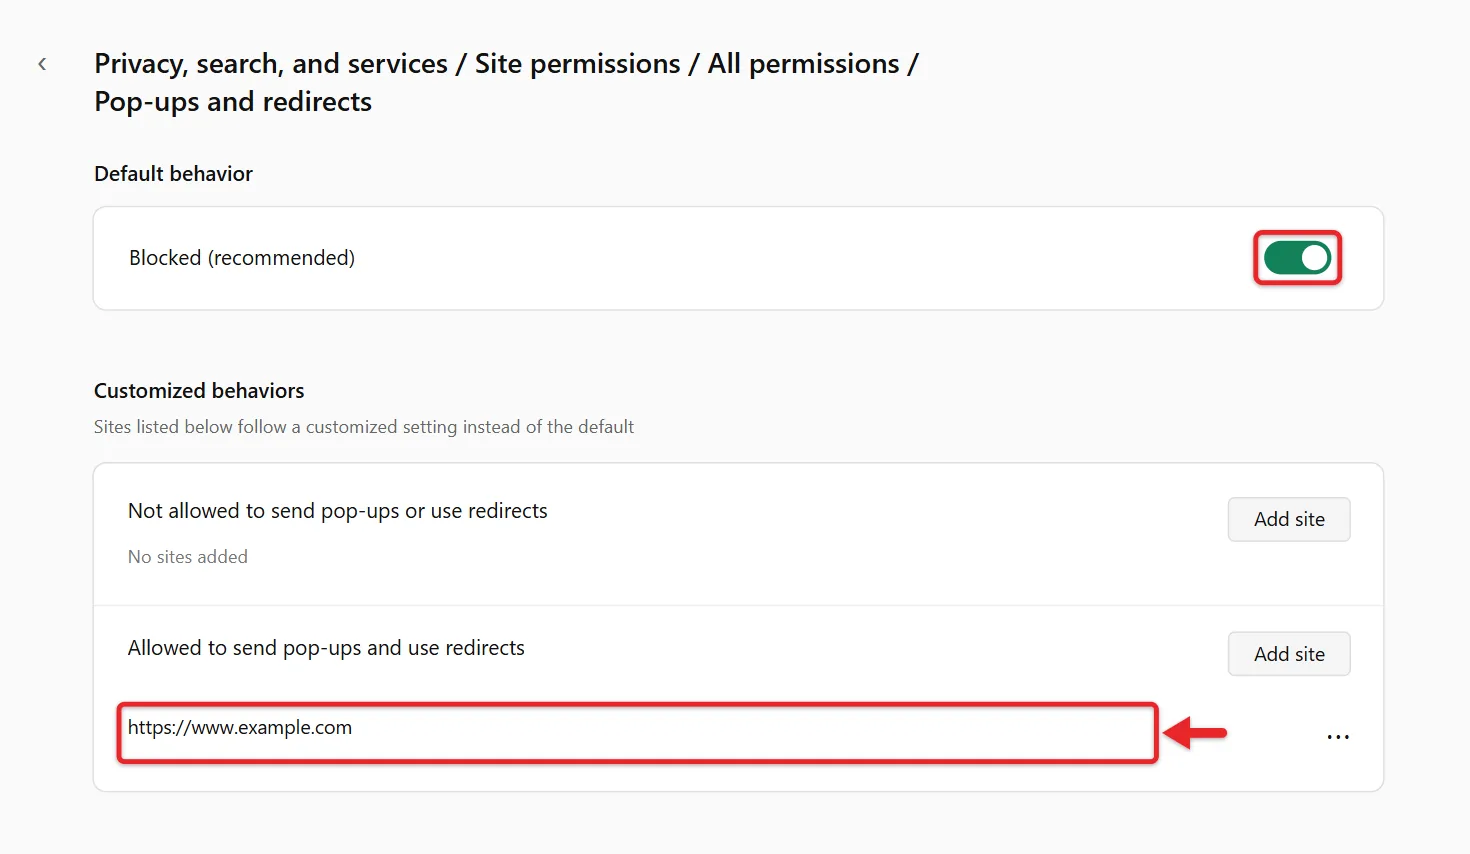
- Select Pop-ups and redirects. You’ll see the Blocked (recommended) switch and the allowed-sites list below it. Leave the switch on.
- Next to Allowed to send pop-ups and use redirects, select Add site. A small box opens.
- Type the full address, starting with https://, such as https://www.example.com, and select Add. The site now appears in the allowed list.
- Go back to the website, reload the page, and try the action again, such as selecting Print or View statement.
If the window still doesn’t open, the site may use a second address for that step, such as a separate sign-in or payment domain. Look at the address in the window or error, and add it only if you’re sure it belongs to the same service. Edge treats www.example.com and login.example.com as separate entries.
Allow Pop-Ups from the Address Bar
When Edge blocks a pop-up, a Pop-up blocked icon appears at the right end of the address bar. This icon is the main clue that the blocker stopped something. Select the icon to see what was blocked and the choices for that site.
You can also change the permission for the site you’re on without opening the full settings list:
- Select the View site information icon (the lock) to the left of the address.
- Select Permissions for this site. The settings for that one site open.
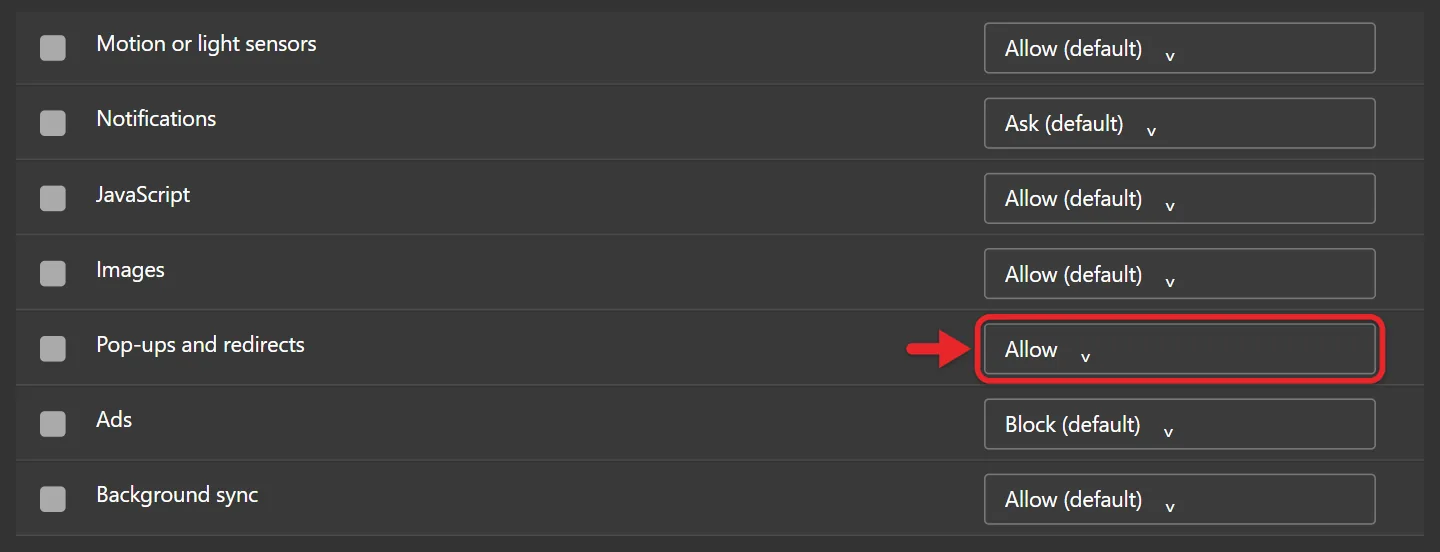
- Find Pop-ups and redirects and choose Allow from the menu next to it.
- Reload the page.
Microsoft documents this same site panel for notification permissions in its guide to managing website notifications. The same panel lets you set a site back to Block later.
Turn the Pop-Up Blocker Off Completely
Turn the blocker off only for a quick test, then turn it back on:
- Open Settings > Privacy, search, and services > Site permissions > All permissions > Pop-ups and redirects.
- Turn Blocked (recommended) off. Edge now allows pop-ups on every site.
- Return to the affected webpage, reload it, and repeat the action that should open a window.
- When the task is finished, return to the same setting and turn Blocked (recommended) back on.
Edge has no timer for this setting, so it stays off until you change it. Turning the blocker back on doesn’t remove the sites you added to the allowed list.
Allow Pop-Ups in Edge on iPhone or iPad
Microsoft’s Edge for mobile FAQs list one switch for this on iOS:
- Open Edge and tap the menu button (…) at the bottom of the screen.
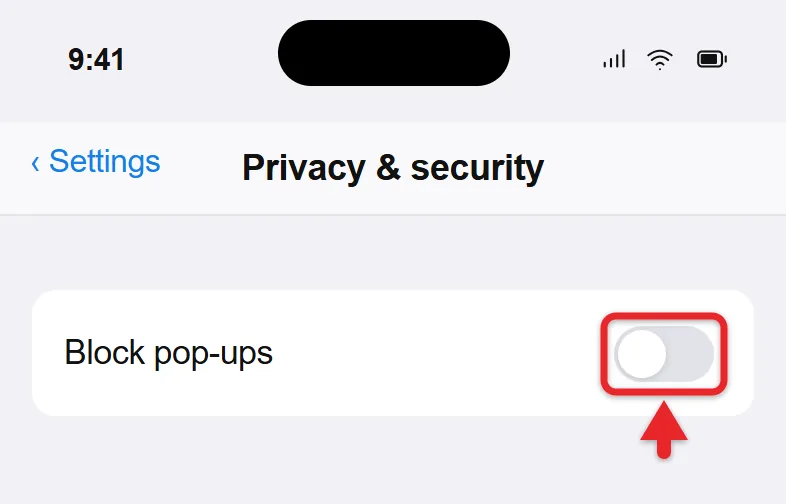
- Tap Settings, then Privacy and security.
- Turn off Block pop-ups, then tap Done.
- Go back to the page and try the action again.
Microsoft’s FAQ doesn’t describe a per-site exception in the iPhone app, so this switch covers every site. Turn Block pop-ups back on as soon as the sign-in, payment, or form step is done.
Allow Pop-Ups in Edge on Android
Microsoft’s mobile FAQ doesn’t list the pop-up path for Android. In the current app it sits with the other site permissions:
- Tap the menu button (…), then tap Settings.
- Tap Site permissions, then Pop-ups and redirects.
- Turn the switch on to allow pop-ups.
Watch the wording. On Android the switch is named for the permission, so on means pop-ups are allowed, the opposite of the Blocked (recommended) switch on a computer. The setting does not carry over from Edge on your PC.
If Your Settings Show Cookies and Site Permissions
Older versions and screenshots commonly use Settings > Cookies and site permissions > Pop-ups and redirects, sometimes with All permissions between those pages.
In that layout, look for Allow > Add to add a site, or the Block (recommended) switch to change the broader behavior. These serve the same purpose as the current allowed-site section and blocker switch. Instructions that mention Advanced settings and a Block pop-ups switch on a Windows PC are for Edge Legacy, the original version of Edge, which Microsoft no longer supports.
To check your version and install any update, select Settings and more > Settings > About Microsoft Edge. Restart if Edge asks you to finish an update, then check the permissions again. Here’s how to restart Microsoft Edge to finish an update.
Work or School Computers
If the Add site button or the blocker switch is grayed out, or a message says the setting is managed by your organization, an administrator controls it. Microsoft’s policy pages describe DefaultPopupsSetting, which can allow or block pop-ups on every site, and PopupsAllowedForUrls, which lists the sites allowed to open pop-ups. Both apply to Edge on Windows, Mac, Android, and iOS.
To see which rules apply, type edge://policy in the address bar and press Enter. Ask IT to add the site you need rather than trying to get around the policy.
Troubleshoot a Site That Still Will Not Open Its Window
Work through the narrower checks first:
- Check the exception. Confirm the correct site address appears in the allowed list. A permission for one site does not automatically cover every unrelated address it links to.
- Retry on a newly loaded page. Refresh the site and select the action again rather than waiting for the originally blocked request to resume.
- Check Edge’s version. Complete any pending update through About Microsoft Edge.
- Review extensions. Open Settings and more > Extensions > Manage extensions. An ad blocker or pop-up blocker extension can stop a window even after Edge allows it. Temporarily turn off an extension that could be involved, reload the page, and test again. Turn it back on if the test makes no difference.
- Check the website’s own support guidance. A form can fail because of session, account, or application problems that pop-up permission cannot fix.
The steps for installing an extension in Microsoft Edge also show where to manage extensions.
Clearing browsing data is a last resort, because removing cookies can sign you out. Here’s how to clear history and browsing data in Edge.
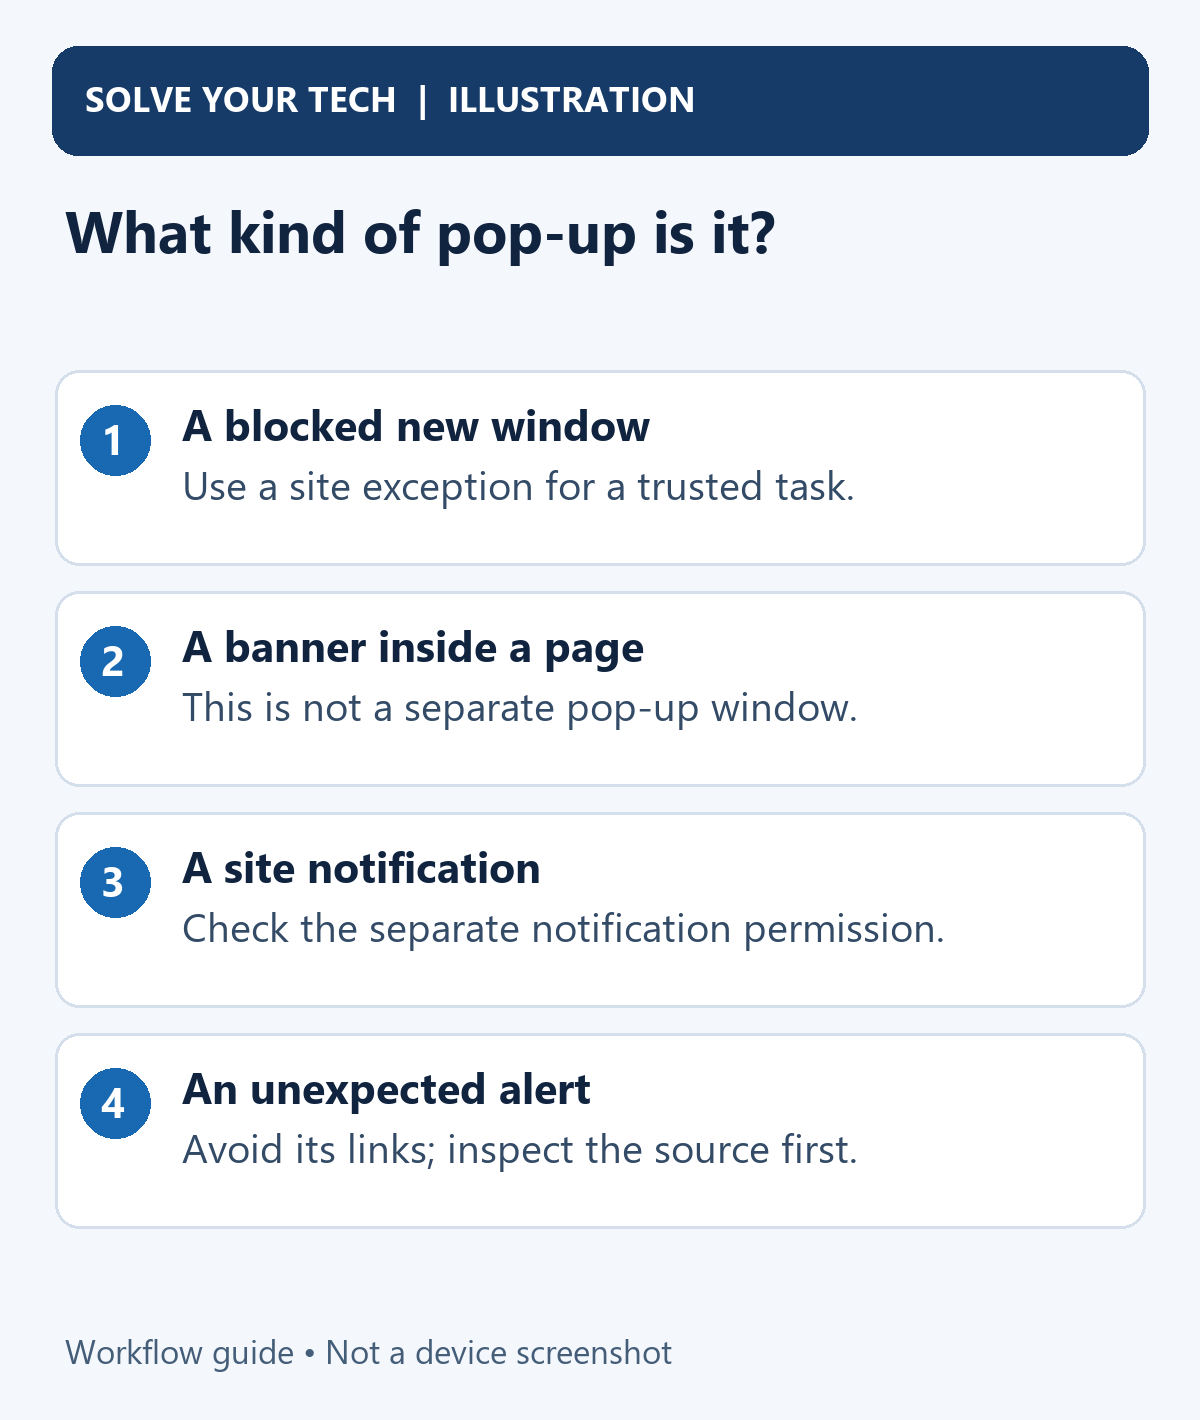
Watch Out for Fake Virus Alerts
Never add a site to the allowed list because a pop-up told you to. Scam pages copy the look of Windows or Microsoft warnings, claim your PC is infected, and show a phone number to call. Microsoft’s guide to avoiding tech support scams is clear on this: Microsoft error and warning messages never include phone numbers, and any contact with Microsoft support has to be started by you.
If a window like that appears, don’t call the number or download anything it offers. Close the tab. If the page won’t let you leave, press Ctrl + Shift + Esc to open Task Manager, select Microsoft Edge, and select End task. When you reopen Edge, don’t restore that page. You can report it with Settings and more > Help and feedback > Report unsafe site.
If You Want to Stop Unwanted Alerts Instead
Website notifications can appear in the notification center even though the pop-up blocker is on. Allowing or blocking new windows does not change notification permission. To stop a site’s notifications, go to Settings > Privacy, search, and services > Site permissions > All sites, select the site, and set Notifications to Block.
For Windows notifications, website alerts, and adware, here’s how to stop pop-ups on Windows 11.
Identify where the alert appears before changing settings. If it covers the webpage itself, look for the page’s close control or leave the site. Edge’s pop-up blocker cannot remove every advertisement designed to look like a pop-up inside an existing page. In the Edge app for iPhone, ads are handled by a separate setting, as explained in how to block ads in Microsoft Edge on an iPhone.
Undo the Change
Open Pop-ups and redirects again. Turn Blocked (recommended) on to restore the default. To remove a site from the allowed list, select More actions (…) next to it, then select Remove. On iPhone or iPad, turn Block pop-ups back on.
To confirm the blocker is working, visit a site you didn’t allow. If it tries to open a window, the Pop-up blocked icon appears in the address bar.
Common Questions
Does allowing pop-ups change every Edge profile?
No. Check the setting in the profile where you are browsing. Changing one browser profile doesn’t update another, and administrator policies can affect which settings are available.
Why is Add site or the blocker switch unavailable?
A managed work or school browser may restrict the setting. Ask its administrator to approve the site you need. Reinstalling Edge or changing unrelated privacy controls won’t remove that restriction.
Must I turn the blocker off to print a statement?
Usually not. If the statement opens in a window from a trusted site, an allowed-site exception is normally enough. Retry the statement action after adding the permission.
Is it safe to allow pop-ups for my bank?
Allowing a site you know, such as your bank’s real address, is reasonable. Keep the blocker on for everything else, and remove the exception if you no longer need it.
Will allowing pop-ups stop cookie banners or newsletter boxes?
No. Those boxes are drawn inside the page, not opened as new windows, so the pop-up setting neither blocks nor allows them.

Matthew Burleigh is the founder, head writer, and editor of Solve Your Tech, which he launched in 2012. He has written technology tutorials since 2008 and worked in IT since 2003, including small-business support, IT management, and consulting. He holds Bachelor’s and Master’s degrees in Computer Science from Arizona State University.
Matthew writes practical guides for Windows, iPhone and iPad, Microsoft Office, Outlook, Google apps, and Android. Solve Your Tech’s guides are checked step by step against the device or app maker’s own documentation and tested on his own devices whenever he has the hardware or software, with clear steps, sources, and update dates.
Read more about Matthew and how Solve Your Tech writes and updates its guides, or report a correction.