If you’ve been using Windows operating systems for a while, then you are likely familiar with the traditional way of uninstalling a program. You open the Control Panel, go to the Add/Remove Programs menu, then you click on an app and you uninstall it.
But Windows 10 includes a simpler method for uninstalling an app, and you can do it right from the Start menu. This makes the process a lot simpler, and it’s more convenient to get rid of an app you encounter in this location if you discover that you don’t need it.
How to Uninstall a Windows 10 App from the Start Menu
The steps in this guide were performed in the Windows 10 Home version of the operating system.
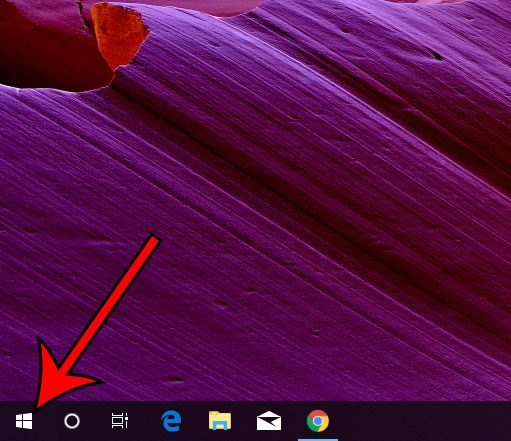
Step 1: Click the Start button at the bottom-left corner of the screen.

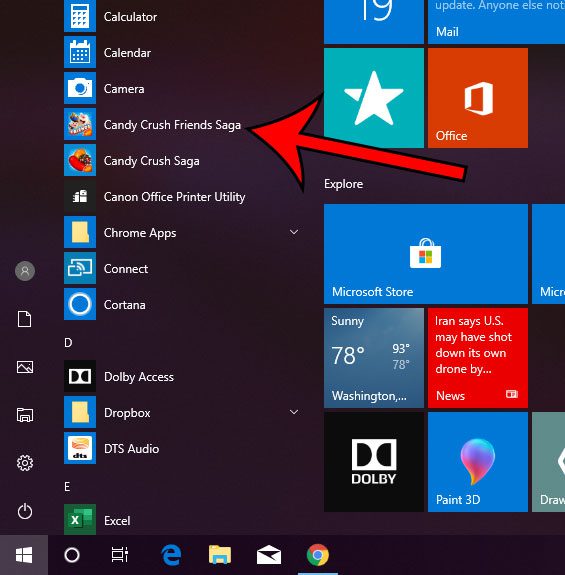
Step 2: Scroll through the list of installed apps until you find one that you want to uninstall.

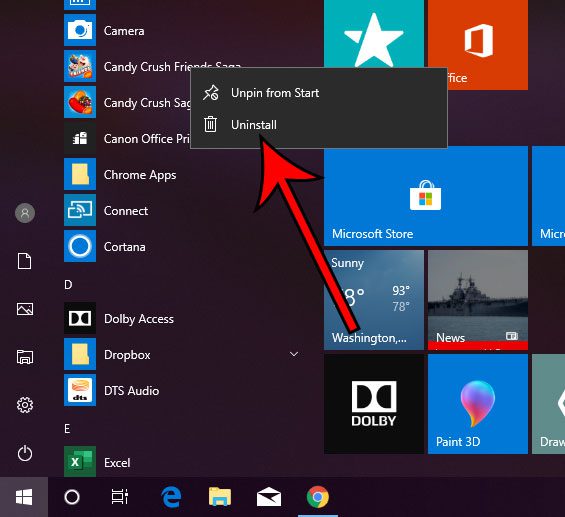
Step 3: Right-click on the app, then choose the Uninstall option.

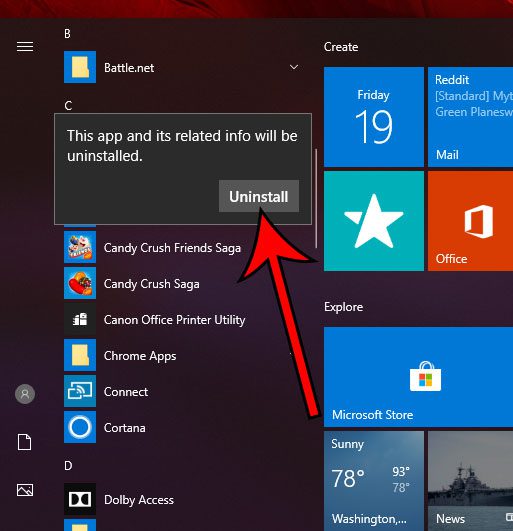
Step 4: Select the Uninstall option to confirm.

You can add some other things to your Start menu, too, if you like that as a location for navigating your computer. For example, find out how to pin a website to your Start menu so that you can launch it.

Matthew Burleigh has been writing tech tutorials since 2008. His writing has appeared on dozens of different websites and been read over 50 million times.
After receiving his Bachelor’s and Master’s degrees in Computer Science he spent several years working in IT management for small businesses. However, he now works full time writing content online and creating websites.
His main writing topics include iPhones, Microsoft Office, Google Apps, Android, and Photoshop, but he has also written about many other tech topics as well.